Canon EOS C200B EOS C200 EOS C200B Instruction Manual
Canon EOS C200B Manual
 |
View all Canon EOS C200B manuals
Add to My Manuals
Save this manual to your list of manuals |
Canon EOS C200B manual content summary:
- Canon EOS C200B | EOS C200 EOS C200B Instruction Manual - Page 1
PUB. DIE-0504-000H Digital Cinema Camera Firmware ver. 1.0.7.1.00 Instruction Manual - Canon EOS C200B | EOS C200 EOS C200B Instruction Manual - Page 2
• SD, SDHC and SDXC Logos are trademarks of SD-3C, LLC. • Canon is an authorized licensee of the CFast 2.0™ trademark, which may be registered in product is licensed under AT&T patents for the MPEG-4 standard and may be used for encoding MPEG- 4 compliant video and/or decoding MPEG-4 compliant video - Canon EOS C200B | EOS C200 EOS C200B Instruction Manual - Page 3
Camera The Canon EOS C200 / EOS C200B Digital Cinema Camera is the latest camera in the highly-respected Cinema EOS line. Cinema EOS cameras are increasingly relied upon by industry professionals due to their state-of-the-art technology and the cameras' high quality. The C200 / C200B continues that - Canon EOS C200B | EOS C200 EOS C200B Instruction Manual - Page 4
AF speed. Even while focusing manually, the Dual Pixel Focus Guide function (A 82) serves as a visual, intuitive guide that you can use to check if the image restore all the menu settings or replicate them perfectly on another C200 / C200B camera (A 137). • Improved clip name format with more - Canon EOS C200B | EOS C200 EOS C200B Instruction Manual - Page 5
Table of Contents 1. Introduction 9 About this Manual 9 Conventions Used in this Manual 9 Supplied Accessories 11 Names of Parts 12 LM-V1 LCD Monitor and LA-V1 LCD Attachment Unit 17 GR-V1 Camera Grip 18 HDU-2 Handle - Canon EOS C200B | EOS C200 EOS C200B Instruction Manual - Page 6
White Balance 78 Auto White Balance (AWB) 79 Adjusting the Focus 80 Manual Focus 81 One-Shot AF 84 AF-Boosted MF 84 Continuous AF Using Metadata 109 Setting a User Memo Created with Canon XF Utility 109 Entering Information About the Recording 110 Recording GPS Information (Geotagging) 111 Reviewing - Canon EOS C200B | EOS C200 EOS C200B Instruction Manual - Page 7
Points 166 Manual Setup 167 Using Browser Remote 173 FTP File Transfer 182 Preparations 182 Transferring Clips (FTP Transfer) 183 8. Additional Information 185 Menu Options 185 Displaying the Status Screens 196 Troubleshooting 207 List of Messages 212 Handling Precautions and Safety Instructions - Canon EOS C200B | EOS C200 EOS C200B Instruction Manual - Page 8
8 - Canon EOS C200B | EOS C200 EOS C200B Instruction Manual - Page 9
1 Introduction 9 About this Manual Thank you for purchasing the Canon EOS C200 / EOS C200B*. Please read this manual carefully before you use the camera and retain it for future reference. Should the camera fail to operate correctly, refer to Troubleshooting (A 207). * Availability differs from - Canon EOS C200B | EOS C200 EOS C200B Instruction Manual - Page 10
this Manual The arrow is used to abbreviate steps in procedures. For a detailed explanation on how to use the menus, refer to Using the Menus modes A shaded icon (like ) indicates that the function described can be used in the operating mode shown or for recordings made in the movie format - Canon EOS C200B | EOS C200 EOS C200B Instruction Manual - Page 11
with the camera. Note that some accessories are supplied only with the C200. 11 LM-V1 LCD Monitor1 LA-V1 LCD Attachment Unit1 UN-5 number is on the product box). Visit your local Canon website to download its instruction manual. Please note that the lens is also sold separately so the supplied - Canon EOS C200B | EOS C200 EOS C200B Instruction Manual - Page 12
Names of Parts Names of Parts 12 1 2 3 4 5 6 7 8 9 11 10 12 13 14 15 16 17 18 19 20 1 Tape measure hook and focal plane mark 2 MAGN. (magnification) button (A 83)/ Assignable button Camera 1 (A 125) 3 PEAKING button (A 83)/ Assignable button Camera 2 (A 125) 4 ND FILTER +/- buttons (A 71) 5 - Canon EOS C200B | EOS C200 EOS C200B Instruction Manual - Page 13
Names of Parts p15 1 11 12 13 2 3 4 5 8 6 9 7 10 1 INPUT 1 terminal (XLR) (A 98) 2 INPUT 2 terminal (XLR) (A 98) 3 SDI terminal (A 149, 152) 4 × (headphone) terminal (A 104) 5 USB terminal (A 111, 159) 6 (Ethernet) terminal (A 168) 7 DC IN terminal (A 26) 8 (Ethernet) indicator - Canon EOS C200B | EOS C200 EOS C200B Instruction Manual - Page 14
Names of Parts 1 14 2 4 5 6 7 8 9 3 10 EF lens mount 1 Tally lamp (A 56) 2 VIDEO terminal (A 28) 3 PUSH AUTO IRIS (momentary automatic aperture) button (A 74)/ Assignable button Camera 10 (A 125) 4 Built-in monaural microphone (A 103) 5 EF lens mount index (A 37) 6 EF-S lens mount - Canon EOS C200B | EOS C200 EOS C200B Instruction Manual - Page 15
level dials for CH1 (top) and CH2 (bottom) (A 101) 13 SD card slot A (left) and B (right) covers (A 48) 14 SD card slots (A 49) In this manual, SD cards in each slot are referred to as "SD card A" and "SD card B", respectively. 15 SD CARD 2 (SD card slot A) and SD CARD 3 (SD - Canon EOS C200B | EOS C200 EOS C200B Instruction Manual - Page 16
Names of Parts 1 16 2 3 4 5 6 7 8 9 10 1 Tape measure hook Use the hook to accurately measure the distance from the focal plane. 2 Accessory socket For mounting accessories with 1/4"-20 screws (6.9 mm (0.27 in.) deep). 3 Strap mounts (A - Canon EOS C200B | EOS C200 EOS C200B Instruction Manual - Page 17
Names of Parts LM-V1 LCD Monitor1 and LA-V1 LCD Attachment Unit1 1 Supplied accessory for the C200; optional accessory for the C200B. 1 2 3 4 5 6 7 8 17 9 10 1 LCD panel with touch screen (A 40, 41) 2 FUNC (main functions) button (A 66)/ Assignable button Monitor 1 (A 125) 3 MENU button (A 33, - Canon EOS C200B | EOS C200 EOS C200B Instruction Manual - Page 18
9 10 1 Control dial (A 70, 72) 2 REC (start/stop recording) button (A 56) 3 Grip belt (A 44) 4 Joystick (A 33)/SET button (A 33) 5 FOCUS GUIDE button (A 82)/ Assignable button Grip 1 (A 125) 6 Rosette Compliant with ARRI rosettes. 7 Lock screw (A 43) 8 Grip attachment ring (A 43) 9 Grip connection - Canon EOS C200B | EOS C200 EOS C200B Instruction Manual - Page 19
screw 7 Thru-hole mounting holes for attaching the handle unit to the camera (A 28) 1 Supplied accessory for the C200; optional accessory for the C200B. 2 With socket for 0.64 cm (1/4") screws Microphone Holder 12 3 1 Microphone lock screw (A 98) 2 Microphone holder (A 98) 3 Microphone cable - Canon EOS C200B | EOS C200 EOS C200B Instruction Manual - Page 20
4K YCbCr 4:2:0 data on an SD card in the camera, or record 4K data using an external 4K recorder connected to the camera's HDMI OUT terminal (A 152). ᕣ In . ᕤ After recording on a CFast card, develop the CFast card data using the Cinema RAW Development software (A 160) to generate full-quality data. - Canon EOS C200B | EOS C200 EOS C200B Instruction Manual - Page 21
color information of the input device to ACES2065-1 color space. Output Transform: Refers to the table used for mapping ACES2065-1 color space information to the specific color information scheme used by the display device. ASC-CDL: Refers to the list that contains color grading adjustment data - Canon EOS C200B | EOS C200 EOS C200B Instruction Manual - Page 22
4K Workflow Overview 22 - Canon EOS C200B | EOS C200 EOS C200B Instruction Manual - Page 23
terminal cover of the battery pack. ቢ ቤ 1 Connect the power cord to the CA-CP200B Compact Power Adapter. • For North America: Make sure you use the power cord for the CA-CP200B. See the sidebar below for information on differentiating the supplied power cords. CHARGE indicator 2 Connect the DC - Canon EOS C200B | EOS C200 EOS C200B Instruction Manual - Page 24
plug CA-CP200B power cord plug IMPORTANT • Do not connect to the battery charger any product that is not expressly recommended for use with this camera. • When using the battery charger or compact power adapter, do not fix it permanently to one place as this may cause a malfunction. • To prevent - Canon EOS C200B | EOS C200 EOS C200B Instruction Manual - Page 25
Attaching the Battery Pack 1 Set the Q switch to OFF. 2 Insert the battery pack all the way into the compartment as shown in the illustration and press it gently toward the left until it clicks. Preparing the Power Supply ቢ 25 ባ Removing the Battery Pack 1 Set the Q switch to OFF. 2 Holding down - Canon EOS C200B | EOS C200 EOS C200B Instruction Manual - Page 26
AC Adapter is different from that for the CA-CP200B Compact Power Adapter. If you do not use the correct power cord, it will not connect to the AC adapter. Attaching the Ferrite Core Before using the supplied CA-A10 AC Adapter, attach the supplied ferrite core to the power cord. This - Canon EOS C200B | EOS C200 EOS C200B Instruction Manual - Page 27
and Off The camera has two operating modes: CAMERA ( ) mode for making recordings and MEDIA ( ) mode for playing back recordings. Select the operating mode using the Q switch. To turn on the camera Set the Q switch to CAMERA for MEDIA for mode. mode or CAMERA mode MEDIA mode To turn off - Canon EOS C200B | EOS C200 EOS C200B Instruction Manual - Page 28
HDU-2 Handle Unit 28 1 Attach the handle unit to the camera. 2 Use the hex wrench1 (for 0.64 cm, 1/4" screws) and turn the lock screw the same as for the LM-V1. 1 Supplied accessory for the C200; optional accessory for the C200B. Attaching the LCD Monitor To attach the LCD monitor to the handle - Canon EOS C200B | EOS C200 EOS C200B Instruction Manual - Page 29
Using the UN-5 Unit Cable2, connect the camera's ቤ VIDEO terminal to the LCD monitor's VIDEO terminal (ቦ). 29 ቦ 2 Supplied accessory for the C200; optional accessory for the ቤ C200B on the situation, the screws may become loose. If necessary, use the hex wrench (for 0.64 cm, 1/4" screws) to - Canon EOS C200B | EOS C200 EOS C200B Instruction Manual - Page 30
slots and then rotate pivot B 90° toward the lens (ቧ). 7 Using a UN-5 Unit Cable2, connect the camera's VIDEO terminal to the LCD monitor's VIDEO terminal (ቨ). 2 Supplied accessory for the C200; optional accessory for the C200B. • Align the Í marks on the cables' plugs and terminals. ቧ ቨ Removing - Canon EOS C200B | EOS C200 EOS C200B Instruction Manual - Page 31
need to set the date and time on the camera before you can start using it. When the internal clock is not set, or if the settings were lithium battery (A 220) and set the time zone, date and time again. • Using the optional GP-E2 GPS Receiver, you can have the camera adjust settings automatically - Canon EOS C200B | EOS C200 EOS C200B Instruction Manual - Page 32
Date, Time and Language Settings Changing the Language The camera's default language is English. You can change it to German, Spanish, French, Italian, Polish, Portuguese, Russian, Simplified Chinese, Korean or Japanese. Please note that some settings and screens will 32 be displayed in English, - Canon EOS C200B | EOS C200 EOS C200B Instruction Manual - Page 33
after pressing the MENU button. In mode, you can also register frequently used menu settings in a customized submenu (My Menu) for easy access. For that may be necessary. In the procedures throughout the rest of this manual, closing the menu is assumed and not included in the procedure. 1 - Canon EOS C200B | EOS C200 EOS C200B Instruction Manual - Page 34
the menu. • On some screens, the following icons may be displayed as a guide: , , . They refer, respectively, to pressing the joystick (or SET button an optional RC-V100 Remote Controller is connected to the camera, you can use the remote controller's up/down/left/right/SET buttons in the same - Canon EOS C200B | EOS C200 EOS C200B Instruction Manual - Page 35
press the joystick to add it. • Push the joystick up/down/left/right to select the desired character and press the joystick to enter it. Use the arrows to change the position of the cursor and the backspace character ( ) to delete the last character entered. • Repeat this step as necessary to - Canon EOS C200B | EOS C200 EOS C200B Instruction Manual - Page 36
Support Unit: The camera is compatible with the optional SU-15 Shoulder Support Unit, which allows you to use the camera in a shoulder-mounted fashion. Attach the SU-15 to the camera using the camera mount through holes close to the tripod base. For details, refer to the SU-15's instruction manual - Canon EOS C200B | EOS C200 EOS C200B Instruction Manual - Page 37
the Lens As much as possible, attach and remove the lens quickly and in a clean environment free of dust. Refer also to the instruction manual of the lens used. IMPORTANT • When attaching/removing a lens, avoid direct sunlight or strong light sources. Also, be careful not to drop the camera or lens - Canon EOS C200B | EOS C200 EOS C200B Instruction Manual - Page 38
focus manually when the focus mode switch is set to AF. - You may not be able to use the your local Canon website. Operating modes: 1 Download the lens firmware update file from the Canon website and not support firmware updates, the SD card may be in SD card slot A or the SD card used may not - Canon EOS C200B | EOS C200 EOS C200B Instruction Manual - Page 39
menu option will appear grayed out. Visit your local Canon website and check if there is correction data available for the lens you are using. If so, download the necessary update package and upgrade the camera's firmware following the instructions supplied therein. 3 Select [On] and then press the - Canon EOS C200B | EOS C200 EOS C200B Instruction Manual - Page 40
mark ባ (on LCD attachment base 2) and - (on LCD attachment unit pivot B) are aligned. 3 Adjust the LCD monitor to the desired position. ቢ ባ ቤ k You can use the viewfinder and watch the LCD screen at the same time NOTES • Based on the LCD monitor's position, you can invert the image displayed on - Canon EOS C200B | EOS C200 EOS C200B Instruction Manual - Page 41
light sources may cause damage to internal components. When you are not using the viewfinder, make sure to attach the viewfinder cap to the viewfinder . • About the LCD and viewfinder screens: The screens are produced using extremely high-precision manufacturing techniques, with more than 99.99% of - Canon EOS C200B | EOS C200 EOS C200B Instruction Manual - Page 42
Setup]1 > [B&W Image: VF Output] (k only) or [B&W Image: VIDEO Output] 1 l Appears on the previous page in the menu. 2 Select [On] and then press the joystick. Using a Tripod The camera is shipped with the TB-1 Tripod Base. When mounting the camera on a tripod with 0.95 cm (3/8") mounting screws - Canon EOS C200B | EOS C200 EOS C200B Instruction Manual - Page 43
Preparing the Camera Removing and Attaching the GR-V1 Camera Grip The camera grip comes originally attached to the C200; it is an optional accessory for the C200B. You can remove it and replace it with the thumb rest should the minimal configuration be necessary. 43 Removing the Camera Grip ባ - Canon EOS C200B | EOS C200 EOS C200B Instruction Manual - Page 44
You can also attach the microphone holder to the camera directly. 2 Use a commercially available Phillips head ("crosshead") screwdriver to secure it firmly SS-1200 Shoulder Strap is supplied with the C200 while it is an optional accessory for the C200B. Pass the ends through the strap mount and - Canon EOS C200B | EOS C200 EOS C200B Instruction Manual - Page 45
. Attaching the Terminal Covers Insert the connecting strip into the opening to attach the terminal cover. NOTES • If the connecting strip is difficult to grasp, use a pair of tweezers or similar tool. - Canon EOS C200B | EOS C200 EOS C200B Instruction Manual - Page 46
instead of the LCD monitor and use the buttons and dials on the C200; optional accessory for the C200B. 1 Attach the handle unit (A 28). 2 Set the Q switch to OFF. 3 Perform the steps up to, but not including, attaching the clamp base to the camera described in the EVF-V70's instruction manual - Canon EOS C200B | EOS C200 EOS C200B Instruction Manual - Page 47
settings files. Compatible Recording Media The following types of memory card can be used with this camera. For the latest information about recording media tested for use with this camera, visit your local Canon website. CFast cards CFast 2.0-compliant cards. SD cards1 SD card type: UHS Speed - Canon EOS C200B | EOS C200 EOS C200B Instruction Manual - Page 48
Preparing Recording Media Inserting a CFast Card 1 Slide the CFast card slot cover switch in the direction of the arrow. 48 • The CFast card slot cover will open. 2 Insert the CFast card straight, with the label facing the SD card slots, all the way into the slot. 3 Close the CFast card slot cover. - Canon EOS C200B | EOS C200 EOS C200B Instruction Manual - Page 49
and Removing an SD Card You can insert an SD card into SD card slot A or slot B. If you have two SD cards, you can use both slots. 1 Open the SD card slot cover. 2 Insert the SD card, with the label facing the right side of the camera (the side with - Canon EOS C200B | EOS C200 EOS C200B Instruction Manual - Page 50
Preparing Recording Media Initializing Recording Media The first time you use a recording media with this camera, initialize it first. You will automatically switch to the other slot. • You cannot use the SLOT SELECT button to switch between SD card slots while recording. • You can also perform - Canon EOS C200B | EOS C200 EOS C200B Instruction Manual - Page 51
icons and the remaining recording time1 (in minutes) on each card (A 58). On the [Media] status screen (A 201), you can check the total space, and used space on each recording media. For SD cards only, the remaining recording time, remaining number of photos and speed class are displayed as well - Canon EOS C200B | EOS C200 EOS C200B Instruction Manual - Page 52
Preparing Recording Media Recovering Clips Some actions, such as suddenly turning off the camera or removing the recording media while data is being recorded, can cause data errors in the recorded clip. 52 Operating modes: 1 Open the index screen with the clip you wish to recover (A 139). 2 Select - Canon EOS C200B | EOS C200 EOS C200B Instruction Manual - Page 53
the procedure from the beginning. NOTES • Adjusting the black balance is necessary in the following cases: - When using the camera for the very first time or after a long period of not using it. - After sudden or extreme changes in ambient temperature. - After changing the ISO speed/gain settings - Canon EOS C200B | EOS C200 EOS C200B Instruction Manual - Page 54
Adjusting the Black Balance 54 - Canon EOS C200B | EOS C200 EOS C200B Instruction Manual - Page 55
making important recordings for the first time, make test recordings using the video configuration(s) you plan to use to check that the camera operates correctly. Should the camera fail to operate correctly, refer to Troubleshooting (A 207). * "Clip" refers to a single movie unit recorded with - Canon EOS C200B | EOS C200 EOS C200B Instruction Manual - Page 56
turn off the camera. • Be sure to save your recordings regularly (A 159), especially after making important recordings. Canon shall not be liable for any loss or corruption of data. NOTES • You can use the review function (A 112) to play back part or all of the last clip recorded without having to - Canon EOS C200B | EOS C200 EOS C200B Instruction Manual - Page 57
REC button*. This is useful in 57 preventing settings from still operate the camera using the Browser Remote application You can use the custom Depending on the focus function used you may see some of the AF-Boosted MF frame - in yellow: manual adjustment range; in white: automatic adjustment - Canon EOS C200B | EOS C200 EOS C200B Instruction Manual - Page 58
Recording Video Left side of the screen Icon/Display Description Custom Display Recording media status, estimated remaining recording time and recording format 2: [Remaining Rec Time] 58 ;, 0000 min, END CFast card status: in green - can record (RAW clips); in white - reading the CFast - Canon EOS C200B | EOS C200 EOS C200B Instruction Manual - Page 59
Icon/Display Network functions: , , 4 Description Custom Display 2: [Network Functions] Network connection status: 59 in white - function ready to be used; in yellow - connecting to or disconnecting from a network; in red - error has occurred. Double slot recording (A 51) 2: [Recording Mode - Canon EOS C200B | EOS C200 EOS C200B Instruction Manual - Page 60
pack with a fully charged one. • Depending on the conditions of use, the actual battery charge may not be indicated accurately. Bottom/Bottom bar (A 75) • Only displayed when the gain, iris and shutter are all set to manual adjustment. AE Shift (A 75) ND filter (A 71) Aperture value (A 72) ISO speed - Canon EOS C200B | EOS C200 EOS C200B Instruction Manual - Page 61
purposes. 7 The camera will automatically add the suffix "_P" to the file name of XF-AVC proxy clips. Additionally, when an SD/SDHC card is used to record XF-AVC proxy clips, a stream number (01 to 99) will be added before the "P". The stream number will advance every time the video - Canon EOS C200B | EOS C200 EOS C200B Instruction Manual - Page 62
Select [Reset] and then press the joystick to reset the user-defined field to [CANON]. 3 Push the joystick up/down to select the first character and then press the most convenient for managing files on a computer. We recommend using the [Continuous] setting. Understanding folder names • An example - Canon EOS C200B | EOS C200 EOS C200B Instruction Manual - Page 63
be activated automatically (in that case, ` will appear next to the b icon). When the camera's temperature has decreased sufficiently, the fan will be turned off. Use this setting when you do not want the camera to pick up the fan's operating sound. The fan runs at all times. Setting the Fan - Canon EOS C200B | EOS C200 EOS C200B Instruction Manual - Page 64
the following procedures you can set the video configuration used for main recording clips. Select the video format, Light data recorded by this camera is different from the Cinema RAW data recorded by other Cinema EOS cameras. Operating modes: 1 Open the [Main Rec Format] submenu. > [Æ ! Recording - Canon EOS C200B | EOS C200 EOS C200B Instruction Manual - Page 65
Hz 50.00 Hz 59.94P 29.97P 23.98P 50.00P 50.00i 25.00P 24.00 Hz 24.00P - Ü Ü Ü - Ü Ü Ü Ü Ü Ü Ü Ü Ü Ü Ü 1 The camera uses a variable bit rate (VBR). 2 Long GOP options compress the image after analyzing also changes across a group of pictures and offer better compression (smaller - Canon EOS C200B | EOS C200 EOS C200B Instruction Manual - Page 66
Button Changing Main Camera Functions with the FUNC Button You can adjust three main camera functions-shutter speed, white balance and ISO speed/gain-using the FUNC button (direct setting mode). 66 This section will explain the basic operation of the direct setting mode. For specific details about - Canon EOS C200B | EOS C200 EOS C200B Instruction Manual - Page 67
device (A 170). 67 Operating modes: [Speed]: Allows you to set the shutter speed (in fractions of a second). You can select the increment to use when adjusting the shutter speed between 1/3-stop and 1/4-stop increments. [Angle]: You can set the shutter angle to determine the shutter speed. [Clear - Canon EOS C200B | EOS C200 EOS C200B Instruction Manual - Page 68
appear soft or out of focus. To avoid the loss of sharpness due to diffraction, use a faster shutter speed, a denser ND filter (A 71) or open up the ], bright red, green or blue dots may appear on the screen. In such case, use a faster shutter speed or select a lower ISO speed or gain value (A 69). - Canon EOS C200B | EOS C200 EOS C200B Instruction Manual - Page 69
800 / 12 dB gain (when it is set to [Canon Log 3]). 2 > [v " Camera Setup] > [ISO Increment] setting (ISO speed) or [Gain Increment] setting (gain). 3 Sensitivity settings that are outside the recommended range but can still be used by setting > [v " Camera Setup] > [ISO/Gain Extended Range] to - Canon EOS C200B | EOS C200 EOS C200B Instruction Manual - Page 70
using the control dial on the camera or that on the camera grip1. 70 You will need to set in advance the function of one of the control dials to [ISO/Gain]. You can select the function assigned to each control dial independently. 1 Supplied accessory for the C200; optional accessory for the C200B - Canon EOS C200B | EOS C200 EOS C200B Instruction Manual - Page 71
) and, if you enable the extended ND range, you can select one of 5 density levels (2 to 10 stops). You can also perform this function remotely using Browser Remote on a connected network device (A 170). Operating modes: Press the ND FILTER + or - button to select the desired ND filter setting - Canon EOS C200B | EOS C200 EOS C200B Instruction Manual - Page 72
C200; optional accessory for the C200B. Required settings on EF Cinema lenses To adjust the aperture from the camera, you will need to enable automatic adjustment using the controls on the lens. Required settings vary depending on the lens. Refer to the following table and the instruction manual - Canon EOS C200B | EOS C200 EOS C200B Instruction Manual - Page 73
the aperture mode will be set to [Manual] and cannot be changed. Skip to step 3. • When using a compatible EF Cinema lens, enable automatic adjustment using the camera. Adjust the aperture using the lens. * Select EF Cinema lenses (A 230) support iris adjustment from this camera. • When using an - Canon EOS C200B | EOS C200 EOS C200B Instruction Manual - Page 74
extender or iris compensation function of an EF Cinema lens, when you switch from automatic aperture to manual aperture. - When the aperture controls on the lens are switched between automatic/manual mode. • When using EF lenses that let you adjust the aperture gain, if the aperture gain is set too - Canon EOS C200B | EOS C200 EOS C200B Instruction Manual - Page 75
automatic aperture, in order to darken or lighten the image. You can also perform this function remotely using Browser Remote on a connected network device (A 170). 75 1 Open the [AE Shift] submenu. > [v # Camera Setup] > [AE Shift] 2 Select an AE shift level and then press - Canon EOS C200B | EOS C200 EOS C200B Instruction Manual - Page 76
when recording backlit scenes. [Standard]: Averages the light metered from the entire screen, giving more weight to the subject in the center. [Spotlight]: Use this option when recording a scene in which only a certain part of the picture is lit, for example, when the subject is lit by a spotlight - Canon EOS C200B | EOS C200 EOS C200B Instruction Manual - Page 77
Å button. • The color temperatures displayed on the screen are approximate. Use them only as a reference. Custom White Balance 1 Press the WB The white balance mode icon will be highlighted in orange. • You can also use the FUNC button and joystick to enter the direct setting mode. 2 Push the - Canon EOS C200B | EOS C200 EOS C200B Instruction Manual - Page 78
continue shooting. Color Temperature/Preset White Balance 1 Press the WB button. • The white balance mode icon will be highlighted in orange. • You can also use the FUNC button and joystick to enter the direct setting mode. 2 Push the joystick up/down to select the ¼ or É icon (preset white balance - Canon EOS C200B | EOS C200 EOS C200B Instruction Manual - Page 79
white balance mode icon will be highlighted in orange. • You can also use the FUNC button and joystick to enter the direct setting mode. 2 - Under mercury lamps and certain types of fluorescent and LED lights • You can use the > [v # Camera Setup] > [AWB Response] setting to change how quickly - Canon EOS C200B | EOS C200 EOS C200B Instruction Manual - Page 80
on the subject inside the AF frame. You can use the focus lock function (A 86) to change the composition manual focus lens is attached to the camera. 2 Supplied accessory for the C200; optional accessory for the C200B. Operating modes: Focusing methods and required settings Focusing method Manual - Canon EOS C200B | EOS C200 EOS C200B Instruction Manual - Page 81
and the instruction manual of the lens used. Lens Part used on the lens Setting for automatic adjustment Setting for manual adjustment 81 Cinema lens, enable manual adjustment on the lens (A 80). 3 Press the FOCUS GUIDE button to display the focus guide. • If you are not using the camera grip, - Canon EOS C200B | EOS C200 EOS C200B Instruction Manual - Page 82
focus frames are displayed on the screen, you can press the joystick to switch the focus guide between them. 1 Supplied accessory for the C200; optional accessory for the C200B. Focus farther (large adjustment) Focus farther (small adjustment) In focus Focus closer (small adjustment) Focus - Canon EOS C200B | EOS C200 EOS C200B Instruction Manual - Page 83
[Off]. • When the Dual Pixel Focus Guide function is used together with Face AF or tracking, the focus guide may not focus the main subject's eyes 2 Supplied accessory for the C200; optional accessory for the C200B. NOTES • About Peaking/Magnification: - You can use the > [A " Assistance - Canon EOS C200B | EOS C200 EOS C200B Instruction Manual - Page 84
will appear on the screen and the camera will focus automatically. When you are using Face AF, the face detection frame around the face of the person who has and the camera will focus using contrast-detection autofocus. AF-Boosted MF In this focus mode, you can focus manually most of the way and - Canon EOS C200B | EOS C200 EOS C200B Instruction Manual - Page 85
Turn the focus ring to adjust the focus. • Focus manually to bring the subject closer into focus. When the focus or may not be able to focus correctly. Visit your local Canon website for the latest information. • When using autofocus with compatible EF lenses, you can change various aspects of - Canon EOS C200B | EOS C200 EOS C200B Instruction Manual - Page 86
following subjects or in the following cases. In such case, focus manually. - Reflective surfaces - Through dirty or wet windows - Subjects with file (A 133) is set to one of the Canon Log settings or [Wide DR]. - When using small apertures. - When subjects at different distances appear inside - Canon EOS C200B | EOS C200 EOS C200B Instruction Manual - Page 87
combine face detection with the Dual Pixel Focus Guide function (A 82) to help you focus on the main subject manually. 1 Open the [Face Detection] submenu. while you hold the ONE-SHOT AF button pressed down. • If you use face detection together with the tracking function (A 88), the camera will be - Canon EOS C200B | EOS C200 EOS C200B Instruction Manual - Page 88
in the following cases: - When the shutter speed used is slower than 1/30 (59.94 Hz recordings), 1/25 (50.00 Hz recordings) or 1/24 (24.00 Hz recordings). - When slow motion recording is activated. - When a manual focus lens is attached to the camera. - When the digital tele-converter is activated - Canon EOS C200B | EOS C200 EOS C200B Instruction Manual - Page 89
the C200; optional accessory for the C200B. Required settings on EF Cinema lenses To operate the zoom from the camera, you will need to enable automatic adjustment using the controls on the lens. Required settings vary depending on the lens. Refer to the following table and the instruction manual - Canon EOS C200B | EOS C200 EOS C200B Instruction Manual - Page 90
and Zebra Patterns Onscreen Markers and Zebra Patterns Using onscreen markers allows you to make sure your various safe areas, such as the action safe area and text safe area. You can select the core area used as the basis for calculating the safe area and a percentage ([80%], [90%], [92.5%] or [95 - Canon EOS C200B | EOS C200 EOS C200B Instruction Manual - Page 91
Onscreen Markers and Zebra Patterns To set the aspect ratio 1 Select [Marker Aspect Ratio], select the desired option and then press the joystick • If you selected one of the preset aspect ratios, the rest of the procedure is not necessary. If you selected [Custom], continue the procedure to set - Canon EOS C200B | EOS C200 EOS C200B Instruction Manual - Page 92
back can be output from the SDI terminal. Depending on the frame rate used, you may be able to select between a drop frame an non-drop frame different for DF and NDF, in this section the NDF display style is used for simplicity's sake. Selecting the Time Code Mode You can select the camera's - Canon EOS C200B | EOS C200 EOS C200B Instruction Manual - Page 93
, 59.94i or 29.97P, you can select between a drop frame (DF) or non-drop frame (NDF) time code, depending on how you plan to use your recordings. With all other frame rates, the time code is set to non-drop frame (NDF) and cannot be changed. Operating modes: 1 Open the - Canon EOS C200B | EOS C200 EOS C200B Instruction Manual - Page 94
frame and non-drop frame time codes, there might be a discontinuity in the time code at the point where the recording starts. • When you are using the [Free Run] running mode, the time code will continue running as long as the lithium button battery has some charge left, even if you - Canon EOS C200B | EOS C200 EOS C200B Instruction Manual - Page 95
] 2 Select the desired user bit type and press the joystick. • Select [Setting] to set your own identification code, [Time] to use the time as the user bit, or [Date] to use the date as the user bit. • If you selected [Time] or [Date], the rest of the procedure is not necessary. If - Canon EOS C200B | EOS C200 EOS C200B Instruction Manual - Page 96
playback. The sampling frequency is 48 kHz and the audio sampling bit depth depends on the recording format. You can 96 record audio using the INPUT terminals (commercially available microphones, analog line-in audio sources, AES/ EBU digital audio sources), the MIC terminal (commercially available - Canon EOS C200B | EOS C200 EOS C200B Instruction Manual - Page 97
Recording Audio [Select CH1/ CH2 Input]1 [Select CH3/ CH4 Input]2 Audio input selection switches [CH2 Input]2 for INPUT 1 for INPUT 2 Recorded audio channels/audio sources CH1 CH2 CH33 CH43 [INPUT Terminals] [MIC Terminal] AES/EBU - - INPUT 1 terminal (digital audio) MIC terminal - Canon EOS C200B | EOS C200 EOS C200B Instruction Manual - Page 98
. To the MIC terminal you can attach commercially 98 available condenser microphones with their own power supply, and a ∅ 3.5 mm stereo mini plug. Using the supplied microphone holder, you can fix external microphones with a diameter of 19 mm to 20 mm. Follow the procedure below to attach - Canon EOS C200B | EOS C200 EOS C200B Instruction Manual - Page 99
the microphone connected when turning off the phantom power. • When using the INPUT terminals to record to only one channel, use the INPUT 1 terminal. IMPORTANT • When connecting an analog microphone or device that does not support phantom power, make sure to set the corresponding INPUT switch to - Canon EOS C200B | EOS C200 EOS C200B Instruction Manual - Page 100
on the monaural microphone, see About the monaural microphone (A 103). Recording a Single Analog Audio Input to Two Audio Channels By default, when using analog audio sources (line in or microphone) connected to the INPUT terminals, each audio input is recorded to a separate audio channel (INPUT - Canon EOS C200B | EOS C200 EOS C200B Instruction Manual - Page 101
When a channel is set to an analog audio input, you can select the automatic audio recording level adjustment or adjust the audio level manually, independently for each channel. When a channel is set to a digital audio source or the built-in monaural microphone, the audio recording level cannot - Canon EOS C200B | EOS C200 EOS C200B Instruction Manual - Page 102
same type of analog audio source (external line input or external microphone), you can use the > [¡ ! Audio Setup] > [CH1/CH2 ALC Link] or [CH3/ channels is set to the INPUT terminals, an analog audio source and manual audio level adjustment, you can activate the audio limiter to prevent audio - Canon EOS C200B | EOS C200 EOS C200B Instruction Manual - Page 103
to the audio and video during editing. The audio recording level of the monaural microphone is adjusted automatically and cannot be changed. To use the monaural microphone, set > [¡ ! Audio Setup] > [Select CH1/CH2 Input] or [Select CH3/CH4 Input] to [Monaural Mic]. Monaural microphone - Canon EOS C200B | EOS C200 EOS C200B Instruction Manual - Page 104
]1 > [Headphone Volume] setting. If you set an assignable button to [Headphones +] or [Headphones -] (A 125), you can press the button to adjust the headphone volume without using the menu. 1 For mode, page !. × (headphone) terminal - Canon EOS C200B | EOS C200 EOS C200B Instruction Manual - Page 105
Colors Bars/Audio Reference Signal Colors Bars/Audio Reference Signal You can have the camera generate color bars and a 1 kHz audio reference signal and output them from the VIDEO terminal, viewfinder1, SDI terminal, HDMI OUT terminal and × (headphone) terminal2. 1 k only. 2 Audio reference signal - Canon EOS C200B | EOS C200 EOS C200B Instruction Manual - Page 106
digits in the same way to select the Y coordinate of the desired line. • When the number of horizontal lines (vertical component) of the resolution used is 1080, you can select a value between 0 and 1079 (1-line increments); when the vertical resolution is 2160, you can select a value between 0 and - Canon EOS C200B | EOS C200 EOS C200B Instruction Manual - Page 107
will appear on the waveform monitor indicating the luminance (Y) level corresponding to the knee point. About the waveform monitor display: • To display Canon Log 3 or Canon Log, set > [ ! Custom Picture/HDR] > [HDR/LUT] to [HDR: Off], the other settings in the same screen to an option other - Canon EOS C200B | EOS C200 EOS C200B Instruction Manual - Page 108
flag clips you want to set apart. You can also perform this function remotely using Browser Remote on a connected Wi-Fi device (A 170). When the camera is (%) to the clip to flag it and set it apart. Furthermore, you can use the $ mark to protect important clips, as clips with an $ mark cannot be - Canon EOS C200B | EOS C200 EOS C200B Instruction Manual - Page 109
and select the user memo, it will be added to clips you record. 1 Use Canon XF Utility to save a user memo to an SD card. • For details, refer to Managing User Memo Profiles in the Canon XF Utility Instruction Manual. 2 Insert the SD card into SD card slot B. 3 Open the metadata [Setting] submenu - Canon EOS C200B | EOS C200 EOS C200B Instruction Manual - Page 110
Scene] or [Take] submenu. > [3 $ Recording/Media Setup] > [Metadata] > [Scene] or [Take] 2 Select [Change] and then press the joystick. • Enter the desired text using the keyboard screen (A 35). • To clear the scene/take information, select [Reset] instead. 3 Select [OK] and then press the joystick. - Canon EOS C200B | EOS C200 EOS C200B Instruction Manual - Page 111
information can be used to organize and search clips using Canon XF Utility (A 159). In mode, you can check if a clip contains GPS information on the [Clip Info] screen (A 145). For details about attaching and configuring the receiver, refer to the GP-E2's instruction manual. 111 Connecting the - Canon EOS C200B | EOS C200 EOS C200B Instruction Manual - Page 112
the joystick. 4 After you finish recording a clip, press the assignable button. • The last clip that was recorded is played back for the selected duration. [Ð REVIEW] appears at the top of the screen. • You can push the joystick left/right during the playback to skip 10 seconds backward or forward - Canon EOS C200B | EOS C200 EOS C200B Instruction Manual - Page 113
has the following video configuration. The frame rate is the same as that used for the primary clip. The audio configuration depends on the proxy clip's recording of the proxy clip will stop as well. • When an SDHC card is used to record proxy clips, the video (stream) file in a proxy clip will be - Canon EOS C200B | EOS C200 EOS C200B Instruction Manual - Page 114
a slow motion effect during playback. Pre-recording: The camera will start recording a few seconds before you press the REC button. This is especially useful when it is difficult to predict when to start recording. Frame recording: The camera will record one frame every time you press the REC button - Canon EOS C200B | EOS C200 EOS C200B Instruction Manual - Page 115
. 5 When you have finished recording, turn off the special recording mode. • Repeat steps 1 and 2 selecting [Normal Recording] instead. 115 NOTES • You can use only one special recording mode at a time. • The shooting frame rate cannot be changed while recording. • The time code signal will not be - Canon EOS C200B | EOS C200 EOS C200B Instruction Manual - Page 116
recorded frames are joined together into one clip. • The tally lamp goes out and [STBY] appears at the top of the screen. NOTES • You can use only one special recording mode at a time. • Some frames at the point the recording was stopped may be recorded and added to the end of - Canon EOS C200B | EOS C200 EOS C200B Instruction Manual - Page 117
recording, turn off the special recording mode. • Repeat steps 1 and 2 of the previous procedure selecting [Normal Recording] instead. NOTES • You can use only one special recording mode at a time. • The interval cannot be changed while recording. • Some frames at the point the recording was - Canon EOS C200B | EOS C200 EOS C200B Instruction Manual - Page 118
tally lamp illuminates and continuous recording starts on SD card B. [CONT STBY'7] changes to [ÜCONT REC'7]. 3 While recording continues on SD card B, you can use the REC button to record normal (non-continuous) recordings on SD card A. • Press the REC button to start recording on SD card A. [STBY - Canon EOS C200B | EOS C200 EOS C200B Instruction Manual - Page 119
Mode] > [Normal Recording] • Selecting a different special recording mode will also deactivate the continuous recording mode. 119 NOTES • You can use only one special recording mode at a time. • When continuous recording mode is activated, if recording on SD card B (continuous recording - Canon EOS C200B | EOS C200 EOS C200B Instruction Manual - Page 120
or turn off the camera. - Do not remove the SD card. NOTES • Photos cannot be taken during pre-recording mode. • You cannot take photos while using Browser Remote. • If the LOCK switch on the SD card is set to prevent writing, you will not be able to record photos or grab - Canon EOS C200B | EOS C200 EOS C200B Instruction Manual - Page 121
SD card. NOTES • The following photos may not be displayed correctly. - Photos not recorded with this camera. - Image files that were created, edited or renamed using a computer. - Canon EOS C200B | EOS C200 EOS C200B Instruction Manual - Page 122
Deleting Photos Deleting Photos 122 You can delete a photo you no longer need. Photos can be deleted one at a time from the photo playback screen. Operating modes: The basic operation of the photo menu is identical to that of the clip menu (A 144). 1 Select the photo you wish to delete. • - Canon EOS C200B | EOS C200 EOS C200B Instruction Manual - Page 123
cable supplied with the remote controller to connect it to the camera. For details on how to connect and use the remote controller, refer to its instruction manual. 123 Operating modes: Remote cable (supplied with the RC-V100) To the RC-V100's REMOTE A terminal 1 Turn off the camera and connect - Canon EOS C200B | EOS C200 EOS C200B Instruction Manual - Page 124
Using the Optional RC-V100 Remote Controller 124 - Canon EOS C200B | EOS C200 EOS C200B Instruction Manual - Page 125
each and the LM-V2 offers two assignable buttons that can be used when these optional accessories are attached to the camera. In most cases also indicate their default settings. 1 Supplied accessory for the C200; optional accessory for the C200B. Operating modes: 125 On the LCD monitor On the - Canon EOS C200B | EOS C200 EOS C200B Instruction Manual - Page 126
buttons will return to their default function. Using an Assignable Button After you assign a function function on/off. Ü [Focus Guide] Turns the Dual Pixel Focus Guide function on/off. Ü [ Switches the aperture adjustment mode between automatic and manual. Ü [Iris +] Opens up the aperture - Canon EOS C200B | EOS C200 EOS C200B Instruction Manual - Page 127
for a custom white balance setting. Ü [AWB Lock] While using auto white balance (AWB), locks the current white balance settings. Bars] Turns color bars on/off. Ü [Photo]1 Records a photo. Ü [Review Recording]1 Plays back the last clip recorded in mode. Ü [Time Code] Opens the - Canon EOS C200B | EOS C200 EOS C200B Instruction Manual - Page 128
[Initialize Media] submenu. Ü [ User Setting]1 Customizable slot. Assign to the button any menu setting you would like to Ü register. 1 Function can be used only by assigning it to a button. 2 Available only when the optional LM-V2 LCD Monitor is attached to the camera. 3 k only. 4 Available - Canon EOS C200B | EOS C200 EOS C200B Instruction Manual - Page 129
picture files are exclusively compatible for use only with C200 / C200B cameras. Selecting Custom Picture Files Select Canon Log 3] [Canon Log] [BT.709] [Gamma]* [Canon Log 3] [Canon Log] [Wide DR] [Color Matrix]* [Neutral] [Cinema EOS Original] [Neutral] Characteristics This setting uses Canon - Canon EOS C200B | EOS C200 EOS C200B Instruction Manual - Page 130
be applied for processing in post-production. For the latest information on available LUTs, please visit your local Canon website. • About changing custom picture related settings using the optional RC-V100 Remote Controller - If a protected custom picture file is selected on the camera, custom - Canon EOS C200B | EOS C200 EOS C200B Instruction Manual - Page 131
[Rename] 3 To change the file name, select [Input] and then press the joystick. • Enter the desired file name (up to 8 characters) using the keyboard screen (A 35). 4 Select [OK] and then press the joystick. Protecting Custom Picture Files Protecting a custom picture file prevents its settings from - Canon EOS C200B | EOS C200 EOS C200B Instruction Manual - Page 132
the one on SD card B. 5 When the confirmation message appears, press the joystick. Embedding Custom Picture Settings in a Clip When you record a clip using custom picture settings, you can have the custom picture file embedded in the metadata and saved along with the clip. Operating modes: 1 Open - Canon EOS C200B | EOS C200 EOS C200B Instruction Manual - Page 133
colors more suitable for motion picture production. [Cinema EOS Original]: Color matrix developed by Canon, designed to reproduce the 4K output of an EOS C500 camera using the BT.709 color space. [Video]: Reproduces the colors of an EOS C300/EOS C500 camera with no custom picture settings applied - Canon EOS C200B | EOS C200 EOS C200B Instruction Manual - Page 134
50 (±0) Increases or decreases the black level. Higher settings will make dark areas brighter but decrease contrast. When [Gamma] is set to one of the Canon Log settings, this setting has no effect on the picture. -50 to 50 (±0) These settings correct the color cast in blacks. When [Gamma] is set - Canon EOS C200B | EOS C200 EOS C200B Instruction Manual - Page 135
higher frequencies. Higher values apply more sharpness to areas with higher frequencies. Use this for subjects in which normal sharpening is not effective. 0 to 9 above the knee point. When [Gamma] is set to one of the Canon Log settings or [Wide DR], these settings have no effect on the picture - Canon EOS C200B | EOS C200 EOS C200B Instruction Manual - Page 136
> [Master Pedestal] setting. When [Gamma] is set to one of the Canon Log settings, this setting has no effect on the picture. [Through], [Press], is connected to the camera, the following custom picture settings can be changed using the buttons and dials on the remote controller. - [Other Settings] - Canon EOS C200B | EOS C200 EOS C200B Instruction Manual - Page 137
you can save those settings in the camera or on SD card B. You can load those settings at a later date or on another C200 / C200B camera so that you can use that camera in the exact same way. Operating modes: 137 Saving Camera Settings 1 Open the [Save] submenu. [B ! System Setup] > [Transfer Menu - Canon EOS C200B | EOS C200 EOS C200B Instruction Manual - Page 138
Saving and Loading Camera Settings 138 - Canon EOS C200B | EOS C200 EOS C200B Instruction Manual - Page 139
back clips with the camera. For details on playing back clips using an external monitor, refer to Connecting to an External Monitor or the recording media contains clips recorded at a system frequency other than the one currently used by the camera, you will not be able to play back the clips. In - Canon EOS C200B | EOS C200 EOS C200B Instruction Manual - Page 140
Playback 140 1 Shot mark (A 108) 2 $ mark/% mark (A 108) 3 Orange selection frame 4 Clip identification (camera index, reel number and clip number) (A 61) For MP4 clips, the file name (A 62) appears instead. 5 Recording date and time 6 Clip thumbnail 7 Recording media 6 7 SD card (the one - Canon EOS C200B | EOS C200 EOS C200B Instruction Manual - Page 141
the index screen, you can control the playback with the buttons on the camera (play/pause/stop only) or with the joystick and onscreen joystick guide (A 143). 1 Move the orange selection frame to the clip you want to play back. 2 Press the Ò button to start playback. • The selected clip will be - Canon EOS C200B | EOS C200 EOS C200B Instruction Manual - Page 142
card 6 Playback operation 7 Frame rate (A 64) For clips recorded using slow motion recording, the shooting frame rate and playback frame rate will both the following sequence. Show all onscreen displays hide the joystick guide hide all onscreen displays* * Except for momentary displays like - Canon EOS C200B | EOS C200 EOS C200B Instruction Manual - Page 143
Controls The following playback types are available using the onscreen joystick guide and any of the joysticks. Playback [Headphones -] (A 125), you can press the button to adjust the headphone volume without using the menu. The audio signal will also be output from the SDI terminal and HDMI OUT - Canon EOS C200B | EOS C200 EOS C200B Instruction Manual - Page 144
available. 2 Appears only when a clip requires recovery. In such case, only [Cancel], [Recover Clip] and [Delete Clip] will appear in the menu. Using the Clip Menu Operating modes: 1 Select a clip and then press the joystick. • The clip menu appears. Available functions depend on the index screen - Canon EOS C200B | EOS C200 EOS C200B Instruction Manual - Page 145
modes: From the [Clip Info] screen, push the joystick up to display the [Lens & Q] screen. In this screen you can check details about the lens used to record the clip. If the clip has an embedded user memo, you will see the user memo content in this screen as well. Push - Canon EOS C200B | EOS C200 EOS C200B Instruction Manual - Page 146
mark (%) to XF-AVC clips to help you identify particular clips for a future purpose. Furthermore, you cannot delete clips with an $ mark so you can use this mark also to protect important clips. Operating modes: Adding an $ Mark or % Mark during Playback To add an OK mark ($) or check mark (%) to - Canon EOS C200B | EOS C200 EOS C200B Instruction Manual - Page 147
Clip Operations Adding Shot Marks During playback, you can add a shot mark (!) to frames that you want to set apart in an XF-AVC clip. Operating modes: 147 Adding Shot Marks during Playback To add a shot mark to a clip during playback or playback pause, you must first set an assignable button to - Canon EOS C200B | EOS C200 EOS C200B Instruction Manual - Page 148
Clip Operations Deleting the User Memo and GPS Information 148 Operating modes: 1 Open the [XF-AVC] index screen, select the desired clip and then press the joystick to open the clip menu. 2 Select [Delete User Memo] and then press the joystick. • The [Delete User Memo] screen appears and it - Canon EOS C200B | EOS C200 EOS C200B Instruction Manual - Page 149
by Terminal Refer to the following table for the video output configuration from each terminal, depending on the recording video configuration used. Footnotes appear at the end of the tables (A 151). Operating modes: Recording video configuration Video format1 Frame rate2 Resolution 59.94P - Canon EOS C200B | EOS C200 EOS C200B Instruction Manual - Page 150
Video Output Configuration 150 Recording video configuration Video format1 Frame rate2 Resolution 100.00P10 50.00i (XF-AVC only) 1920x1080 MP4 / XF-AVC 24.00P 3840x2160 1920x1080 120.00P10 1920x1080 Video output configuration SDI terminal3 4 HDMI OUT terminal4 SDI output5 Maximum - Canon EOS C200B | EOS C200 EOS C200B Instruction Manual - Page 151
60.00i 1920x10806 YCbCr 4:2:2 8 bit 1 > [3 ! Recording/Media Setup] > [Main Rec Format]. 2 The frame rate of the video output will be the same as that used for recording (except during slow motion recording and when the SDI/HDMI scan mode is set to PsF). 3 When [On (Linked to VIDEO Term.)] is - Canon EOS C200B | EOS C200 EOS C200B Instruction Manual - Page 152
BNC cables (commercially available) HDMI cable (commercially available) HDMI OUT terminal 3G/HD-SDI inputs External monitor/ digital video recorder HDMI input Using the SDI Terminal The digital signal that is output from the SDI terminal includes the video signal, audio signal (up to 4 channels - Canon EOS C200B | EOS C200 EOS C200B Instruction Manual - Page 153
the SMPTE ST 425-1 standard. Preparations for Recording 2K Video Using an External Recorder You can connect an external video recorder to the camera's SDI terminal to record 2K video. Refer also to the external recorder's instruction manual for details on how to record. For details about the audio - Canon EOS C200B | EOS C200 EOS C200B Instruction Manual - Page 154
then press the joystick. NOTES • The HDMI OUT terminal is for output only. Do not connect the camera to another device's output terminal using the HDMI OUT terminal as this will cause a malfunction. • Correct operation cannot be guaranteed when connecting the camera to DVI monitors. • Video may - Canon EOS C200B | EOS C200 EOS C200B Instruction Manual - Page 155
compliant with the ITU-R BT.2100(HLG) or ITU-R BT.2100(PQ) standard from the SDI terminal or HDMI OUT terminal. The signal output will use narrow range coding. Operating modes: 1 Open the [HDR/LUT] screen. > [ ! Custom Picture/HDR] > [HDR/LUT] 2 Select [HDR: Off] and then press the joystick. 3 Push - Canon EOS C200B | EOS C200 EOS C200B Instruction Manual - Page 156
LUT options by gamma curve Available LUTs depend on the gamma curve used, whether it was set through one of the [ ! Custom Picture or through the individual > [ ! Custom Picture/HDR] > [Gamma] settings. [Gamma] [Canon Log 3] [Canon Log] [Wide DR] [LUT: BT.709] Ü Ü - Available LUTs [LUT: HDR - Canon EOS C200B | EOS C200 EOS C200B Instruction Manual - Page 157
2 Only when [ ! Custom Picture/HDR] > [Preset] is set to [Canon Log 3]. Available only for SDI output. 157 NOTES • When you apply the [LUT ACESproxy] LUT to the SDI terminal, it will output ACESproxy video data. Using a compatible monitor, you can perform on-set color grading and check the image - Canon EOS C200B | EOS C200 EOS C200B Instruction Manual - Page 158
Audio Output Audio Output 158 The camera can output audio from the SDI terminal, HDMI OUT terminal, × (headphone) terminal or speaker*. When recording with 4-channel audio, you can select which two channels of the 4 audio channels recorded with the clip will be output from the terminals and - Canon EOS C200B | EOS C200 EOS C200B Instruction Manual - Page 159
a Canon Service Center. http://www.pixela.co.jp/oem/canon/e/index_biz.html Saving Clips Using Data Import Utility: • Save clips to the computer using an . For details about using the software, refer to the instruction manual (PDF file) that is installed with the software. Canon XF Utility: Software - Canon EOS C200B | EOS C200 EOS C200B Instruction Manual - Page 160
will be ready for color grading. Alternatively, you can use the Canon RAW Plugin to easily use RAW clips unaltered (in RAW) directly from major non- will download from the website. For details about using the software, refer to the instruction manual (PDF file) that is installed with the software - Canon EOS C200B | EOS C200 EOS C200B Instruction Manual - Page 161
as the Wi-Fi access point. Before using the network functions • The instructions in this chapter assume you already have a use. • Configuring the network settings requires adequate knowledge about configuring and using wired (Ethernet) and/or wireless (Wi-Fi) networks. Canon cannot provide support - Canon EOS C200B | EOS C200 EOS C200B Instruction Manual - Page 162
how to activate the Wi-Fi protected setup, refer to the instruction manual of your wireless router. WPS (PIN code): Even if your wireless router does not have a dedicated WPS button, it may support WPS using a PIN code instead. For setup using a PIN code, you will need to know in advance how to - Canon EOS C200B | EOS C200 EOS C200B Instruction Manual - Page 163
can connect. Follow the instructions on the screen to network name) the camera will use as a Wi-Fi access point using the keyboard screen (A 35). Manual] and then press the joystick. • If you selected [Automatic], the IP address will be assigned automatically. Continue with the procedure to review - Canon EOS C200B | EOS C200 EOS C200B Instruction Manual - Page 164
• Push the joystick left/right to review additional settings before pressing the joystick. make it easier to identify. Enter the desired name using the keyboard screen (A 35). 3 Select [OK] corresponding to the method you wish to use (see the reference pages below). [WPS: Button] (A 165) - Canon EOS C200B | EOS C200 EOS C200B Instruction Manual - Page 165
screen. • For details about how to access your wireless router's settings and activate the Wi-Fi Protected Setup (WPS) using a PIN code, refer to the instruction manual of your wireless router. 3 Within 2 minutes, press the joystick. • While [Connecting] appears on the screen, you can press the - Canon EOS C200B | EOS C200 EOS C200B Instruction Manual - Page 166
network name (SSID) and password refer to the wireless router's instruction manual or consult the network administrator in charge of the access point. • Enter the password of the selected Wi-Fi network using the keyboard screen (A 35). 5 Continue with the procedure to configure the IP address assignment - Canon EOS C200B | EOS C200 EOS C200B Instruction Manual - Page 167
enter manually the details of the Wi-Fi network you want to connect to. Follow the instructions on the screen to complete the procedure. 1 To enter the [SSID] (network name), select [Input] and then press the joystick. • Enter the SSID (network name) of the selected Wi-Fi network using the keyboard - Canon EOS C200B | EOS C200 EOS C200B Instruction Manual - Page 168
to a Wired (Ethernet) Network Connect the camera to a router or other device connected to a wired (Ethernet) network using a commercially available Ethernet cable. Use Category 5e, shielded twisted pair (STP) Ethernet cables compatible with Gigabit 168 Ethernet (1000BASE-T) and with good shielding - Canon EOS C200B | EOS C200 EOS C200B Instruction Manual - Page 169
network configuration profile even after the initial setup. Changing settings manually requires more advanced knowledge of Wi-Fi and network settings. with the procedure corresponding to the network connection method being used. - For infrastructure connections, follow the procedure for Connecting - Canon EOS C200B | EOS C200 EOS C200B Instruction Manual - Page 170
, operating systems, Web browsers, etc., please visit your local Canon website. Setting Up Browser Remote You can set a unique camera , select [Camera ID] and then press the joystick. • Enter the desired camera ID using the keyboard screen (A 35). 6 Select [OK] and then press the joystick. User - Canon EOS C200B | EOS C200 EOS C200B Instruction Manual - Page 171
screen (A 196). * A Web browser that supports JavaScript and is enabled to accept cookies is Web browsers, etc., please visit your local Canon website. Operating modes: 171 Preparations on the (network name) in the Wi-Fi settings and use the password from step 4 above. With Infrastructure and - Canon EOS C200B | EOS C200 EOS C200B Instruction Manual - Page 172
the list. Most buttons and controls emulate physical controls on the camera and are labeled in English only, regardless of the language selected. 6 Use the Browser Remote controls to operate the camera. • Descriptions of the controls are given in the following pages. Detailed operation is given in - Canon EOS C200B | EOS C200 EOS C200B Instruction Manual - Page 173
the functions themselves, please refer to each function's explanation. NOTES • Browser Remote does not support multi-touch gestures. The Main Remote Recording Screen [v] * [Full]/[Camera] users only. When using a computer, tablet and other devices with larger screens, this screen offers all the - Canon EOS C200B | EOS C200 EOS C200B Instruction Manual - Page 174
currently selected recording media is indicated with a Ð mark next to the icon. Remaining recording times are approximate and calculated based on the current video configuration used. 11 [SLOT SELECT] button Touch the button to select the other SD card when both SD card slots contain a SD card. - Canon EOS C200B | EOS C200 EOS C200B Instruction Manual - Page 175
gray card or white object with no pattern so it fills the center of the monitoring/live view screen and touch [Å]. Use the same lighting conditions you plan to use when recording. During the procedure, the icon in the button will flash quickly. When it stops flashing, the procedure is completed - Canon EOS C200B | EOS C200 EOS C200B Instruction Manual - Page 176
adjustment, you can also touch [PUSH AUTO IRIS] to have the camera adjust the aperture automatically once. (The manual aperture buttons will not be available at this time.) • When using an EF Cinema lens with the built-in extender function activated, you cannot change the aperture by selecting an - Canon EOS C200B | EOS C200 EOS C200B Instruction Manual - Page 177
the adjustment speed of applicable lenses when using autofocus functions. 5 [Face Detection] button 6 [Focus Guide] (Dual Pixel Focus Guide function) button 7 [ONE-SHOT AF] button (A 177) / [AF Lock] button (A 178) 8 Tracking buttons 9 Manual focus buttons 177 Manual focus 1 Touch the AF mode - Canon EOS C200B | EOS C200 EOS C200B Instruction Manual - Page 178
mode button and select [AF-Boosted MF]. • When the focus is in the manual adjustment range, a yellow focus frame will appear on the live view screen. • desired subject in the live view screen. • Depending on the focus mode used, a frame may appear on the selected subject and the camera may also - Canon EOS C200B | EOS C200 EOS C200B Instruction Manual - Page 179
1 Set the lens's zoom operation change-over knob to SERVO. • If you are using the PZ-E1, set the zoom mode switch to PZ (Power Zoom). 2 Touch starts moving. The Metadata Screen [ ] * [Full]/[Meta] users only. Using Browser Remote you can create, edit and transfer to the camera a metadata profile - Canon EOS C200B | EOS C200 EOS C200B Instruction Manual - Page 180
Browser Remote: Controlling the Camera from a Network Device 1 180 2 5 6 3 7 4 8 9 10 11 1 Clip title Touch/click inside the text box and enter the desired text. To delete the text, touch [Clear All]. 2 GPS information To enter the altitude: Touch inside the [Altitude] text box and enter the - Canon EOS C200B | EOS C200 EOS C200B Instruction Manual - Page 181
([ Activate] button), you can give priority to metadata sent from the application. However, you cannot return the priority back to the SD card. To use a user memo file saved on the SD card you will need to set > [3 $ Recording/Media Setup] > [Metadata] > [Setting] to [SD Card] on the camera - Canon EOS C200B | EOS C200 EOS C200B Instruction Manual - Page 182
FTP File Transfer FTP File Transfer You can transfer MP4 or XF-AVC clips from the camera to another device connected to the network, using the FTP protocol. 182 The following explanations assume that the FTP server is on, ready and correctly configured. Operating modes: Preparations Before you can - Canon EOS C200B | EOS C200 EOS C200B Instruction Manual - Page 183
4 Select [Select] to select which clips to transfer, or [All] to transfer all the clips and then press the joystick. • If you selected [Select], use the joystick to move between the clips. Press the joystick to select a clip to transfer and repeat as necessary. After selecting all the desired clips - Canon EOS C200B | EOS C200 EOS C200B Instruction Manual - Page 184
FTP File Transfer 184 IMPORTANT • Observe the following precautions when transferring files. Failing to do so may interrupt the transfer and incomplete files may remain at the transfer destination. - Do not open the SD card slot cover. - Do not remove the power source or turn off the camera. • If - Canon EOS C200B | EOS C200 EOS C200B Instruction Manual - Page 185
Gain Increment] mode only) Setting options and additional information [Automatic], [Manual] (A 73) This setting is available only when a compatible lens (A (A 73) [On], [Off] (A 73) [On], [Off] If you are using a compatible lens, when this setting is set to [On], the camera will adjust the - Canon EOS C200B | EOS C200 EOS C200B Instruction Manual - Page 186
] [VIDEO], k [VF]: [LUT Off], [LUT: BT.709], [LUT: HDR Assist. (1600%)], [LUT: HDR Assist. (400%)] [Canon Log 3], [Canon Log], [BT.709], [Off] [Canon Log 3], [Canon Log], [Wide DR], [Normal 1 (Standard)], [Normal 2 (x4.0)], [Normal 3 (BT.709)], [Normal 4 (x5.0)] [Neutral], [Production Camera - Canon EOS C200B | EOS C200 EOS C200B Instruction Manual - Page 187
(A 99) [On], [Off] (A 51) [A] to [Z] (A 61) [001] to [999], [Change], [Reset], [Cancel] (A 61) User defined string up to 5 characters ([CANON]), [Change], [Reset], [Cancel] (A 61) Scene description up to 16 characters / Take description up to 8 characters, [Change], (A 110) [Reset], [Cancel - Canon EOS C200B | EOS C200 EOS C200B Instruction Manual - Page 188
[Off], 1 to 15 (8) Available only during mode, this allows the speaker's volume to be adjusted. [Automatic], [Manual] 0 to 100 (50) [Automatic], [Manual] 0 to 100 (50) [Automatic], [Manual] 0 to 100 (50) (A 102) (A 102) (A 102) (A 102) (A 102) (A 102) [+12 dB], [+6 dB], [0 dB], [-6 dB], [-12 dB - Canon EOS C200B | EOS C200 EOS C200B Instruction Manual - Page 189
41) (A 41) (A 41) (A 41) (A 41) -99 to +99 (±0) -99 to +99 (±0) -20 to +20 (±0) 1 to 4 (2) [+2], [+1], [Normal] [LCD LM-V2] settings are used to adjust, respectively, the brightness, contrast, color saturation, sharpness and luminance of an optional LM-V2 LCD Monitor. -99 to +99 (±0) (A 41) -99 - Canon EOS C200B | EOS C200 EOS C200B Instruction Manual - Page 190
]: The date and time when the clip/photo was recorded. [Camera Data]: The aperture value, shutter speed and ISO speed/gain value used to record the clip (clips only). & (l %) [OSD Output] [On], [Off] (A 157) [Custom Display 1] (A 57) [Light Metering], [Custom Picture/HDR], [Focal Length], [ND - Canon EOS C200B | EOS C200 EOS C200B Instruction Manual - Page 191
Menu Options [A Assistance Functions] menu Menu item Setting options and additional information ! [Focus Guide] [On], [Off] [Focus Guide 2nd Frame] [On], [Off] " [Peaking: VIDEO Output], k [Peaking: VF Output] [On], [Off] [Peaking] [Peaking 1], [Peaking 2] [Peaking 1] [Color] [White - Canon EOS C200B | EOS C200 EOS C200B Instruction Manual - Page 192
options and additional information [1: (NONE)], [2: (NONE)], [3: (NONE)], [4: (NONE)] [Off], [Browser Remote] 1 to 65535 ([80]) Camera identifier up to 8 characters ([C200]) [One User (Full)], [Two Users (Camera/Meta)] User name up to 8 characters (Default user names are [Full], [Camera] and [Meta - Canon EOS C200B | EOS C200 EOS C200B Instruction Manual - Page 193
], 6: [Shutter], 7: [Display] " [Camera 8] to [Camera 11] 8: [FUNC], 9: [Audio Status], 10: [Push Auto Iris], 11: [One-Shot AF] # [Camera Grip: 1] 1: [Focus Guide] $ [LCD LM-V1/V2: 1] and [LCD LM-V1/V2: 2] 1: [FUNC], 2: [Display] % [EVF-V70: 1] to [EVF-V70: 4] 1: [FUNC], 2: [EVF-V70 Setup - Canon EOS C200B | EOS C200 EOS C200B Instruction Manual - Page 194
[Mode] [Fan Speed (Always)] [Touch Screen Response]5 [Review Recording] [GPS Auto Time] & [Retract Lens]1 [Reset [Disable], [Enable] Independently enables or disables the uses of the REC buttons on the camera. [High C200; optional accessory for the C200B) or optional LM-V2 LCD Monitor is attached. - Canon EOS C200B | EOS C200 EOS C200B Instruction Manual - Page 195
Menu Options [¥ My Menu] ( mode only) Menu item ! [CAMERA-1 Edit] " [CAMERA-2 Edit] # [CAMERA-3 Edit] $ [CAMERA-4 Edit] % [CAMERA-5 Edit] Setting options and additional information [Register], [Move], [Delete], [Reset All], [Rename] [Register], [Move], [Delete], [Reset All], [Rename] [Register], - Canon EOS C200B | EOS C200 EOS C200B Instruction Manual - Page 196
] Status Screen ( mode only) 1 2 1 Gamma curve, color space and color matrix used for recordings, video output and displays [CFast]: Settings used for clips recorded on the CFast card (A 129, 133) [SD CARD]: Settings/LUT used for clips recorded on the SD card (A 113) [SDI], [HDMI]: Settings/LUT - Canon EOS C200B | EOS C200 EOS C200B Instruction Manual - Page 197
Displaying the Status Screens [/ Data 1/2] Status Screen ( mode only) 1 2 3 4 5 6 7 8 9 10 1 Custom picture file name (A 129) 2 Master pedestal (A 134) 3 Master black RGB levels (A 134) 4 Black gamma settings (level, range and point) (A 134) 5 Low key saturation (A 134) 6 Knee settings (slope, - Canon EOS C200B | EOS C200 EOS C200B Instruction Manual - Page 198
Displaying the Status Screens [Camera 1/4] to [Camera 4/4] Status Screens ( mode only) 198 1 5 2 6 7 8 3 9 4 1 ISO speed/Gain (A 69) Selected mode, extended range, ISO increment and gain increment 2 Aperture (A 72) Iris increment, aperture correction while zooming 3 Shutter speed increment - Canon EOS C200B | EOS C200 EOS C200B Instruction Manual - Page 199
the camera grip1 3 On the LCD monitor1 4 On the optional EVF-V70 Electronic Viewfinder 5 On the optional RC-V100 Remote Controller 1 Supplied accessory for the C200; optional accessory for the C200B. - Canon EOS C200B | EOS C200 EOS C200B Instruction Manual - Page 200
/ speaker (A 158) 3 Headphone volume (A 143) 4 Audio format (A 96), audio bit depth (A 158) and audio channels (A 158) used for recording or output. [CFast]: Settings used for clips recorded on the CFast card. [SD Card]: Settings used for clips recorded on the SD card. [SDI], [HDMI]: Settings - Canon EOS C200B | EOS C200 EOS C200B Instruction Manual - Page 201
the Status Screens [Media] Status Screen 1 2 3 4 1 SD card A 2 SD card B 3 CFast card For each: 4 Visual bar: Approximate used/available space 5 Total space 5 6 7 8 9 6 Used (recorded) space 7 Available space Only for the SD card: 8 Number of remaining photos 9 SD/UHS speed class NOTES - Canon EOS C200B | EOS C200 EOS C200B Instruction Manual - Page 202
Displaying the Status Screens [Recording] Status Screen ( mode only) 1 202 2 3 4 5 6 7 1 Resolution and color sampling (A 65) 2 Bit rate (A 64) 3 Relay recording (A 51) 4 Special recording mode (A 114) 5 Interval length for interval recording mode (A 117) 6 MP4 Clip/Photo numbering (A 62 - Canon EOS C200B | EOS C200 EOS C200B Instruction Manual - Page 203
Displaying the Status Screens [Battery/Hour Meter] Status Screen 1 Remaining recording time 2 Remaining recording time indicator 3 Battery life indicator 1 2 3 4 5 4 Total operation time (A 194) 5 Operation time since using [Reset Hour Meter] (A 194) 203 - Canon EOS C200B | EOS C200 EOS C200B Instruction Manual - Page 204
Displaying the Status Screens [Network 1/5] to [Network 3/5] Status Screens* * In mode, [Network 1/6] to [Network 3/6]. 204 1 2 3 4 5 6 7 8 9 10 11 12 13 Connection settings of the current network connection (A 161) 1 Network configuration name (A 169) 4 Authentication and encryption method - Canon EOS C200B | EOS C200 EOS C200B Instruction Manual - Page 205
Displaying the Status Screens [Network 4/5] and [Network 5/5] Status Screens ( mode only) 1 205 2 3 4 Settings for Browser Remote (A 170) 1 Camera ID 2 Port number 3 Camera's URL 4 User setting (A 170), user name and password settings [Network 4/6] to [Network 6/6] Status Screens ( mode - Canon EOS C200B | EOS C200 EOS C200B Instruction Manual - Page 206
Displaying the Status Screens [GPS Information Display] Status Screen ( mode only) 206 1 2 3 4 5 1 Latitude 2 Longitude 3 Elevation 4 UTC (coordinated universal time) date and time 5 Satellite signal strength For details refer to Recording GPS Information (Geotagging) (A 111). - Canon EOS C200B | EOS C200 EOS C200B Instruction Manual - Page 207
Troubleshooting Troubleshooting If you have a problem with your camera, refer to this section. Consult your dealer or a Canon Service Center if the problem on certain subjects using autofocus. Focus manually (A 81). - When the AF mode is set to AF-boosted MF, start focusing manually until the AF - Canon EOS C200B | EOS C200 EOS C200B Instruction Manual - Page 208
Troubleshooting 208 Abnormal images appear on the screen and the camera cannot record properly. - While recording using unusually hot or it becomes hot after using it only for a short while, it may indicate a problem with the camera. Consult a Canon Service Center. Playback Cannot delete a clip. - Canon EOS C200B | EOS C200 EOS C200B Instruction Manual - Page 209
Troubleshooting b camera will automatically turn off in approximately 10 minutes. Consult a Canon Service Center. i appears on the screen. - The camera and lens power source and reconnect it after a short time. If the problem still persists, use the > [! System Setup] > [Reset] > [All Settings - Canon EOS C200B | EOS C200 EOS C200B Instruction Manual - Page 210
Troubleshooting microphone attenuator (A 103), or adjust the audio recording level manually. Recording Media and Accessories Cannot insert the recording media. - is not connected correctly to the external monitor. Make sure you are using the correct connection (A 152). - The video input on the - Canon EOS C200B | EOS C200 EOS C200B Instruction Manual - Page 211
Troubleshooting up the network-related settings again. If this does not solve the problem, refer to Precautions Regarding Wi-Fi Networks (A 212). - When you system or Web browser used may not be supported. For the latest information about supported systems, visit your local Canon Web site. - Enable - Canon EOS C200B | EOS C200 EOS C200B Instruction Manual - Page 212
logo? - This may be due to using a battery pack not recommended by Canon for use with this camera. - If you are using a battery pack recommended by Canon for use with this camera, there may be a problem with the battery pack or camera. Consult a Canon Service Center. Buffer overflow. Recording was - Canon EOS C200B | EOS C200 EOS C200B Instruction Manual - Page 213
Fan error - The cooling fan may not be working properly. Consult a Canon Service Center. File name error - You attempted to record a clip while clip Media is not supported - 600 MB or smaller CFast cards and 256 MB or smaller SD cards cannot be used with the camera. Use a recommended recording - Canon EOS C200B | EOS C200 EOS C200B Instruction Manual - Page 214
Troubleshooting recording media being used and reinsert it. Alternatively, replace the CFast card. If this does not solve the problem, consult a Canon Service Center. SD YCC420 8 bit]. Replace the SD card with one that supports a UHS Speed Class rating of 3 or set the resolution/bit rate to - Canon EOS C200B | EOS C200 EOS C200B Instruction Manual - Page 215
Troubleshooting Wi-Fi Functions Along with this list, refer also to the instruction manuals of the access point or other external devices you are using. A User is already accessing the server. Try again later. - This message appears on the screen of the connected device. Another device connected to - Canon EOS C200B | EOS C200 EOS C200B Instruction Manual - Page 216
FTP server. Check the FTP server settings (A 182). Unable to obtain an IP address - If you are not using a DHCP server, connect using the [Manual] option and enter the IP address using the [Manual] option (A 167). - Turn on the DHCP server. If it is already on, make sure it is functioning properly - Canon EOS C200B | EOS C200 EOS C200B Instruction Manual - Page 217
vibration. • Use only power sources specified in this instruction manual for use with the product. • Observe the following instructions when using a battery The use of a tripod or similar equipment is recommended when using the product in hot places and for people with circulation problems or less - Canon EOS C200B | EOS C200 EOS C200B Instruction Manual - Page 218
into the camera it may damage the camera and/or the lens. Consult a Canon Service Center as soon as possible. • Be careful to avoid dust and dirt particles accumulating on the lens or entering the camera. When you finish using the camera, make sure to attach the body cap to the lens mount - Canon EOS C200B | EOS C200 EOS C200B Instruction Manual - Page 219
Handling Precautions and Safety Instructions Battery Pack DANGER! Treat the battery pack with care. • it fully. Still, the correct time may not be displayed if a fully charged battery pack is used continuously in high temperatures or it is left unused for long periods of time. Also, the correct - Canon EOS C200B | EOS C200 EOS C200B Instruction Manual - Page 220
Handling Precautions and Safety Instructions Lithium Button Battery 220 WARNING! • The battery used in this device may present a fire or chemical burn be corrupted or lost due to defects or exposure to static electricity. Canon shall not be liable for lost or corrupted data. • Do not touch or expose the - Canon EOS C200B | EOS C200 EOS C200B Instruction Manual - Page 221
hours before resuming use of the camera. Using the Camera Abroad Power Sources You can use the AC adapter to operate the camera and the battery charger to charge battery packs in any country/region with power supply between 100 and 240 V AC, 50/60 Hz. Consult a Canon Service Center for information - Canon EOS C200B | EOS C200 EOS C200B Instruction Manual - Page 222
Attachment Unit LA-V2 LCD Attachment Unit GR-V1 Camera Grip HDU-2 Handle Unit RD-1 Rod Clamp EVF-V70 OLED Electronic Viewfinder* SU-15 Shoulder Support Unit TB-1 Tripod Adapter Base CL-V2 Clamp Base GP-E2 GPS Receiver UN-5 Unit Cable (50 cm, 1.6 ft.)/ UN-10 Unit Cable (1 m, 3.3 ft.) RC - Canon EOS C200B | EOS C200 EOS C200B Instruction Manual - Page 223
. When you use Canon video equipment, we recommend Canon-brand accessories or products bearing the same mark. NOTES • You can have the camera's EF lens mount replaced by a PL lens mount. For details, consult the retail dealer from whom you purchased the camera or contact a Canon Service Center. - Canon EOS C200B | EOS C200 EOS C200B Instruction Manual - Page 224
224 C200 / C200B System • Recording System Movies: RAW Video format: Cinema RAW Light Audio format: Linear PCM, 16 or 24 bit, 48 kHz, 4 channels File format: CRM (Canon RAW Movie; Canon proprietary .00P, 24.00P 1 Available options may differ depending on the system frequency currently in use. - Canon EOS C200B | EOS C200 EOS C200B Instruction Manual - Page 225
temperatures are approximate and given for reference purposes only. • Focus Manual focus, autofocus (one-shot AF, AF-boosted MF, continuous at 59.94P); 50.00 Hz: F11 (2048x1080 at 50.00P) • S/N Ratio (ISO 800, using Canon Log 3 gamma, HDMI output) 53 dB (typical, 3840x2160, at 29.97P (59.94 Hz) or - Canon EOS C200B | EOS C200 EOS C200B Instruction Manual - Page 226
band) • Connection Methods: Infrastructure (Wi-Fi Protected Setup (WPS), search for access points, manual), Camera Access Point • Authentication Methods: Open, shared key; WPA-PSK, WPA2-PSK • Encryption grip unit1 connection plug 1 Supplied accessory for the C200; optional accessory for the C200B. - Canon EOS C200B | EOS C200 EOS C200B Instruction Manual - Page 227
Specifications Power/Others • Power Supply (rated) 14.4 V DC (battery pack), 16.7 V DC (DC IN) • Power Consumption k with the SDI terminal, LCD screen and viewfinder active 19.3 W (recording at 59.94P; MP4/XF-AVC: 3840x2160, RAW: 4096x2160) 18.5 W (recording at 50.00P; MP4/XF-AVC: 3840x2160, RAW: - Canon EOS C200B | EOS C200 EOS C200B Instruction Manual - Page 228
Specifications 228 k Modular Units LM-V1 LCD Monitor Includes the LCD panel (touch panel). • LCD Screen: 10.1 cm (4.0 in.) color LCD, 16:9 aspect ratio, approx. 1,230,000 dots, 100% coverage, capacitive touch screen operation • VIDEO Terminal Proprietary connector for connection to the camera; - Canon EOS C200B | EOS C200 EOS C200B Instruction Manual - Page 229
CG-A20 Battery Charger • Rated Input: 24 V DC, 1.8 A • Rated Output: 16.7 V DC, 1.5 A • Operating Temperature: 0 - 40 °C (32 - 104 °F) • Dimensions (W x H x D): 100 x 24 x 100 mm (3.9 x 0.9 x 3.9 in.) • Weight: Approx. 145 g (5.1 oz.) CA-CP200B Compact Power Adapter • Rated Input: 100 - 240 V AC, 50 - Canon EOS C200B | EOS C200 EOS C200B Instruction Manual - Page 230
. For details, consult a Canon Service Center. Lens EF lenses EF lenses compatible with auto iris EF Cinema lenses CN20x50 IAS H/E1 CN7x17 KAS S/E1 CN10x25 IAS S/E1 CN-E18-80mm T4.4 L IS KAS S CN-E70-200mm T4.4 L IS KAS S Prime lenses compatible with Dual Pixel Focus Guide Manual Ü Ü Iris control - Canon EOS C200B | EOS C200 EOS C200B Instruction Manual - Page 231
160 Mbps 45 Mbps 5 min. 10 min. 25 min. 50 min. 105 min. 20 min. 45 min. 90 min. 185 min. 375 min. Charging Times Use the supplied CG-A20 Battery Charger to charge battery packs. The charging times given in the following table are approximate and vary according to charging - Canon EOS C200B | EOS C200 EOS C200B Instruction Manual - Page 232
A ABB (automatic black balance 53 Abroad, using the camera 221 Access point 161, 164 Camera settings 137 Canon Log, Canon Log 3 (gamma curves) . . . .133 Canon XF Utility (download recording 51 Drop frame (time code 93 Dual Pixel Focus Guide 82 E EF Cinema lenses 230 EF lens mount 37 EF-S - Canon EOS C200B | EOS C200 EOS C200B Instruction Manual - Page 233
Continuous AF 85 Face AF 87 Focus assistance functions 82 Manual focus 81 One-shot AF 84 Tracking 88 Frame rate 64 mode 117 Iris 72 ISO speed 69 J Joystick 33 Joystick guide 143 K Key lock 57 233 L Language 32 LCD attachment unit1 for the C200; optional accessory for the C200B. - Canon EOS C200B | EOS C200 EOS C200B Instruction Manual - Page 234
controller 123 Remote operation 123, 170 REMOTE terminal 123 Resolution (frame size 65 Reviewing a clip 112 Router 162 Running mode (time code 92 S Safe area T Terminal covers 45 Thumb rest 43 Time code 92 Tripod 42 Troubleshooting 207 Turning the camera on/off 27 U User bit 95 User - Canon EOS C200B | EOS C200 EOS C200B Instruction Manual - Page 235
the Products or contact the CANON INFORMATION CENTER AT 855-CINE-EOS (855-246-3367) or on the internet at pro.usa.canon.com/support. You will be directed to the nearest service facility for your Products. This Limited Warranty covers all defects encountered in normal use of the Products and does - Canon EOS C200B | EOS C200 EOS C200B Instruction Manual - Page 236
use of non-Canon accessories or failure to follow operating, maintenance or environmental instructions prescribed in Canon Canada's user's manual; service calls or service problems; D. If defects or damages are caused by service other than Canon Canada's factory service centers or authorized service - Canon EOS C200B | EOS C200 EOS C200B Instruction Manual - Page 237
Europa N.V. Bovenkerkerweg 59, 1185 XB Amstelveen, The Netherlands http://www.canon-europe.com USA http://pro.usa.canon.com CANON U.S.A., INC. http://pro.usa.canon.com/support (855) CINE-EOS (855-246-3367) (USA only) UNITED KINGDOM Canon UK Ltd Unit 160, Centennial Park, Centennial Avenue, Elstree
-
 1
1 -
 2
2 -
 3
3 -
 4
4 -
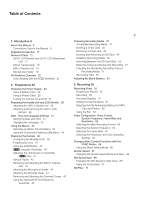 5
5 -
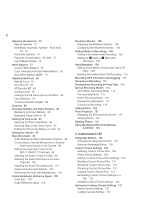 6
6 -
 7
7 -
8
-
9
-
10
-
11
-
12
-
13
-
14
-
15
-
16
-
17
-
18
-
19
-
20
-
21
-
22
-
23
-
24
-
25
-
26
-
27
-
28
-
29
-
30
-
31
-
32
-
33
-
34
-
35
-
36
-
37
-
38
-
39
-
40
-
41
-
42
-
43
-
44
-
45
-
46
-
47
-
48
-
49
-
50
-
51
-
52
-
53
-
54
-
55
-
56
-
57
-
58
-
59
-
60
-
61
-
62
-
63
-
64
-
65
-
66
-
67
-
68
-
69
-
70
-
71
-
72
-
73
-
74
-
75
-
76
-
77
-
78
-
79
-
80
-
81
-
82
-
83
-
84
-
85
-
86
-
87
-
88
-
89
-
90
-
91
-
92
-
93
-
94
-
95
-
96
-
97
-
98
-
99
-
100
-
101
-
102
-
103
-
104
-
105
-
106
-
107
-
108
-
109
-
110
-
111
-
112
-
113
-
114
-
115
-
116
-
117
-
118
-
119
-
120
-
121
-
122
-
123
-
124
-
125
-
126
-
127
-
128
-
129
-
130
-
131
-
132
-
133
-
134
-
135
-
136
-
137
-
138
-
139
-
140
-
141
-
142
-
143
-
144
-
145
-
146
-
147
-
148
-
149
-
150
-
151
-
152
-
153
-
154
-
155
-
156
-
157
-
158
-
159
-
160
-
161
-
162
-
163
-
164
-
165
-
166
-
167
-
168
-
169
-
170
-
171
-
172
-
173
-
174
-
175
-
176
-
177
-
178
-
179
-
180
-
181
-
182
-
183
-
184
-
185
-
186
-
187
-
188
-
189
-
190
-
191
-
192
-
193
-
194
-
195
-
196
-
197
-
198
-
199
-
200
-
201
-
202
-
203
-
204
-
205
-
206
-
207
-
208
-
209
-
210
-
211
-
212
-
213
-
214
-
215
-
216
-
217
-
218
-
219
-
220
-
221
-
222
-
223
-
224
-
225
-
226
-
227
-
228
-
229
-
230
-
231
-
232
-
233
-
234
-
235
-
236
-
237
 |
 |

Digital Cinema Camera
Instruction Manual
Firmware ver. 1.0.7.1.00
PUB. DIE-0504-000H