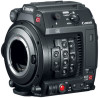
Canon EOS C200B EOS C200 EOS C200B Instruction Manual - Page 123
Using the Optional RC-V100 Remote Controller, Select [RC-V100 REMOTE A] and then press SET.
 |
View all Canon EOS C200B manuals
Add to My Manuals
Save this manual to your list of manuals |
Page 123 highlights
Using the Optional RC-V100 Remote Controller Using the Optional RC-V100 Remote Controller You can connect the optional RC-V100 Remote Controller to the camera's REMOTE terminal in order to control the camera (including advanced recording functions) from a distance. The remote controller lets you turn the camera on, navigate the menus and remotely control the aperture and shutter speed, change picture-related settings like the knee and sharpness, and more. Use the cable supplied with the remote controller to connect it to the camera. For details on how to connect and use the remote controller, refer to its instruction manual. 123 Operating modes: Remote cable (supplied with the RC-V100) To the RC-V100's REMOTE A terminal 1 Turn off the camera and connect the optional RC-V100 Remote Controller to the camera. 2 Turn on the camera and open the [REMOTE Term.] submenu. > [B ! System Setup] > [REMOTE Term.] 3 Select [RC-V100 (REMOTE A)] and then press SET. Options [RC-V100 (REMOTE A)]: Select this option to use the optional RC-V100 Remote Controller. [Standard]: Select this option to use commercially available remote controls. NOTES • The AGC button, AUTO KNEE button and AF button on the remote controller will not operate the camera. • The AUTO IRIS button on the remote controller will operate the camera only when a compatible EF lens (A 230) is attached to the camera. • The ZOOM dial on the remote controller can operate the lens only when a compatible EF Cinema lens (A 230) is attached to the camera. • Adjusting picture-related settings with the remote controller can be performed only when the detailed settings were activated ( > [ ! Custom Picture/HDR] > [Activate Other Settings] is set to [On], A 129).
-
 1
1 -
2
-
3
-
4
-
5
-
6
-
7
-
8
-
9
-
10
-
11
-
12
-
13
-
14
-
15
-
16
-
17
-
18
-
19
-
20
-
21
-
22
-
23
-
24
-
25
-
26
-
27
-
28
-
29
-
30
-
31
-
32
-
33
-
34
-
35
-
36
-
37
-
38
-
39
-
40
-
41
-
42
-
43
-
44
-
45
-
46
-
47
-
48
-
49
-
50
-
51
-
52
-
53
-
54
-
55
-
56
-
57
-
58
-
59
-
60
-
61
-
62
-
63
-
64
-
65
-
66
-
67
-
68
-
69
-
70
-
71
-
72
-
73
-
74
-
75
-
76
-
77
-
78
-
79
-
80
-
81
-
82
-
83
-
84
-
85
-
86
-
87
-
88
-
89
-
90
-
91
-
92
-
93
-
94
-
95
-
96
-
97
-
98
-
99
-
100
-
101
-
102
-
103
-
104
-
105
-
106
-
107
-
108
-
109
-
110
-
111
-
112
-
113
-
114
-
115
-
116
-
117
-
 118
118 -
 119
119 -
 120
120 -
 121
121 -
 122
122 -
 123
123 -
 124
124 -
 125
125 -
 126
126 -
 127
127 -
 128
128 -
129
-
130
-
131
-
132
-
133
-
134
-
135
-
136
-
137
-
138
-
139
-
140
-
141
-
142
-
143
-
144
-
145
-
146
-
147
-
148
-
149
-
150
-
151
-
152
-
153
-
154
-
155
-
156
-
157
-
158
-
159
-
160
-
161
-
162
-
163
-
164
-
165
-
166
-
167
-
168
-
169
-
170
-
171
-
172
-
173
-
174
-
175
-
176
-
177
-
178
-
179
-
180
-
181
-
182
-
183
-
184
-
185
-
186
-
187
-
188
-
189
-
190
-
191
-
192
-
193
-
194
-
195
-
196
-
197
-
198
-
199
-
200
-
201
-
202
-
203
-
204
-
205
-
206
-
207
-
208
-
209
-
210
-
211
-
212
-
213
-
214
-
215
-
216
-
217
-
218
-
219
-
220
-
221
-
222
-
223
-
224
-
225
-
226
-
227
-
228
-
229
-
230
-
231
-
232
-
233
-
234
-
235
-
236
-
237
 |
 |
