Canon XC15 User Manual - Page 87
Recording Audio, Connecting an External Microphone or External Audio Input Source to the Camera, udio
 |
View all Canon XC15 manuals
Add to My Manuals
Save this manual to your list of manuals |
Page 87 highlights
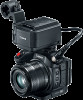
Recording Audio Recording Audio This camcorder features 2-channel linear PCM audio recording and playback with a sampling frequency of 48 kHz. You can record audio using a commercially available external microphone (INPUT terminals, MIC terminal), analog line input (INPUT terminals) or the built-in stereo microphone. 87 Audio is not recorded during slow & fast motion recording mode. Operating modes: Connecting an External Microphone or External Audio Input Source to the Camera To each of the INPUT terminals you can attach commercially available microphones or analog line in sources with an XLR connector. To the MIC terminal you can attach commercially available condenser microphones with their own power supply, and a ∅ 3.5 mm stereo mini plug. In order to use the INPUT terminals, the supplied MA-400 Microphone Adapter must be correctly attached to the camcorder. It has a microphone holder where you can fix external microphones with a diameter of 19 mm to 20 mm (0.75" to 0.79"). Follow the procedure below to attach a microphone (refer also to the following illustration). To connect an external device to the camcorder, plug the device's cable into the desired INPUT terminal (ብ). 1 Loosen the microphone lock screw (ቢ), open the microphone holder and insert the microphone (ባ). 2 Tighten the lock screw and put the microphone cable through the cable clamp under the microphone holder (ቤ). 3 Plug the microphone cable into the desired INPUT terminal (ብ) or the MIC terminal (ቦ). Cable clamp ቢ ባ ቤ Microphone lock screw ብ ቦ MIC terminal INPUT 1 terminal INPUT 2 terminal Table of Contents Menus Index
-
 1
1 -
2
-
3
-
4
-
5
-
6
-
7
-
8
-
9
-
10
-
11
-
12
-
13
-
14
-
15
-
16
-
17
-
18
-
19
-
20
-
21
-
22
-
23
-
24
-
25
-
26
-
27
-
28
-
29
-
30
-
31
-
32
-
33
-
34
-
35
-
36
-
37
-
38
-
39
-
40
-
41
-
42
-
43
-
44
-
45
-
46
-
47
-
48
-
49
-
50
-
51
-
52
-
53
-
54
-
55
-
56
-
57
-
58
-
59
-
60
-
61
-
62
-
63
-
64
-
65
-
66
-
67
-
68
-
69
-
70
-
71
-
72
-
73
-
74
-
75
-
76
-
77
-
78
-
79
-
80
-
81
-
 82
82 -
 83
83 -
 84
84 -
 85
85 -
 86
86 -
 87
87 -
 88
88 -
 89
89 -
 90
90 -
 91
91 -
 92
92 -
93
-
94
-
95
-
96
-
97
-
98
-
99
-
100
-
101
-
102
-
103
-
104
-
105
-
106
-
107
-
108
-
109
-
110
-
111
-
112
-
113
-
114
-
115
-
116
-
117
-
118
-
119
-
120
-
121
-
122
-
123
-
124
-
125
-
126
-
127
-
128
-
129
-
130
-
131
-
132
-
133
-
134
-
135
-
136
-
137
-
138
-
139
-
140
-
141
-
142
-
143
-
144
-
145
-
146
-
147
-
148
-
149
-
150
-
151
-
152
-
153
-
154
-
155
-
156
-
157
-
158
-
159
-
160
-
161
-
162
-
163
-
164
-
165
-
166
-
167
-
168
-
169
-
170
-
171
-
172
 |
 |
