Dell Latitude E5500 Service Manual - Page 43
Replacing a Memory Module
 |
View all Dell Latitude E5500 manuals
Add to My Manuals
Save this manual to your list of manuals |
Page 43 highlights
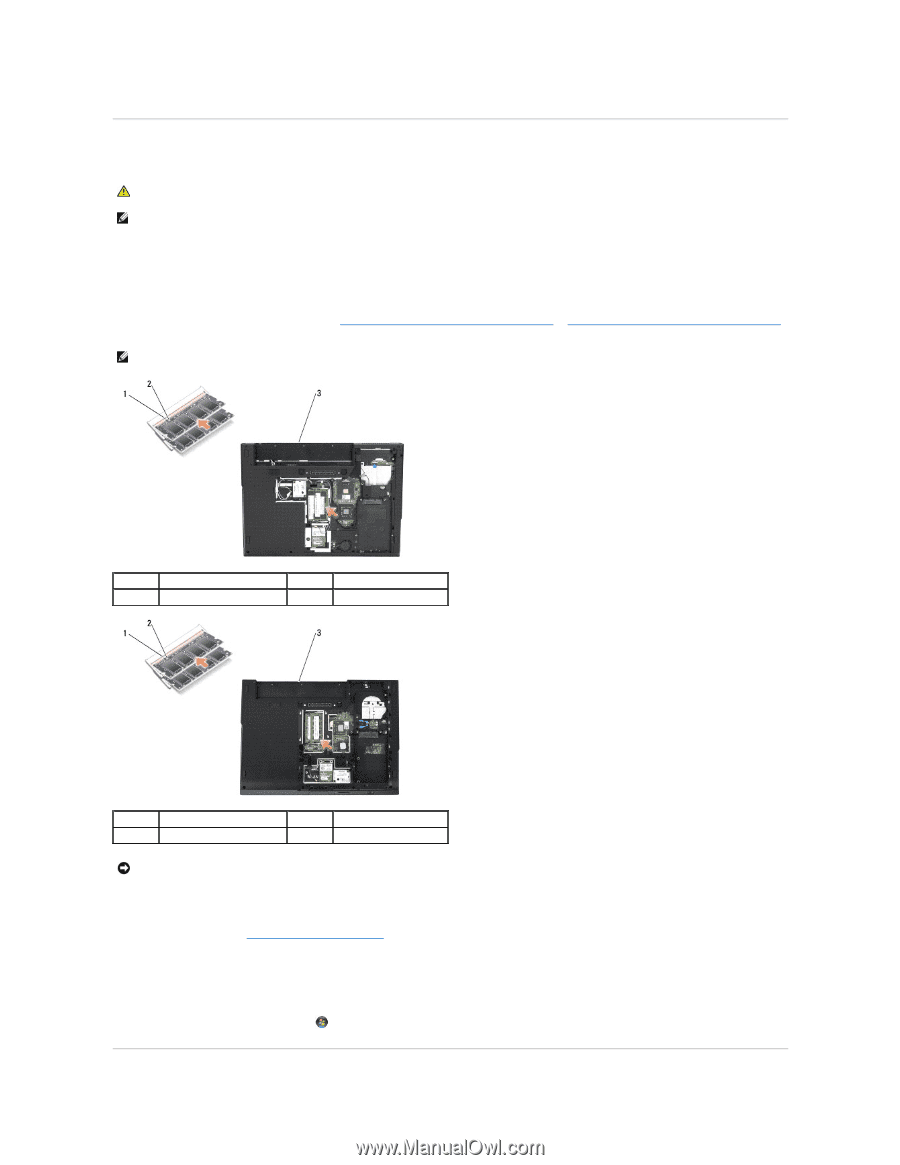
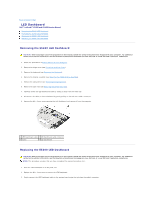
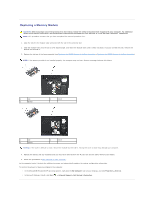
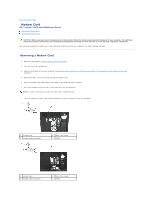
Replacing a Memory Module CAUTION: Before you begin any of the procedures in this section, follow the safety instructions that shipped with your computer. For additional safety best practices information, see the Regulatory Compliance Homepage on www.dell.com at: www.dell.com/regulatory_compliance. NOTE: This procedure assumes that you have completed the removal procedure first. 1. Align the notch in the module edge connector with the tab in the connector slot. 2. Slide the module firmly into the slot at a 45-degree angle, and rotate the module down until it clicks into place. If you do not feel the click, remove the module and reinstall it. 3. Replace the bottom of the base assembly (see Replacing the E5400 Bottom of the Base Assembly or Replacing the E5500 Bottom of the Base Assembly). NOTE: If the memory module is not installed properly, the computer may not boot. No error message indicates this failure. 1 tab 3 E5400 2 notch 1 tab 3 E5500 2 notch NOTICE: If the cover is difficult to close, remove the module and reinstall it. Forcing the cover to close may damage your computer. 4. Replace the battery and any installed cards you may have removed from the PC card slot and the SD/IO memory card reader. 5. Follow the procedures in After Working on Your Computer. As the computer boots, it detects the additional memory and automatically updates the system configuration information. To confirm the amount of memory installed in the computer: l In the Microsoft® Windows® XP operating system, right-click the My Computer icon on your desktop, and click Properties® General. l In Microsoft Windows Vista®, click Start ® Help and Support® Dell System Information.
-
 1
1 -
2
-
3
-
4
-
5
-
6
-
7
-
8
-
9
-
10
-
11
-
12
-
13
-
14
-
15
-
16
-
17
-
18
-
19
-
20
-
21
-
22
-
23
-
24
-
25
-
26
-
27
-
28
-
29
-
30
-
31
-
32
-
33
-
34
-
35
-
36
-
37
-
 38
38 -
 39
39 -
 40
40 -
 41
41 -
 42
42 -
 43
43 -
 44
44 -
 45
45 -
 46
46 -
 47
47 -
 48
48 -
49
-
50
-
51
-
52
-
53
-
54
-
55
-
56
-
57
-
58
-
59
-
60
-
61
-
62
-
63
-
64
-
65
-
66
-
67
-
68
-
69
-
70
-
71
-
72
-
73
 |
 |