Dell OptiPlex 320 User Guide
Dell OptiPlex 320 Manual
 |
UPC - 683728237738
View all Dell OptiPlex 320 manuals
Add to My Manuals
Save this manual to your list of manuals |
Dell OptiPlex 320 manual content summary:
- Dell OptiPlex 320 | User Guide - Page 1
Dell™ OptiPlex™ 320 User's Guide Mini Tower Computer Desktop Computer - Dell OptiPlex 320 | User Guide - Page 2
to Contents Page Advanced Features Dell™ OptiPlex™ 320 User's Guide LegacySelect Technology Control Manageability Security Password Protection System Setup Booting to a USB Device Clearing Forgotten Passwords Clearing CMOS Settings Hyper-Threading Power Management LegacySelect Technology Control - Dell OptiPlex 320 | User Guide - Page 3
system password when the following option is displayed: l Not Set - No system one of these combinations, the speaker emits a beep. As you press each character key (or computer. Typing Your System Password When you start or restart your computer, one of the following prompts appears on the screen - Dell OptiPlex 320 | User Guide - Page 4
message appears on the screen. The third and subsequent times you type an incorrect or incomplete system password, the computer displays the following message: ** Incorrect password. ** Number of unsuccessful password attempts: 3 System halted! Must power down. Even after your computer is turned off - Dell OptiPlex 320 | User Guide - Page 5
until you see the Microsoft® Windows® desktop. Then shut down your computer and try again (see Turning Off Your Computer). System Setup Screens The system setup screen displays current or changeable configuration information for your computer. Information on the screen is divided into three areas - Dell OptiPlex 320 | User Guide - Page 6
may not appear. System System Info Processor Info Memory Info PCI Info Date/Time Boot Sequence Lists the computer name, BIOS Version, Service Tag, Express Service Code, (if applicable), and the Asset Tag. None of these fields can be modified. Identifies the CPU type, bus speed, clock speed, and L2 - Dell OptiPlex 320 | User Guide - Page 7
. On enables the second core. Enables Intel® SpeedStep® for all supported processors in the computer. This setting changes the processor power consumption and frequency. NOTE: This option may not be available on your computer. Limit CPUID Value (Off default) Limits the maximum value the processor - Dell OptiPlex 320 | User Guide - Page 8
mode, and S3, a suspend state in which the power is reduced or turned off for many components, however, system memory remains active. Maintenance Service Tag Displays the Service Tag for your computer. SERR Message Some graphics cards require that the SERR message be disabled. (On default) Load - Dell OptiPlex 320 | User Guide - Page 9
may appear in the boot list. The computer attempts to boot from the expansion card. Changing Boot Sequence for the Current Boot You can use this feature, for example, to tell the computer to boot from the CD drive so that you can run the Dell Diagnostics on the Drivers and Utilities CD (ResourceCD - Dell OptiPlex 320 | User Guide - Page 10
unjumpered 3. Replace the computer cover (see Replacing the Computer Cover). 4. Connect your computer and monitor to electrical outlets, and turn them on. 5. After the Microsoft® Windows® desktop appears on your computer, shut down your computer (see Turning Off Your Computer). 6. Turn off the - Dell OptiPlex 320 | User Guide - Page 11
, follow the safety instructions located in the Product Information Guide. 1. Follow the computer performance by allowing one physical processor to function as two logical processors, capable of performing certain tasks simultaneously. It is recommended that you use the Microsoft® Windows® XP Service - Dell OptiPlex 320 | User Guide - Page 12
event such as Remote Wake Up. The following table lists the sleep modes and the methods you can use to wake the computer from each mode. Sleep Mode Wake-Up Methods (Windows XP) Standby l Press the power button l Auto power on l Move or click the mouse l Type on the keyboard l USB device activity - Dell OptiPlex 320 | User Guide - Page 13
Back to Contents Page Battery Dell™ OptiPlex™ 320 User's Guide CAUTION: Before you begin any of the procedures in this section, follow the safety instructions in the Product Information Guide. NOTICE: To prevent static damage to components inside your computer, discharge static electricity from your - Dell OptiPlex 320 | User Guide - Page 14
connector, you must firmly support the connector while replacing the battery. 5. Install the new system battery. a. Support the battery connector by connector until it snaps into place. 6. Replace the computer cover (see Replacing the Computer Cover). 7. Enter system setup and restore the settings - Dell OptiPlex 320 | User Guide - Page 15
Back to Contents Page Before You Begin Dell™ OptiPlex™ 320 User's Guide Recommended Tools Turning Off Your Computer Before Working Inside Your Computer This chapter provides procedures for removing and installing the components in your computer. Unless otherwise noted, each procedure assumes that - Dell OptiPlex 320 | User Guide - Page 16
telephone or telecommunication lines from the computer. 3. Disconnect your computer and all attached devices from their electrical outlets, and then press the power button to ground the system board. 4. If applicable, remove the computer stand (for instructions, see the documentation that came with - Dell OptiPlex 320 | User Guide - Page 17
Cleaning Your Computer Dell™ OptiPlex™ 320 User's Guide CAUTION: Before you begin any of the procedures in this section, follow the safety instructions located in the Product Information Guide. Computer, Keyboard, and Monitor CAUTION: Before you clean your computer, disconnect the computer from the - Dell OptiPlex 320 | User Guide - Page 18
some protection from dust, fingerprints, and scratches. Cleaning products for CDs are safe to use on DVDs. Back to Contents Page - Dell OptiPlex 320 | User Guide - Page 19
Multiple Monitors Dell™ OptiPlex™ 320 User's Guide Before Connecting Mutiple Monitors or a Monitor and a Television to Your Computer Connecting Two to Three Monitors Using Surround View Connecting Dual Monitors or a Monitor and a Television to a Graphics Card Changing the Display Settings CAUTION - Dell OptiPlex 320 | User Guide - Page 20
the same image. l In extended desktop mode, you can drag objects from one screen to the other, effectively doubling the amount of viewable work space. For information on changing the display settings for your graphics card, see the user's guide in the Help and Support Center (click the Start button - Dell OptiPlex 320 | User Guide - Page 21
is configured as a wake device in the Windows Device Manager. For more information about sleep modes and exiting from a power-saving mode, see Power Management. SeeSystem Lights" for a description of light codes that can help you troubleshoot problems with your computer. 6 diagnostic lights Use - Dell OptiPlex 320 | User Guide - Page 22
Insert a CD or DVD (if supported) into this drive. 11 location of Service Tag Use the Service Tag to identify your computer when you access the Dell Support website or call technical support. Back View 1 card slots 2 back-panel connectors 3 power connector 4 voltage selection switch Access - Dell OptiPlex 320 | User Guide - Page 23
the electrical outlet before removing the computer cover. NOTICE: Be careful when opening the computer cover to ensure that you do not accidentally disconnect cables from the system board. 1 drives bay (CD/DVD, floppy, and hard drive) 2 power supply 3 system board 4 card slots 5 heat sink assembly - Dell OptiPlex 320 | User Guide - Page 24
SPKR1) 2 processor connector (CPU) 11 password jumper (PSWD) 3 processor power connector (12VPOWER) 12 real time clock reset jumper (RTCRST) 4 front-panel connector (FNT_PANEL) 13 battery socket (BATT) 5 memory module connectors (DIMM_1, DIMM_2) 14 PCI Express x16 card connector 6 serial ATA - Dell OptiPlex 320 | User Guide - Page 25
Express Cards Dell™ OptiPlex™ 320 User's Guide Installing an Expansion Card Removing an Expansion Card CAUTION: Before you begin any of the procedures in this section, follow the safety instructions in the Product Information Guide. NOTICE: To prevent static damage to components inside your computer - Dell OptiPlex 320 | User Guide - Page 26
plug it into the computer. 9. If you installed a sound card: a. Enter system setup, select Audio Controller, and change the setting to Off (see Entering System Setup). b. Connect external audio devices to the sound card's connectors. Do not connect external audio devices to the microphone, speaker - Dell OptiPlex 320 | User Guide - Page 27
then plug it into the computer. 7. Replace the computer cover (see Replacing the Computer Cover). 8. Uninstall the card's driver. See the documentation that came with the card for instructions. 9. If you removed a sound card: a. Enter system setup, select Audio Controller, and change the setting - Dell OptiPlex 320 | User Guide - Page 28
Processor Dell™ OptiPlex™ 320 User's Guide Removing the Processor Installing the Processor CAUTION: Before you begin any of the procedures in this section, follow the safety instructions located in the Product Information Guide. NOTICE: To prevent static damage to components inside your computer - Dell OptiPlex 320 | User Guide - Page 29
Ground yourself by touching an unpainted metal surface on the back of the computer. NOTICE: When replacing the processor, do not touch any of the pins excessive force when you install the processor. 6. Set the processor lightly in the socket and ensure that the processor is positioned correctly. - Dell OptiPlex 320 | User Guide - Page 30
the heat sink assembly: a. Place the heat sink assembly back onto the heat-sink assembly bracket. b. Rotate the heat sink assembly down towards the computer base and tighten the two captive screws. NOTICE: Ensure that the heat sink assembly is correctly seated and secure. 1 heat sink assembly 2 heat - Dell OptiPlex 320 | User Guide - Page 31
Back to Contents Page Drives Dell™ OptiPlex™ 320 User's Guide Drives General Installation Guidelines CD/DVD Drive Floppy Drive Hard Drive Your computer supports: l One SATA (serial ATA) hard drive l One optional floppy drive l One optional CD or DVD drive 1 CD/DVD drive 2 floppy drive 3 hard drive - Dell OptiPlex 320 | User Guide - Page 32
data cable is the master or boot device (drive 0), and the device attached to the middle connector on the data cable is the slave device (drive 1). See the drive documentation in your upgrade kit for information on configuring devices for the cable select setting. Power Cable Connectors IDE Drive - Dell OptiPlex 320 | User Guide - Page 33
drive to verify that the drive is configured for your computer. If you are installing an IDE drive, configure the drive for the cable select setting. and tighten them. 4. Connect the power and data cables to the drive. 5. Align the shoulder screws with the screw guides, and slide the drive into the - Dell OptiPlex 320 | User Guide - Page 34
more information. 9. Verify that your computer works correctly by running the Dell Diagnostics (see Dell Diagnostics). Floppy Drive CAUTION: Before you begin any of the procedures in this section, follow the safety instructions in the Product Information Guide. CAUTION: To guard against electrical - Dell OptiPlex 320 | User Guide - Page 35
power and data cables from the back of the floppy drive. Installing a Floppy Drive 1. If you are installing a new drive: a. Gently slide a small flat-edge screw driver between the front of the computer the power and data cables to the floppy drive. 5. Align the shoulder screws with the screw guides, - Dell OptiPlex 320 | User Guide - Page 36
computer works correctly by running the Dell Diagnostics (see Dell Diagnostics). Hard Drive CAUTION: Before you begin any of the procedures in this section, follow the safety instructions in the Product Information Guide to verify that it is configured for your computer. 3. Follow the procedures in - Dell OptiPlex 320 | User Guide - Page 37
Check the documentation for the drive to verify that it is configured for your computer. NOTICE: To avoid damage to the drive, do not tabs (2) 3 release tabs (2) 2 drive 4 plastic hard-drive bracket 5. Connect the power and data cables to the drive. 6. Locate the correct slot for the drive, and - Dell OptiPlex 320 | User Guide - Page 38
into your boot drive. 11. Turn on the computer. 12. Partition and logically format your drive before you proceed to the next step. For instructions, see the documentation that came with your operating system. 13. Test the hard drive by running the Dell Diagnostics (see Dell Diagnostics). 14. Install - Dell OptiPlex 320 | User Guide - Page 39
Page I/O Panel Dell™ OptiPlex™ 320 User's Guide Removing the I/O Panel CAUTION: Before you begin any of the procedures in this section, follow the safety instructions located in the Product Information Guide. CAUTION: To guard against electrical shock, always unplug your computer from the electrical - Dell OptiPlex 320 | User Guide - Page 40
Power Supply Dell™ OptiPlex™ 320 User's Guide Replacing the Power Supply DC Power Connectors Replacing the Power Supply CAUTION: Before you begin any of the procedures in this section, follow the safety instructions located in the Product Information Guide power supply to the back of the computer - Dell OptiPlex 320 | User Guide - Page 41
the AC power cable to the connector. 13. Replace the computer cover (see Replacing the Computer Cover). DC Power Connectors DC Power Connector P1 VDC White 12 +3.3 VDC Orange 13 +3.3 VDC Orange 14 -12 VDC* Blue 15 GND Black 16 PWR_PS_ON* Green 17 GND Black 18 GND Black 19 GND - Dell OptiPlex 320 | User Guide - Page 42
VDC Red 24 GND Black *Uses 22-AWG wire instead of 18-AWG wire. DC Power Connector P2 Pin Number Signal Name 18-AWG Wire 1 GND Black 2 GND Black 3 +12 VDC Yellow 4 +12 VDC Yellow DC Power Connector P3 Pin Number Signal name 18-AWG Wire 1 +12 VDC Yellow 2 GND Black 3 GND - Dell OptiPlex 320 | User Guide - Page 43
Pin Number Signal name 18-AWG Wire 1 +3.3 VDC Orange 2 GND Black 3 +5 VDC Red 4 GND Black 5 +12 VDC Yellow Back to Contents Page - Dell OptiPlex 320 | User Guide - Page 44
Page Removing the Computer Cover Dell™ OptiPlex™ 320 User's Guide CAUTION: Before you begin any of the procedures in this section, follow the safety instructions in the Product Information Guide. CAUTION: To guard against electrical shock, always unplug your computer from the electrical outlet - Dell OptiPlex 320 | User Guide - Page 45
Back to Contents Page Desktop Computer Specifications Dell™ OptiPlex™ 320 User's Guide Microprocessor Microprocessor type internal cache Memory Type Memory connectors Memory modules supported Minimum memory Maximum memory BIOS address Computer Information Chipset Data bus width Address bus width - Dell OptiPlex 320 | User Guide - Page 46
only) displays a boot device menu that allows the user to enter a device for a single boot (during system startup only) as well as options to run hard-drive and system diagnostics push button green light - Blinking green indicates a sleep mode; solid green indicates a power-on state. amber light - Dell OptiPlex 320 | User Guide - Page 47
) Diagnostic lights Standby power light green solid green light indicates network connection green light for 10-Mb operation and orange light for 100-Mb operation yellow blinking light four lights on the front panel (see Diagnostic Lights) AUX_PWR on the system board Power DC power supply: Wattage - Dell OptiPlex 320 | User Guide - Page 48
Back to Contents Page FCC Notice (U.S. Only) Dell™ OptiPlex™ 320 User's Guide FCC Class B This equipment generates, uses, and can radiate radio frequency energy and, if not installed and used in accordance with the manufacturer's instruction manual, may cause interference with radio and television - Dell OptiPlex 320 | User Guide - Page 49
CD to reinstall drivers (see Reinstalling Drivers and Utilities), to run the Dell Diagnostics (see Dell Diagnostics), or to access your documentation. l How to set up my computer l Basic troubleshooting information l How to run the Dell Diagnostics l Error codes and diagnostic lights l Tools and - Dell OptiPlex 320 | User Guide - Page 50
support - Service call status and support history, service contract, online discussions with technical support l Reference - Computer documentation, details on my computer configuration, product specifications, and white papers l Downloads - Certified drivers, patches, and software updates l Desktop - Dell OptiPlex 320 | User Guide - Page 51
Back to Contents Page See Drivers and Utilities CD (also known as ResourceCD). Your operating system product key label is located on your computer (see Service Tag and Microsoft® Windows® License). NOTE: The color of your CD varies based on the operating system you ordered. - Dell OptiPlex 320 | User Guide - Page 52
the computer power and modem cables from all electrical outlets. 1. Complete the procedures in Solving Problems. 2. Run the Dell Diagnostics (see Dell Diagnostics). 3. Make a copy of the Diagnostics Checklist and fill it out. 4. Use Dell's extensive suite of online services available at Dell Support - Dell OptiPlex 320 | User Guide - Page 53
your questions about Dell hardware. Our technical support staff uses computer-based diagnostics to provide fast, accurate answers. To contact Dell's technical support service, see Technical Assistance and then call the number for your country as listed in Contacting Dell. Problems With Your Order - Dell OptiPlex 320 | User Guide - Page 54
file before calling Dell. Error message, beep code, or diagnostic code: Description of problem and troubleshooting procedures you performed: Contacting Dell To contact Dell electronically, you can access the following websites: l www.dell.com l support.dell.com (support) For specific web addresses - Dell OptiPlex 320 | User Guide - Page 55
) E-mail for desktop and portable computers: [email protected] International Access Code: 00 E-mail for servers and EMC® storage products: [email protected] Country Code: 54 Customer Care City Code: 11 Technical Support Technical Support Services Sales Website: www.dell.com.aw - Dell OptiPlex 320 | User Guide - Page 56
.com General Support Website: support.euro.dell.com Czech Republic (Prague) E-mail: [email protected] Technical Support International Access Code: 00 Customer Care Country Code: 420 Fax Technical Fax Switchboard Website: support.euro.dell.com Technical Support for XPS 604 633 4888 604 - Dell OptiPlex 320 | User Guide - Page 57
Sales Fax Website: support.euro.dell.com E-mail: [email protected] Germany (Langen) Technical Support for XPS Technical Support for all other Dell computers International Access Code: 00 Home/Small Business Customer Care Country Code: 49 City Code: 69 Global Segment - Dell OptiPlex 320 | User Guide - Page 58
Customer Care Small Business Customer Care International Access Code: 00 Corporate Customer Care Country Code: 353 Technical Support City Code: 1 Technical Support for XPS computers only Technical Support for all other Dell computers General Fax/Sales Fax Switchboard U.K. Customer Care - Dell OptiPlex 320 | User Guide - Page 59
Customer Care Fax Macao Country Code: 853 Technical Support Customer Service (Xiamen, China) Transaction Sales (Xiamen, China) Website: support.ap.dell.com Malaysia (Penang) Technical Support (Dell Precision, OptiPlex, and Latitude) Technical Support (Dimension, Inspiron, and Electronics and - Dell OptiPlex 320 | User Guide - Page 60
@dell.com General Support Website: support.euro.dell.com Technical Support for XPS Technical Support for all other Dell computers Netherlands (Amsterdam) Technical Support Fax Home/Small Business Customer Care International Access Code: 00 Relational Customer Care Country Code: 31 City Code - Dell OptiPlex 320 | User Guide - Page 61
: 00 Switchboard Country Code: 34 City Code: 91 Fax Corporate Technical Support Customer Care Switchboard Fax Website: support.euro.dell.com Sweden (Upplands Vasby) Technical Support for XPS Technical Support for all other Dell products International Access Code: 00 Relational Customer Care - Dell OptiPlex 320 | User Guide - Page 62
desktop computers) Hardware and Warranty Support (Dell TV, Printers, and Projectors) for Relationship customers U.S.A. (Austin, Texas) International Access Code: 011 Country Code: 1 Americas Consumer XPS Support Consumer (Home and Home Office) Support for all other Dell products Customer Service - Dell OptiPlex 320 | User Guide - Page 63
Virgin Islands Venezuela Dell Outlet Store (Dell refurbished computers) Software and Peripherals Sales Spare Parts Sales Extended Service and Warranty Sales Fax Dell Services for the Deaf, Hard-of-Hearing, or Speech-Impaired E-mail: [email protected] General Support Website: www.dell.com/ve - Dell OptiPlex 320 | User Guide - Page 64
to Contents Page Glossary Dell™ OptiPlex™ 320 User's Guide Terms in this Glossary are provided for informational purposes only and may or may not describe features included with your particular computer. A AC - alternating current - The form of electricity that powers your computer when you plug - Dell OptiPlex 320 | User Guide - Page 65
CD media and write to DVD+RW (rewritable DVDs) discs. DVI - digital video interface - A standard for digital transmission between a computer and a digital video display. E ECC - error checking and correction - A type of memory that includes special circuitry for testing the accuracy of data as it - Dell OptiPlex 320 | User Guide - Page 66
support both the PCI Express and USB 2.0 standard. Express Service Code - A numeric code located on a sticker on your Dell™ computer. Use the Express Service Code when contacting Dell for assistance. Express Service Code service may not be available in some countries. extended display mode - Dell OptiPlex 320 | User Guide - Page 67
before you shut down the computer. Your computer can contain several different forms of memory, such as RAM, ROM, and video memory. Frequently, the word memory is used as a synonym for RAM. memory address - A specific location where data is temporarily stored in RAM. memory mapping - The process by - Dell OptiPlex 320 | User Guide - Page 68
are Plug and Play compliant. POST - power-on self-test - Diagnostics programs, loaded automatically by the BIOS, that perform basic tests on the major computer components, such as memory, hard drives, and video. If no problems are detected during POST, the computer continues the start-up. processor - Dell OptiPlex 320 | User Guide - Page 69
standard for video cards and controllers. Typical SVGA resolutions are 800 x 600 and 1024 x 768. The number of colors and resolution that a program displays depends on the capabilities of the monitor, the video controller and its drivers, and the amount of video memory installed in the computer. - Dell OptiPlex 320 | User Guide - Page 70
1280 x 1024. SXGA+ - super-extended graphics array plus - A video standard for video cards and controllers that supports resolutions up to 1400 x 1050. system board - The main circuit board in your computer. Also known as the motherboard. system setup - A utility that serves as an interface between - Dell OptiPlex 320 | User Guide - Page 71
resolutions up to 1280 x 800." X XGA - extended graphics array - A video standard for video cards and controllers that supports resolutions up to 1024 x 768. Z ZIF - zero insertion force - A type of socket or connector that allows a computer chip to be installed or removed with no stress applied to - Dell OptiPlex 320 | User Guide - Page 72
Specifications l Desktop Computer Specifications NOTICE: Before you install new memory modules, download the most recent BIOS for your computer from the Dell Support website at support.dell.com. DDR2 Memory Overview NOTICE: Do not install ECC memory modules. Doing so may cause the system not to boot - Dell OptiPlex 320 | User Guide - Page 73
CAUTION: Before you begin any of the procedures in this section, follow the safety instructions in the Product Information Guide. NOTICE: If you remove your original memory modules from the computer during a memory upgrade, keep them separate from any new modules that you may have, even if you - Dell OptiPlex 320 | User Guide - Page 74
towers, see Removing the Computer Cover) and check the installed memory modules to ensure that they are seated properly in their sockets. Then repeat step 5 through step 7. 9. When the System Memory total is correct, press to exit system setup. 10. Run the Dell Diagnostics to verify that the - Dell OptiPlex 320 | User Guide - Page 75
Dell™ OptiPlex™ 320 User's Guide Mini Tower Computer About Your Computer Finding Information Mini Tower Computer Mini Tower Computer Specifications Advanced Features Cleaning Your Computer Connecting Multiple Monitors Reinstalling Drivers and the Operating System Solving Problems Microsoft® Windows - Dell OptiPlex 320 | User Guide - Page 76
to Contents Page Mini Tower Computer Dell™ OptiPlex™ 320 User's Guide About Your Mini Tower Computer Inside Your Computer About Your Mini Tower Computer Front View 1 location of Service Tag Use the Service Tag to identify your computer when you access the Dell Support website or call technical - Dell OptiPlex 320 | User Guide - Page 77
it is configured as a wake device in the Windows Device Manager. For more information about sleep modes and exiting from a power-saving mode, see Power Management. See System Lights for a description of light codes that can help you troubleshoot problems with your computer. 9 headphone connector - Dell OptiPlex 320 | User Guide - Page 78
If you have a USB printer, plug it into a USB connector. 2 link integrity light NOTE: The integrated parallel connector is automatically disabled if the computer detects an installed card containing a parallel connector configured to the same address. For more information, see System Setup Options - Dell OptiPlex 320 | User Guide - Page 79
floppy drive 2 CD/DVD drive 3 power supply 4 system board 5 heat sink assembly 6 hard drive System Board Components 1 fan connector (FAN) 2 processor connector (CPU) 3 processor power connector (12VPOWER) 4 front-panel connector (FNT_PANEL) 5 memory module connectors (DIMM_1, DIMM_2) 10 - Dell OptiPlex 320 | User Guide - Page 80
6 SATA drive connectors (SATA0, SATA1) 7 power connector (POWER) 8 CD/DVD drive connector (IDE) 9 SATA drive connectors (SATA2, SATA3) Back to Contents Page 15 PCI card connectors (2) 16 floppy drive connector (FLOPPY) 17 serial/ PS/2 connector (PS2/SER2) - Dell OptiPlex 320 | User Guide - Page 81
Cards Dell™ OptiPlex™ 320 User's Guide Installing a Expansion Card Removing an Expansion Card CAUTION: Before you begin any of the procedures in this section, follow the safety instructions located in the Product Information Guide. NOTICE: To prevent static damage to components inside your computer - Dell OptiPlex 320 | User Guide - Page 82
that is already installed in the computer, remove the card. If necessary, disconnect any cables connected to the card. 7. Prepare the new card for installation. NOTE: See the documentation that came with the card for information on configuring the card, making internal connections, or customizing it - Dell OptiPlex 320 | User Guide - Page 83
of the computer. 16. Install any drivers required for the card as described in the card documentation. Removing an Expansion Card 1. Follow card retention latch 4 card-edge connector 2 alignment guide 5 card connector 3 card 6 release tab 3. Open the card retention mechanism that secures the card - Dell OptiPlex 320 | User Guide - Page 84
then plug it into the computer. 10. Replace the computer cover (see Replacing the Computer Cover). 11. Uninstall the card's driver. See the documentation that came with the card for instructions. 12. If you removed a sound card: a. Enter system setup, select Audio Controller, and change the setting - Dell OptiPlex 320 | User Guide - Page 85
Processor Dell™ OptiPlex™ 320 User's Guide Removing the Processor Installing the Processor CAUTION: Before you begin any of the procedures in this section, follow the safety instructions located in the Product Information Guide. NOTICE: To prevent static damage to components inside your computer - Dell OptiPlex 320 | User Guide - Page 86
the socket is ready for the new processor. Installing the Processor NOTICE: Ground yourself by touching an unpainted metal surface on the back of the computer. NOTICE: When replacing the processor, do not touch any of the pins inside the socket or allow any objects to fall on the pins in - Dell OptiPlex 320 | User Guide - Page 87
use excessive force when you install the processor. 6. Set the processor lightly in the socket and ensure that the processor is positioned correctly. 7. bracket. b. Rotate the heat sink assembly down towards the computer base and tighten the two captive screws. NOTICE: Ensure that the heat sink - Dell OptiPlex 320 | User Guide - Page 88
1 heat sink assembly 2 heat-sink assembly bracket 3 captive screw housing (2) 12. Replace the computer cover (see Replacing the Computer Cover). Back to Contents Page - Dell OptiPlex 320 | User Guide - Page 89
Back to Contents Page Dell™ OptiPlex™ 320 User's Guide Drives General Installation Guidelines Hard Drive Drive-Panel Inserts Floppy Drive CD/DVD Drive Your computer supports: l Up to two SATA (serial ATA) hard drives l One optional floppy drive l Up to two CD or DVD drives NOTE: Due to the limited - Dell OptiPlex 320 | User Guide - Page 90
boot device (drive 0), and the device attached to the middle connector on the data cable is the slave device (drive 1). See the drive documentation in your upgrade kit for information on configuring devices for the cable select setting. Power Cable Connectors IDE Drive Power Connector SATA Power - Dell OptiPlex 320 | User Guide - Page 91
for the drive to verify that it is configured for your computer. 3. Follow the procedures in Before You Begin. 4. Disconnect the power and data cables from the drive. 1 hard-drive data cable 2 hard-drive data connector on system board 3 power cable 5. Press the blue release tabs on each side of the - Dell OptiPlex 320 | User Guide - Page 92
it for installation. 2. Check the documentation for the drive to verify that it is configured for your computer. 3. If your replacement hard drive does not have the plastic hard-drive bracket attached into the drive bay until it clicks into place. 5. Connect the power and data cables to the drive. - Dell OptiPlex 320 | User Guide - Page 93
. Exit system setup, and reboot the computer. 12. Partition and logically format your drive before you proceed to the next step. See the documentation for your operating system for instructions. 13. Test the hard drive by running the Dell Diagnostics (see Dell Diagnostics). 14. If the drive you just - Dell OptiPlex 320 | User Guide - Page 94
lower bay: a. Disconnect the power and the data cables from the back of the first hard drive. b. Press in on the blue release tabs on each side of new hard drive into the upper bay until it clicks into place. 7. Connect a power cable to each drive. 8. Attach the SATA data cable removed in step 5 to - Dell OptiPlex 320 | User Guide - Page 95
1 hard-drive data cable 2 hard-drive data connector on system board (SATA0 or SATA1) 3 power cable 10. Replace the computer cover (see Replacing the Computer Cover). Drive-Panel Inserts 1. Follow the procedures in Before You Begin. 2. Remove the drive panel by sliding the drive release latch - Dell OptiPlex 320 | User Guide - Page 96
any of the procedures in this section, follow the safety instructions located in the Product Information Guide. CAUTION: To guard against electrical shock, always unplug your computer from the electrical outlet before removing the computer cover. Removing the Floppy Drive 1. Follow the procedures in - Dell OptiPlex 320 | User Guide - Page 97
Drive. Otherwise, replace the drive panel by aligning its hinges and rotating it up until it snaps into place. 6. Replace the computer cover (see Replacing the Computer Cover). Installing the Floppy Drive 1. If you are replacing a floppy drive, remove the shoulder screws from the existing drive and - Dell OptiPlex 320 | User Guide - Page 98
Setup). 8. Verify that your computer works correctly by running the Dell Diagnostics (see Dell Diagnostics). CD/DVD Drive CAUTION: Before you begin any of the procedures in this section, follow the safety instructions located in the Product Information Guide. CAUTION: To guard against electrical - Dell OptiPlex 320 | User Guide - Page 99
to open the panel, and then remove it from the hinges. 3. Disconnect the power and data cables from the back of the drive. 4. Slide the drive release drive to verify that the drive is configured for your computer. If you are installing an IDE drive, configure the drive for the cable select setting - Dell OptiPlex 320 | User Guide - Page 100
. For information on SATA cable connectors, see General Installation Guidelines. 1 power cable 2 CD/DVD data cable 3 CD/DVD drive connector 7. Check computer cover (see Replacing the Computer Cover). 10. Verify that your computer works correctly by running the Dell Diagnostics (see Dell Diagnostics - Dell OptiPlex 320 | User Guide - Page 101
Page I/O Panel Dell™ OptiPlex™ 320 User's Guide Removing the I/O Panel CAUTION: Before you begin any of the procedures in this section, follow the safety instructions located in the Product Information Guide. CAUTION: To guard against electrical shock, always unplug your computer from the electrical - Dell OptiPlex 320 | User Guide - Page 102
Back to Contents Page Power Supply Dell™ OptiPlex™ 320 User's Guide Replacing the Power Supply DC Power Connectors Replacing the Power Supply CAUTION: Before you begin any of the procedures in this section, follow the safety instructions located in the Product Information Guide. NOTICE: To prevent - Dell OptiPlex 320 | User Guide - Page 103
power cables to the power supply. 10. Connect the AC power cable to the AC power connector. 11. Replace the computer cover (see Replacing the Computer Cover). DC Power Connectors DC Power +3.3 VDC Orange 13 +3.3 VDC Orange 14 -12 VDC Blue 15 GND Black 16 PWR_PS_ON Green 17 GND Black - Dell OptiPlex 320 | User Guide - Page 104
P3 and P5 Pin Number Signal name 18-AWG Wire 1 +3.3 VDC Orange 2 GND Black 3 +5 VDC Red 4 GND Black 5 +12 VDC White DC Power Connector P4 Pin Number Signal name 18-AWG Wire 1 N/C N/C 2 GND Black 3 GND Black 4 + 3.3 VDC Orange 5 +5 VDC Red 6 +12 VDC White DC - Dell OptiPlex 320 | User Guide - Page 105
Pin Number Signal Name 22-AWG Wire 1 +5 VDC Red 2 GND Black 3 GND Black 4 +12 VDC Yellow DC Power Connectors P8 and P9 Pin Number Signal name 18-AWG Wire 1 +12 VDC White 2 GND Black 3 GND Black 4 +5 VDC Red Back to Contents Page - Dell OptiPlex 320 | User Guide - Page 106
Page Removing the Computer Cover Dell™ OptiPlex™ 320 User's Guide CAUTION: Before you begin any of the procedures in this section, follow the safety instructions located in the Product Information Guide. CAUTION: To guard against electrical shock, always unplug your computer from the electrical - Dell OptiPlex 320 | User Guide - Page 107
Back to Contents Page Mini Tower Computer Specifications Dell™ OptiPlex™ 320 User's Guide Microprocessor Microprocessor type internal cache Memory Type Memory connectors Memory modules supported Minimum memory Maximum memory BIOS address Computer Information Chipset Data bus width Address bus width - Dell OptiPlex 320 | User Guide - Page 108
serial port card 5-pin connector two 120-pin connectors 164-pin connector 4-pin connector 40-pin connector in Microsoft® Windows® XP, brings up the Windows Security window.; in DOS mode, restarts (reboots) the computer starts embedded system setup (during system startup only) displays a boot device - Dell OptiPlex 320 | User Guide - Page 109
) Activity light (on integrated network adapter) Diagnostic lights Standby power light green light for 10-Mb operation and orange light for 100-Mb operation yellow blinking light four lights on the front panel (see Diagnostic Lights) AUX_PWR on the system board Power DC power supply: Wattage - Dell OptiPlex 320 | User Guide - Page 110
Back to Contents Page Microsoft® Windows® XP Features Dell™ OptiPlex™ 320 User's Guide Transferring Information to a New Computer User Accounts and Fast User Switching Setting Up a Home and Office Network Transferring Information to a New Computer The Microsoft Windows XP operating system provides a - Dell OptiPlex 320 | User Guide - Page 111
cable to a network connection device, such as a network wall jack. Network Setup Wizard The Microsoft Windows XP operating system provides a Network Setup Wizard to guide you through the process of sharing files, printers, or an Internet connection between computers in a home or small office. - Dell OptiPlex 320 | User Guide - Page 112
: Selecting the connection method This computer connects directly to the Internet enables the integrated firewall provided with Windows XP SP1. 4. Complete the checklist and required preparations. 5. Return to the Network Setup Wizard and follow the instructions on the screen. Back to Contents Page - Dell OptiPlex 320 | User Guide - Page 113
Replacing the Computer Cover Dell™ OptiPlex™ 320 User's Guide CAUTION: Before you begin any of the procedures in this section, follow the safety instructions in the Product Information Guide. 1. Ensure that all cables are connected, and fold cables out of the way. Gently pull the power cables toward - Dell OptiPlex 320 | User Guide - Page 114
Dell™ OptiPlex™ 320 User's Guide Desktop Computer About Your Computer Finding Information Desktop Computer Desktop Computer Specifications Advanced Features Connecting Multiple Monitors Cleaning Your Computer Reinstalling Drivers and the Operating System Solving Problems Microsoft® Windows® XP - Dell OptiPlex 320 | User Guide - Page 115
Dell™ OptiPlex™ 320 User's Guide Drivers Using Microsoft® Windows® XP System Restore Reinstalling Microsoft Windows XP CAUTION: Before you begin any of the procedures in this section, follow the safety instructions in the Product Information Guide. NOTICE: You must use Microsoft® Windows® XP Service - Dell OptiPlex 320 | User Guide - Page 116
and operating system and then displays a list of device drivers for your system configuration. 5. Click the appropriate driver and follow the instructions to download the driver for your computer. To view a list of all available drivers for your computer, click Drivers in the Topic drop-down - Dell OptiPlex 320 | User Guide - Page 117
System Restore screen appears and the computer restarts. 4. After the computer restarts, click OK. Enabling System Restore If you reinstall Windows XP with off System Restore is unchecked. Reinstalling Microsoft Windows XP NOTICE: You must use Windows XP Service Pack 1 or later when you reinstall - Dell OptiPlex 320 | User Guide - Page 118
XP unless a Dell technical support representative instructs you to do so. NOTICE: To prevent conflicts with Windows XP, disable any virus protection software installed on your computer before you reinstall Windows XP. See the documentation that came with the software for instructions. Booting - Dell OptiPlex 320 | User Guide - Page 119
the default selections. Windows XP installs the operating system components and configures the computer. The computer automatically restarts. NOTICE: Do not press any key when the following message appears: Press any key to boot from the CD. 13. When the Welcome to Microsoft screen appears, click - Dell OptiPlex 320 | User Guide - Page 120
Problems Dell™ OptiPlex™ 320 User's Guide Battery Problems Drive Problems Keyboard Problems Lockups and Software Problems Memory Problems Mouse Problems Network Problems Power Problems Printer Problems Restoring Default Settings Serial or Parallel Device Problems Sound and Speaker Problems Video - Dell OptiPlex 320 | User Guide - Page 121
Windows before writing to a CD/DVD-RW disc - See Power Management. Hard drive problems Running the Dell IDE Hard Drive Diagnostics - The Dell IDE Hard Drive Diagnostics is a utility that tests the hard drive to troubleshoot or confirm a hard drive failure. 1. Turn on your computer (if your computer - Dell OptiPlex 320 | User Guide - Page 122
Utilities CD (see Finding Information) and at support.dell.com. NOTE: You must use Microsoft® Windows® XP Service Pack 1 or later when you reinstall Windows XP. The computer does not start up Check the Diagnostic Lights - See Diagnostic Lights. Ensure that the power cable is firmly connected to the - Dell OptiPlex 320 | User Guide - Page 123
menu Run the Dell Diagnostics - See Dell Diagnostics. If all tests run successfully, the error condition is related to a software problem. Memory Problems NOTE: Your computer might emit a series of beeps (beep code) during start-up if the monitor cannot display errors or problems. This series of - Dell OptiPlex 320 | User Guide - Page 124
Problems Fill out the Diagnostics Checklist as you complete these checks. CAUTION: Before you begin any of the procedures in this section, follow the safety instructions located in the Product Information Guide. If the power light is green and the computer is not responding - See Diagnostic Lights - Dell OptiPlex 320 | User Guide - Page 125
Remove and then reinstall the memory modules (see Memory). l Remove and then reinstall any cards. l Remove and then reinstall the graphics card, if applicable. If the power light is blinking amber - The computer is receiving electrical power, but an internal power problem might exist. l Ensure that - Dell OptiPlex 320 | User Guide - Page 126
until you see the Windows desktop. Then shut down your computer through the Start menu and try again. 3. Under System Management, select the Maintenance option and follow the directions on the screen (see System Setup). Serial or Parallel Device Problems Fill out the Diagnostics Checklist as you - Dell OptiPlex 320 | User Guide - Page 127
the sound is not muted. Video and Monitor Problems Fill out the Diagnostics Checklist as you complete these checks. CAUTION: Before you begin any of the procedures in this section, follow the safety instructions located in the Product Information Guide. If the screen is blank NOTE: See the monitor - Dell OptiPlex 320 | User Guide - Page 128
lights - See Diagnostic Lights. Check the card setting - Enter system setup and ensure that Primary Video option is set correctly. Exit system setup and restart your computer (see System Setup). Run the monitor self-test - Check the monitor documentation for more information. If the screen - Dell OptiPlex 320 | User Guide - Page 129
Dell™ OptiPlex™ 320 User's Guide Replacing the System Board Removing the System Board 1. Follow the procedures in Before You Begin. CAUTION: To guard against the electrical shock, always unplug your computer For your mini tower computer, see Processor. l For your desktop computer, see Processor. 4. - Dell OptiPlex 320 | User Guide - Page 130
3. Replace any components and cables that you removed from the system board. 4. Reconnect all cables to their connectors at the back of the computer. 5. Replace the computer cover (see Replacing the Computer Cover). Back to Contents Page - Dell OptiPlex 320 | User Guide - Page 131
to Contents Page Dell™ OptiPlex™ 320 User's Guide Notes, Notices, and Cautions NOTE: A NOTE indicates important information that helps you make better use of your computer. NOTICE: A NOTICE indicates either potential damage to hardware or loss of data and tells you how to avoid the problem. CAUTION - Dell OptiPlex 320 | User Guide - Page 132
Back to Contents Page Troubleshooting Tools and Utilities Dell™ OptiPlex™ 320 User's Guide Dell Diagnostics System Lights Diagnostic Lights Beep Codes Error Messages Resolving Software and Hardware Incompatibilities Dell Diagnostics CAUTION: Before you begin any of the procedures in this section, - Dell OptiPlex 320 | User Guide - Page 133
computer is in a power-saving mode (Microsoft® Windows® XP). A configuration error exists. Suggested Resolution No corrective action is required. Press the power button, move the mouse, or press a key on the keyboard to wake the computer. Check the diagnostic lights to see if the specific problem - Dell OptiPlex 320 | User Guide - Page 134
video during POST Solid green power light and no beep code but the computer locks up during POST The Dell Diagnostics is running a test, or a device on the system board may be faulty or incorrectly installed. A power supply or system board failure has occurred. A problem was detected while the BIOS - Dell OptiPlex 320 | User Guide - Page 135
screen. l If the problem persists, (see Contacting Dell). After POST is complete, all four diagnostic lights turn green briefly before turning off to indicate normal operating condition. None. Beep Codes Your computer might emit a series of beeps during start-up if the monitor cannot display - Dell OptiPlex 320 | User Guide - Page 136
instructions. Alert! Previous attempts at booting this system have failed at checkpoint [nnnn]. For help in resolving this problem, please note this checkpoint and contact Dell Technical Support - Contact Dell and report the checkpoint code (nnnn) to the support technician (see Contacting Dell - Dell OptiPlex 320 | User Guide - Page 137
is correct (see System Setup). No boot sector on hard-disk drive - l Enter system setup and ensure that the computer configuration information for the hard drive is correct (see System Setup). No timer tick interrupt - Run the Dell Diagnostics. See Dell Diagnostics. Non-system disk or disk error - Dell OptiPlex 320 | User Guide - Page 138
disk or hard drive. See Windows Help for instructions. l If a large number of sectors are defective, back up the data (if possible), and then reformat the floppy disk or hard drive. Seek error - See Drive Problems. Shutdown failure - Run the Dell Diagnostics. See Dell Diagnostics. Time-of-day clock - Dell OptiPlex 320 | User Guide - Page 139
See the documentation that came with the device for information on configuring the device. To resolve incompatibilities using the Windows XP Hardware Troubleshooter: 1. Click the Start button and click Help and Support. 2. Type hardware troubleshooter in the Search field and click the arrow to start - Dell OptiPlex 320 | User Guide - Page 140
Warranty Dell™ OptiPlex™ 320 User's Guide Dell Inc. ("Dell") manufactures its hardware products from parts and components that are new or equivalent to new in accordance with industry-standard practices. For information about the Dell warranty for your computer, see the Product Information Guide or
-
 1
1 -
 2
2 -
 3
3 -
 4
4 -
 5
5 -
 6
6 -
 7
7 -
8
-
9
-
10
-
11
-
12
-
13
-
14
-
15
-
16
-
17
-
18
-
19
-
20
-
21
-
22
-
23
-
24
-
25
-
26
-
27
-
28
-
29
-
30
-
31
-
32
-
33
-
34
-
35
-
36
-
37
-
38
-
39
-
40
-
41
-
42
-
43
-
44
-
45
-
46
-
47
-
48
-
49
-
50
-
51
-
52
-
53
-
54
-
55
-
56
-
57
-
58
-
59
-
60
-
61
-
62
-
63
-
64
-
65
-
66
-
67
-
68
-
69
-
70
-
71
-
72
-
73
-
74
-
75
-
76
-
77
-
78
-
79
-
80
-
81
-
82
-
83
-
84
-
85
-
86
-
87
-
88
-
89
-
90
-
91
-
92
-
93
-
94
-
95
-
96
-
97
-
98
-
99
-
100
-
101
-
102
-
103
-
104
-
105
-
106
-
107
-
108
-
109
-
110
-
111
-
112
-
113
-
114
-
115
-
116
-
117
-
118
-
119
-
120
-
121
-
122
-
123
-
124
-
125
-
126
-
127
-
128
-
129
-
130
-
131
-
132
-
133
-
134
-
135
-
136
-
137
-
138
-
139
-
140
 |
 |
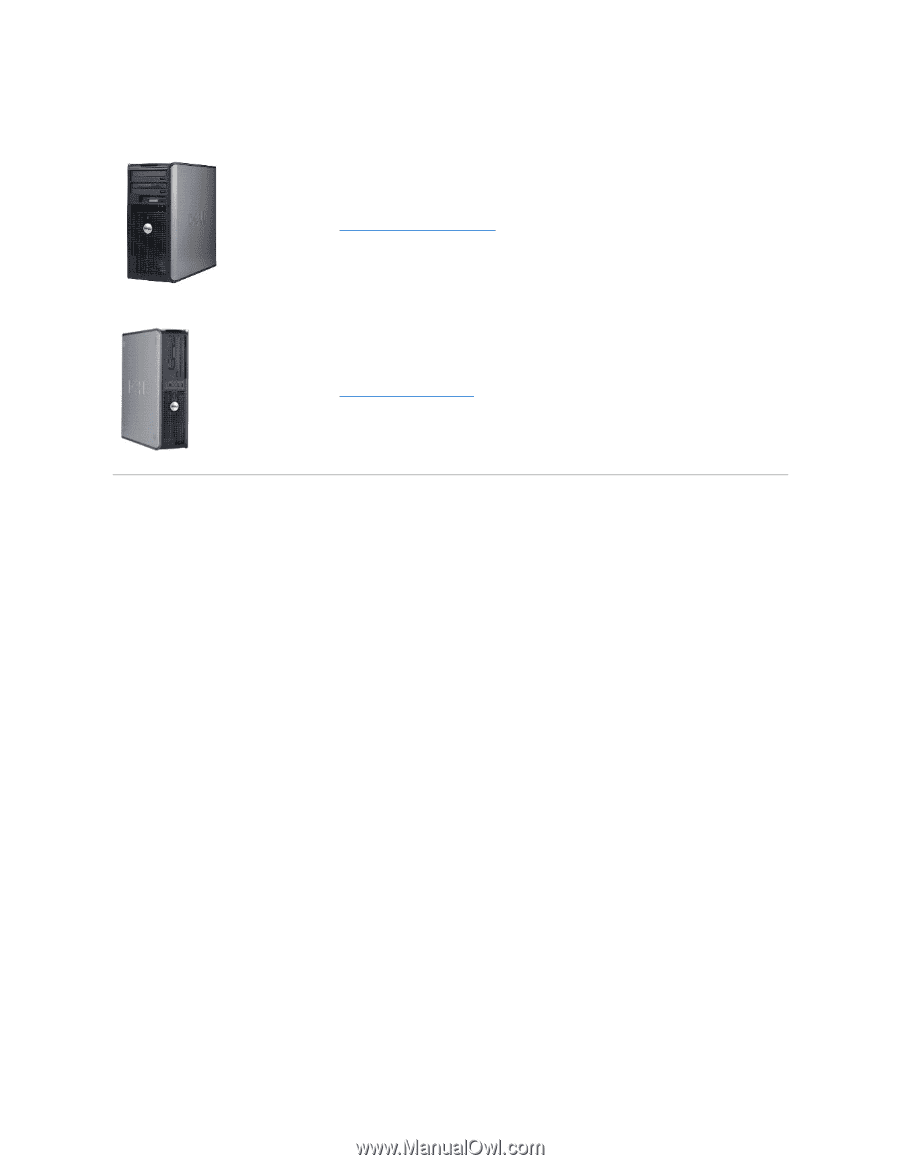
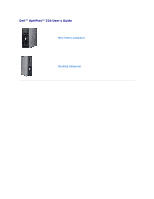
Dell™ OptiPlex™ 320 User's Guide
Mini Tower Computer
Desktop Computer