Dell OptiPlex 320 User Guide - Page 97
Installing the Floppy Drive
 |
UPC - 683728237738
View all Dell OptiPlex 320 manuals
Add to My Manuals
Save this manual to your list of manuals |
Page 97 highlights
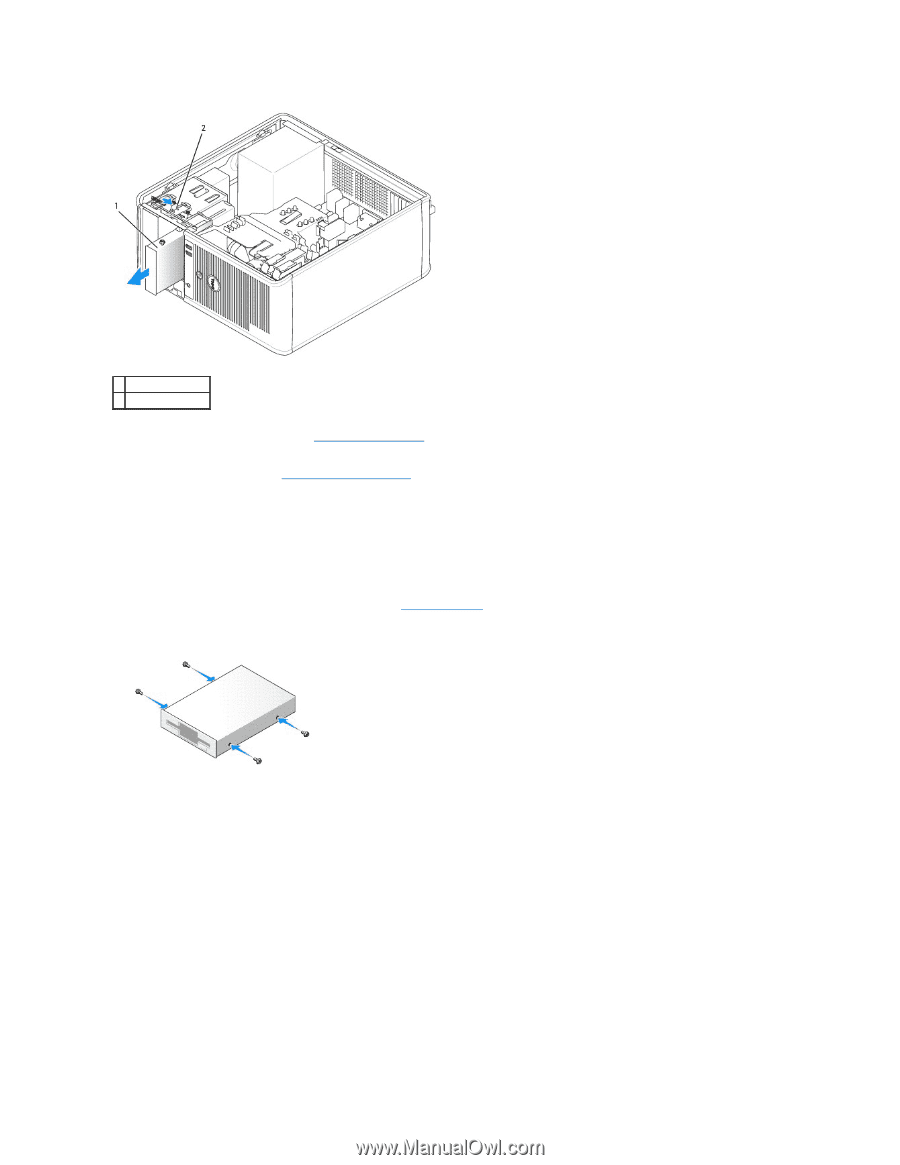
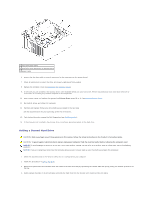
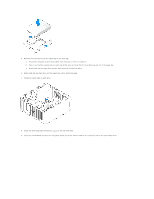
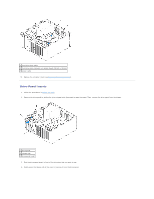
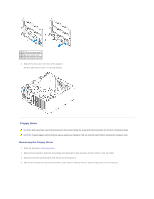
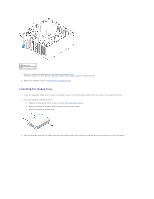
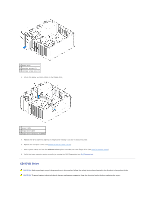
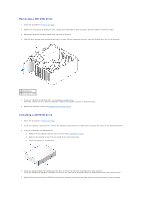
1 floppy drive 2 drive release latch 5. If you are replacing the floppy drive, see Installing the Floppy Drive. Otherwise, replace the drive panel by aligning its hinges and rotating it up until it snaps into place. 6. Replace the computer cover (see Replacing the Computer Cover). Installing the Floppy Drive 1. If you are replacing a floppy drive, remove the shoulder screws from the existing drive and attach the screws to the replacement drive. 2. If you are installing a new floppy drive: a. Remove the drive-panel insert for your new drive (see Drive-Panel Inserts). b. Remove the shoulder screws from the inside of the drive-panel insert. c. Attach the screws to the new drive. 3. Align the shoulder screws on the floppy drive with the shoulder screw slots, and gently slide the drive into the bay until it clicks into place.
-
 1
1 -
2
-
3
-
4
-
5
-
6
-
7
-
8
-
9
-
10
-
11
-
12
-
13
-
14
-
15
-
16
-
17
-
18
-
19
-
20
-
21
-
22
-
23
-
24
-
25
-
26
-
27
-
28
-
29
-
30
-
31
-
32
-
33
-
34
-
35
-
36
-
37
-
38
-
39
-
40
-
41
-
42
-
43
-
44
-
45
-
46
-
47
-
48
-
49
-
50
-
51
-
52
-
53
-
54
-
55
-
56
-
57
-
58
-
59
-
60
-
61
-
62
-
63
-
64
-
65
-
66
-
67
-
68
-
69
-
70
-
71
-
72
-
73
-
74
-
75
-
76
-
77
-
78
-
79
-
80
-
81
-
82
-
83
-
84
-
85
-
86
-
87
-
88
-
89
-
90
-
91
-
 92
92 -
 93
93 -
 94
94 -
 95
95 -
 96
96 -
 97
97 -
 98
98 -
 99
99 -
 100
100 -
 101
101 -
 102
102 -
103
-
104
-
105
-
106
-
107
-
108
-
109
-
110
-
111
-
112
-
113
-
114
-
115
-
116
-
117
-
118
-
119
-
120
-
121
-
122
-
123
-
124
-
125
-
126
-
127
-
128
-
129
-
130
-
131
-
132
-
133
-
134
-
135
-
136
-
137
-
138
-
139
-
140
 |
 |