Dell Precision M65 User's Guide - Page 59
Caution, Notice
 |
View all Dell Precision M65 manuals
Add to My Manuals
Save this manual to your list of manuals |
Page 59 highlights
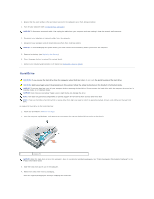
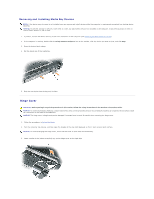
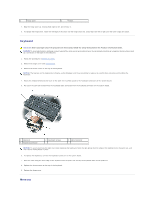
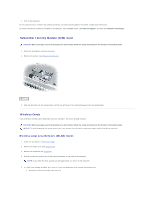
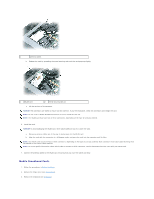
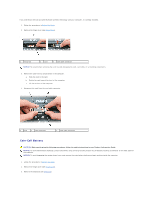
You can increase your computer memory by installing memory modules on the system board. See Specifications for information on the memory supported by your computer. Install only memory modules that are intended for your computer. NOTE: Memory modules purchased from Dell are covered under your computer warranty. CAUTION: Before you begin any of the procedures in this section, follow the safety instructions in the Product Information Guide. NOTICE: To avoid damaging the system board, you must remove the main battery before you begin working inside the computer. The computer has two memory slots, DIMM A and DIMM B. DIMM A is located on top of the computer under the keyboard, and DIMM B is located on the bottom of the computer under the memory module cover. DIMM A holds the basic memory module as configured from the factory. If you did not order additional memory, DIMM B is empty. Generally, if you add memory, you use DIMM B. If you are upgrading memory, you may need to install memory in DIMM A and DIMM B, depending on the extent of the upgrade. To install a memory module in DIMM A: 1. Follow the procedures in Before You Begin. 2. Remove the hinge cover (see Hinge Cover). 3. Remove the keyboard (see Keyboard). 4. Ground yourself by touching one of the metal connectors on the back of the computer. NOTICE: If you leave the area, ground yourself again when you return to the computer. 5. If you are replacing a memory module, remove the existing module: NOTICE: To prevent damage to the memory module connector, do not use tools to spread the memory-module securing clips. a. Use your fingertips to carefully spread apart the securing clips on each end of the memory module connector until the module pops up. b. Remove the module from the connector. 1 memory module 2 securing clips (2) NOTICE: Insert memory modules at a 45-degree angle to avoid damaging the connector. NOTE: If the memory module is not installed properly, the computer may not boot properly. No error message indicates this failure. 6. Ground yourself and install the new memory module: a. Align the notch in the module edge connector with the tab in the connector slot. b. Slide the module firmly into the slot at a 45-degree angle, and rotate the module down until it clicks into place. If you do not feel the click, remove the module and reinstall it. 7. Replace the keyboard (see Keyboard). 8. Replace the hinge cover (see Hinge Cover). 9. Insert the battery into the battery bay, or connect the AC adapter to your computer and an electrical outlet. 10. Turn on the computer.
-
 1
1 -
2
-
3
-
4
-
5
-
6
-
7
-
8
-
9
-
10
-
11
-
12
-
13
-
14
-
15
-
16
-
17
-
18
-
19
-
20
-
21
-
22
-
23
-
24
-
25
-
26
-
27
-
28
-
29
-
30
-
31
-
32
-
33
-
34
-
35
-
36
-
37
-
38
-
39
-
40
-
41
-
42
-
43
-
44
-
45
-
46
-
47
-
48
-
49
-
50
-
51
-
52
-
53
-
 54
54 -
 55
55 -
 56
56 -
 57
57 -
 58
58 -
 59
59 -
 60
60 -
 61
61 -
 62
62 -
 63
63 -
 64
64 -
65
-
66
-
67
-
68
-
69
-
70
-
71
-
72
-
73
-
74
-
75
-
76
-
77
-
78
-
79
-
80
-
81
-
82
-
83
-
84
-
85
-
86
-
87
-
88
-
89
-
90
-
91
-
92
-
93
-
94
-
95
-
96
-
97
-
98
-
99
-
100
 |
 |