Denon S-5BD Owners Manual - English - Page 60
Audio Setup, Option Setup - + digital amps
 |
UPC - 083795001216
View all Denon S-5BD manuals
Add to My Manuals
Save this manual to your list of manuals |
Page 60 highlights
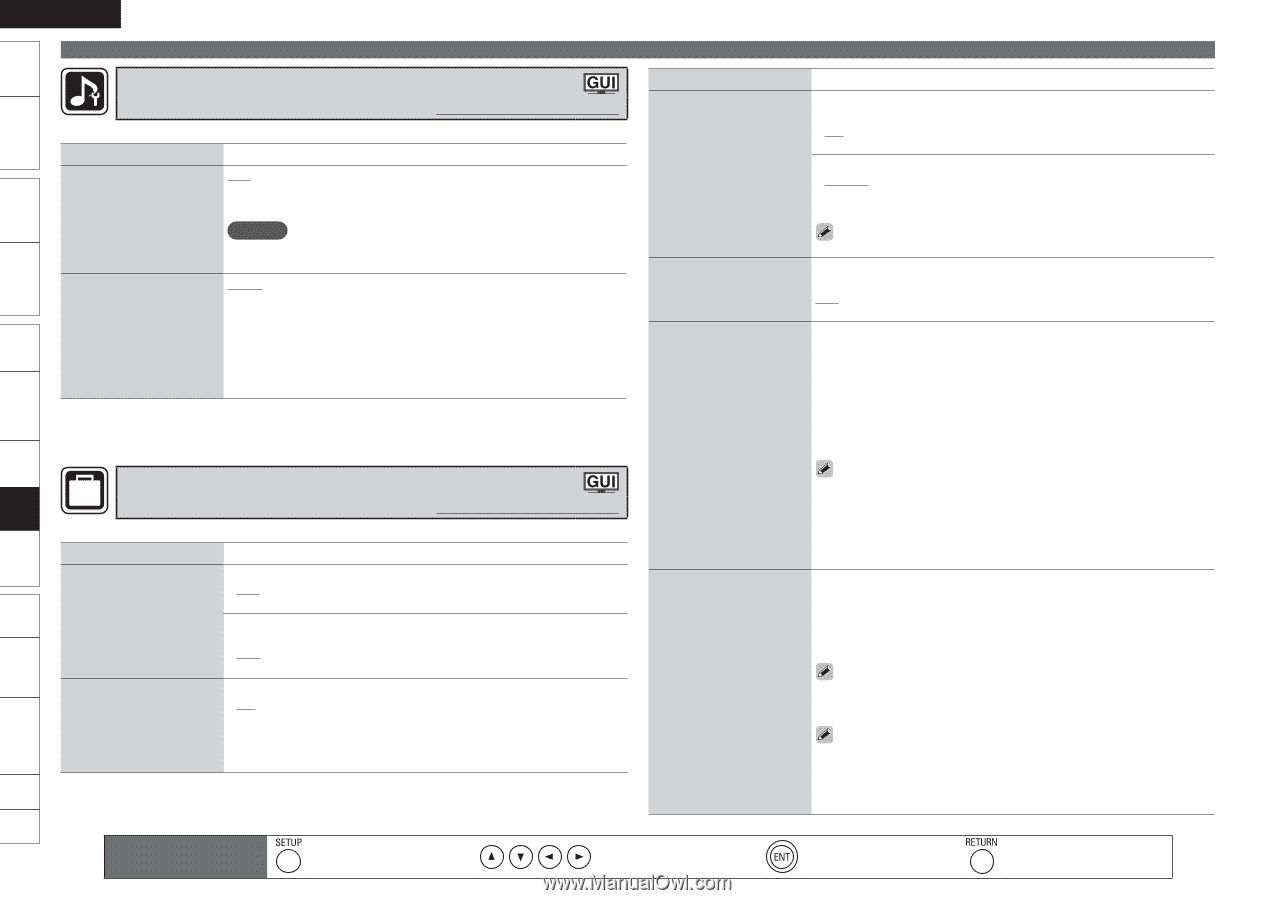
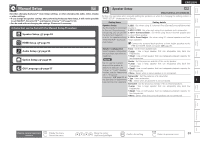
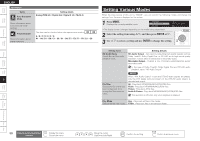
Getting Started Simple Version Connections Playback (Basic) Settings Playback (Advanced) ENGLISH Manual Setup Audio Setup Default settings are underlined. Set the audio input and output. Setting items COAX Input Assign Assign coaxial digital connector. Setting details OFF : Do not assign coaxial digital connector. AUX1 : Sets to the digital audio input connector for AUX1. AUX2 : Sets to the digital audio input connector for AUX2. Dynamic Play Mode When playing back on a 2.0/2.1-channel setup, the unused surround channels (amps) are used together with the front channels (amps) to give improved sound quality. NOTE When set to "AUX1" or "AUX2", priority is given to output of COAXIAL input signals over analog or OPTICAL input signals. AUTO : Automatically ON when parallel drive possible. OFF : Parallel drive is not performed. Option Setup OPTION Make various other settings. Default settings are underlined. Setting items Volume Control Set the MAIN ZONE (room where the unit is located) volume setting. GUI Make GUI related settings. Setting details Volume Limit : Make a setting for maximum volume. • OFF : Do not set a maximum volume. • 60 / 70 / 80 Power On Level : Define the volume setting that is active when the power is turned on. • Last : Use the memorized setting from the last session. • 0 - 99 : The volume is adjusted to the set level. Screensaver : Make screensaver settings. • ON : If is no operation is performed for approximately three minutes while the GUI menu or iPod playback screen is displayed, a screen saver is activated. When you press uio p, the screen saver is cancelled and the screen before that screen saver started is displayed. • OFF : Screen saver is not activated. Setting items GUI (Continued) Setting details Text : Display the details of operation when switching surround mode, input mode, etc. • ON • OFF Master Volume : Display the master volume during adjustment. • Bottom : Display at the bottom. • Top : Display at the top. • OFF : Turn display off. Quick Start Mode Make Quick Mode settings. When the master volume display is hard to see when superimposed on movie subtitles, set to "Top". ON : Start up time is faster but power consumption during standby is higher. OFF : Turn off Quick Mode. Remote Preset Codes By registering the preset codes in the supplied remote control unit, you can operate a TV, satellite tuner or cable TV made by other manufacturers. 1. Select the device you want to register using ui and press ENTER to confirm. 2. Select the first letter of the manufacturer's name using ui and press ENTER to confirm. 3. Select the manufacturer's name using ui and press ENTER to confirm. 4. The procedures for registering remote control codes and remote control preset registration are displayed. Trigger Out Select the condition for activating Trigger Out for the input source, surround mode, etc. See "TRIGGER OUT Jacks" (vpage 17) for more information on trigger out. • Some devices you want to register may have more than one preset code. In this case, after registering the preset code, try operating the device with the remote control unit to check that it is working properly. • For details on operating devices with the remote control unit after registering the preset code, see "Operating Components" (vpage 59). When Setting for Zone (MAIN ZONE/ZONE2): Trigger out is activated through linkage to the power of the zone set to "ON". When Setting for Input Source: Activate trigger out when the input source set to "ON" is selected. Active for the zone set to "ON" with "When Setting for Zone". When Setting for Surround Mode: Activate trigger out when the surround mode set to "ON" is selected. Active when the "MAIN ZONE" set to "ON" with "When Setting for Zone" is selected, and when the input source set to "ON" with "When Setting for Input Source" is selected. • ON : Activate trigger on this mode Do not activate trigger on this mode. Multizone GUI Remote Control Part Names Other Information Troubleshooting Spec. Index 56 Remote control operation buttons Display the menu Cancel the menu Move the cursor (Up/Down/Left/Right) Confirm the setting Return to previous menu
-
 1
1 -
2
-
3
-
4
-
5
-
6
-
7
-
8
-
9
-
10
-
11
-
12
-
13
-
14
-
15
-
16
-
17
-
18
-
19
-
20
-
21
-
22
-
23
-
24
-
25
-
26
-
27
-
28
-
29
-
30
-
31
-
32
-
33
-
34
-
35
-
36
-
37
-
38
-
39
-
40
-
41
-
42
-
43
-
44
-
45
-
46
-
47
-
48
-
49
-
50
-
51
-
52
-
53
-
54
-
 55
55 -
 56
56 -
 57
57 -
 58
58 -
 59
59 -
 60
60 -
 61
61 -
 62
62 -
 63
63 -
 64
64 -
 65
65 -
66
-
67
-
68
-
69
-
70
-
71
-
72
-
73
-
74
-
75
-
76
-
77
-
78
-
79
-
80
-
81
-
82
-
83
-
84
-
85
-
86
-
87
-
88
-
89
-
90
-
91
-
92
-
93
-
94
-
95
 |
 |