Garmin 2620 Owners Manual
Garmin 2620 - StreetPilot Portable Automotive GPS Navigator Manual
 |
UPC - 753759045449
View all Garmin 2620 manuals
Add to My Manuals
Save this manual to your list of manuals |
Garmin 2620 manual content summary:
- Garmin 2620 | Owners Manual - Page 1
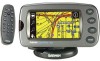
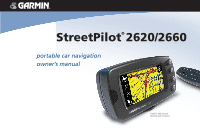
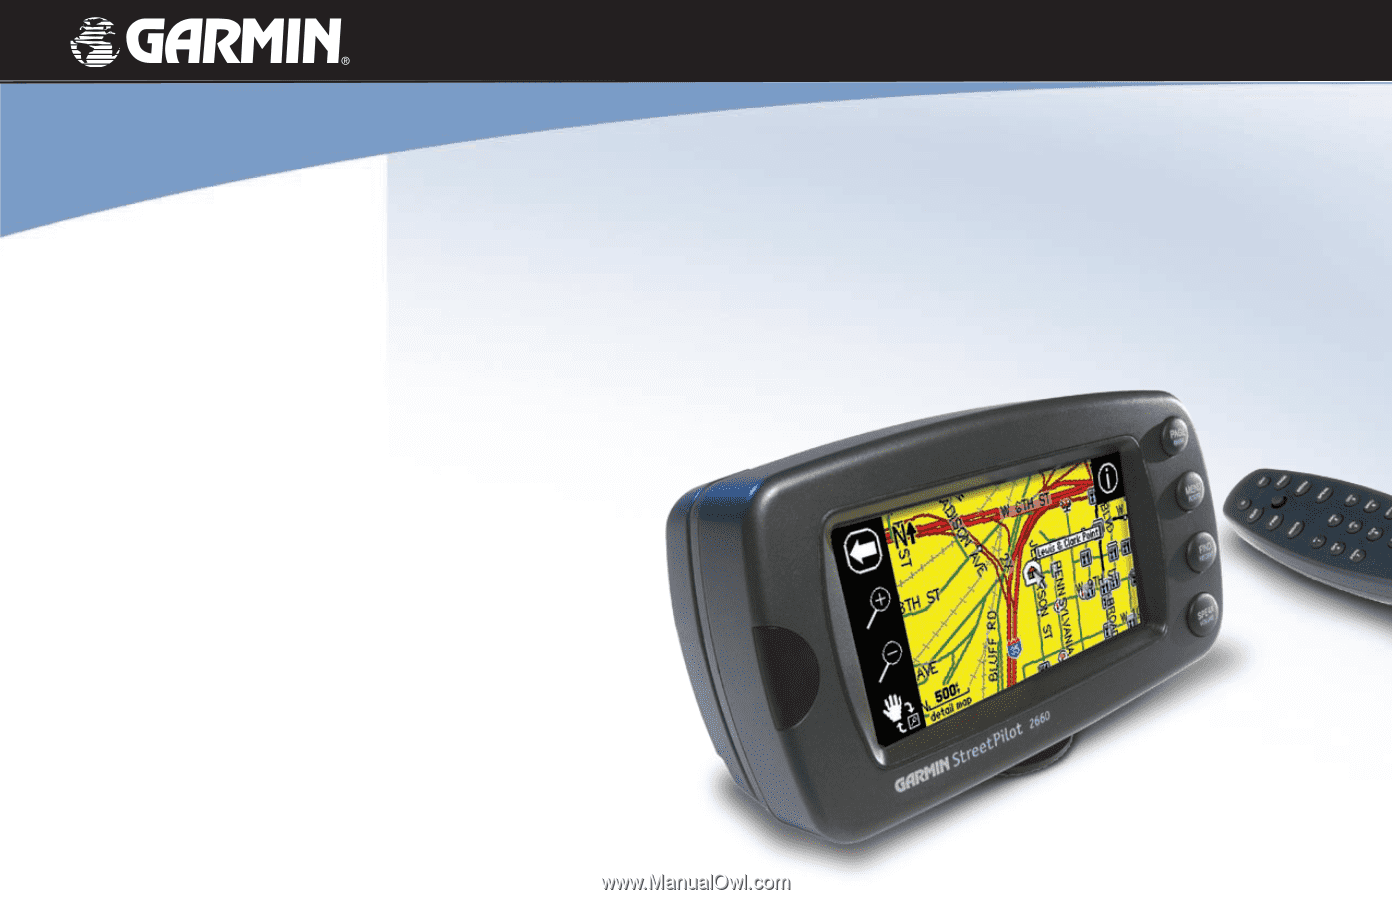
StreetPilot® 2620/2660 portable car navigation owner's manual StreetPilot 2660 pictured StreetPilot 2620 not shown - Garmin 2620 | Owners Manual - Page 2
in any storage medium, for any purpose without the express prior written consent of Garmin. Garmin hereby grants permission to download a single copy of this manual and of any revision to this manual onto a hard drive or other electronic storage medium to be viewed and to print one copy of this - Garmin 2620 | Owners Manual - Page 3
navigation systems available! The Garmin StreetPilot 2620/2660 utilizes the proven performance of Garmin GPS and full-featured mapping to create an unsurpassed mobile navigation system. This manual covers instructions for the StreetPilot 2620 and Street Pilot 2660. Unit operation and specifications - Garmin 2620 | Owners Manual - Page 4
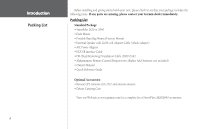
• PC/USB Interface Cable • DR (Dead Reckoning) Installation Cable (2660 Only) • Alphanumeric Remote Control (Requires two alkaline AAA batteries; not included) • Owner's Manual • Quick Reference Guide Optional Accessories: • Remote GPS Antenna (GA 27C) and antenna mounts • Deluxe Carrying Case View - Garmin 2620 | Owners Manual - Page 5
the Overall Setup of Your StreetPilot44 Obtaining the latest Software Upgrades 55 Introduction Table of Contents APPENDIX A: VEHICLE INSTALLATION 61 APPENDIX B: DR CABLE WIRING (2660 ONLY) ........65 APPENDIX C: USING DIACRITICAL MARKS 66 APPENDIX D: ADDING MAPS TO YOUR STREETPILOT .68 APPENDIX - Garmin 2620 | Owners Manual - Page 6
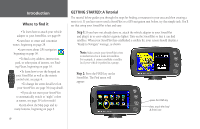
the keypad on ZOOM QUIT PAGE FIND MENU your StreetPilot as well as the remote ROUTE SPEAK ABC DEF 1 2 3 GHI JKL MNO 4 5 6 PQRS 7 TUV 8 WXYZ 9 0 control unit, see page 4. •To change the street detail level on your StreetPilot, see page 39 (map detail). •If you do not want your - Garmin 2620 | Owners Manual - Page 7
this restaurant, touch the Go To button located at the bottom of the Food/Drink page. A Route Preference window will appear. Touch Step 4: Scroll the restaurant: touch Go To to create a route to this restaurant. What's Next? Read the manual to learn how to use your StreetPilot accurately, effi - Garmin 2620 | Owners Manual - Page 8
. Select Yes, and the StreetPilot gives driving instructions for the entire route. vi Manual Conventions • This manual refers to the StreetPilot as a "StreetPilot," "unit," or "GPS receiver." It makes no distinction between these terms. "StreetPilot" refers to both the 2620 and 2660 models unless - Garmin 2620 | Owners Manual - Page 9
page. USB Connector Interface unit with a PC to update your detail map and/ or add mapping software to the internal hard drive, or to upload software upgrades. Power/Speaker Connector Connector for power, speaker, and Dead Reckoning cable (2660 only). Back View Adjustable Mount Allows the unit - Garmin 2620 | Owners Manual - Page 10
the chance for battery leakage in the battery compartment, remove the batteries when storing the remote control for more than six months. Caring for the Pre-Programmed Hard Drive Your StreetPilot 2620/2660 comes with an internal pre-programmed hard drive. As with any hard drive, excessive shock and - Garmin 2620 | Owners Manual - Page 11
the StreetPilot On and Off Toggle the power switch on the right side down to turn the unit ON and up to turn it OFF. When turned on, the Welcome screen appears briefly, followed by the Map Information and Copyright page. Touch OK on the screen to acknowledge, or wait briefly until the Safe Driving - Garmin 2620 | Owners Manual - Page 12
may need to be calibrated. Calibrating the Touchscreen To calibrate the touchscreen: 1. Press the remote or unit MENU key. Select 'Display.' 2. Press the remote or unit FIND key to begin calibration. Follow the on-screen instructions. Using the Remote Control The StreetPilot 2620/2660's alphanumeric - Garmin 2620 | Owners Manual - Page 13
the left front of the StreetPilot. Adjusting the Speaker Volume Introduction Installing the Remote Control Batteries F The remote control requires two AAA alkaline batteries. To install the batteries, press up on the battery door clip, then pull the battery door away from the remote. Install the - Garmin 2620 | Owners Manual - Page 14
see after the startup screens, and it's what you view as you navigate to a destination. Many features make up the Map page. Whether you're navigating a route or simply driving with your StreetPilot turned on, you will see a map that displays your current location as well as surrounding street detail - Garmin 2620 | Owners Manual - Page 15
to using the touchscreen for zooming in and out of an area on the Map page is to use the IN and OUT zoom buttons located at the top of your remote control. An alternative to "panning," or touching the map with your finger and moving the map, is to use the thumb stick on your - Garmin 2620 | Owners Manual - Page 16
available. The black triangle, or "vehicle icon," shows your current physical location on the Map page. While in panning mode, the data tabs on the right of the screen are hidden. In addition to zooming in to or out of the Map page, you can also define a particular area to enlarge on the - Garmin 2620 | Owners Manual - Page 17
as businesses, parks, and other points of interest. Thus, if you are viewing Denver at a map scale of 800 feet, your StreetPilot will display information from its base map. The map scale will switch from "base map" to "detail map" as you continue to zoom in to Denver. If you continue to zoom in to - Garmin 2620 | Owners Manual - Page 18
Map page by using the touchscreen with your finger or by using your remote control. As you pan, the map pointer appears. It serves as a target marker for the map. If you change the scale, the map current physical location. This view of the Gateway Arch appears when you touch Show Map. The coordinates - Garmin 2620 | Owners Manual - Page 19
location on a lake or in a National Park), you can mark this area by creating a waypoint for it. Touch the flag icon and a New Map to mark your waypoint. Touch the 011 text to display a new screen that serves as a , touch OK. The mini keyboard is used in a variety of places with your StreetPilot. It - Garmin 2620 | Owners Manual - Page 20
of your current position, and the name of the next road ahead. Map Orientation Your current speed Your Current Position Current driving direction Map Scale Street address at your current location The next road ahead Map page in routing mode Although the information varies slightly between - Garmin 2620 | Owners Manual - Page 21
the zoom icons to view a new level of detail. Touch the arrow to return to the Map page in routing mode. In the example above, your current driving position always appears on the Map page. Another StreetPilot feature allows you to "look ahead" on the Map page so that you can view areas beyond your - Garmin 2620 | Owners Manual - Page 22
of the turn. 14 Touch anywhere on the Map page (except the map scale) to activate the map tools bar and map pointer, and hide the data tabs. Touch the arrow to return to the previous Map page. Use this feature whether you are simply driving with your StreetPilot turned on (driving Map page) or - Garmin 2620 | Owners Manual - Page 23
which provides step-by-step route instructions, all on one page. Simply press PAGE from your StreetPilot (or from the remote control) and the Current Route page through the entire list by moving the scroll bar up or down. Highlight and touch any of the turns on the list to view the Next Turn page for - Garmin 2620 | Owners Manual - Page 24
the time the StreetPilot has been tracking your location since, the Trip Computer was last reset. Max Speed - The maximum speed recorded since the Trip Computer was last reset. Max Speed can also be reset individually without resetting other Trip Computer information. Driving Time - The length - Garmin 2620 | Owners Manual - Page 25
Time - The total length of time that the StreetPilot has been tracking your location since the Trip Computer was last reset. This is always equal to Driving Time plus Stopped Time. To reset the Trip Computer or the Maximum Speed: 1. Press the unit or remote MENU key to display a 'Menu' page. You - Garmin 2620 | Owners Manual - Page 26
dead reckoning cable is connected to your vehicle's speedometer and backup lights (it must be professionally installed by an authorized Garmin installer). Thus, when you lose GPS reception, your StreetPilot can acknowledge your turns as well as your distance travelled while you are driving. In this - Garmin 2620 | Owners Manual - Page 27
StreetPilot unit (or remote) to take the guess work out of locating a city street all city names that are loaded in your mapping software will be searched. For example, if you are touch OK. The Reference Finding Places scroll bar Access this menu by selecting FIND on your StreetPilot unit or remote - Garmin 2620 | Owners Manual - Page 28
will appear. Touch the green flag on the lower left-hand side of the page if you want to mark the city as a waypoint, or Show Map if you want to see the city on the Map page (see page 10 for an example), or Go To if you want your StreetPilot to navigate - Garmin 2620 | Owners Manual - Page 29
mini keyboard will appear; touch the pertinent numbers/letters to complete the street names. The StreetPilot initially limits its searches to addresses or intersections within the state/province in which you are currently physically located, or where the map pointer is located if you have panned to - Garmin 2620 | Owners Manual - Page 30
feature of your StreetPilot is being able to locate interesting and exciting places all over the U.S. without having to ask for directions to get there. If you are new to a town and you need to find a bank or car wash, touch the Services icon from the Find menu. If you are driving through town on - Garmin 2620 | Owners Manual - Page 31
need to stop at an exit with a service station or when you need to find the nearest rest area. When you initially select Exits, your StreetPilot lists all exits on the highway or interstate that are closest to your current location. If you are driving on Interstate 40 near Albuquerque, for example - Garmin 2620 | Owners Manual - Page 32
mark the location as a waypoint, or Show Map if you want to see the exit on the Map page (see page 10 for an example), or Go To if you want your StreetPilot to navigate to this exit. Finding a Waypoint Waypoints that you have created and stored in the StreetPilot can be found by touching the - Garmin 2620 | Owners Manual - Page 33
, or Go To if you want your StreetPilot to navigate to the waypoint. Touch Delete if you want to remove this waypoint from your StreetPilot's memory. Advanced Find Features Main Map Feature: As was discussed above, you can view a selected location (an eatery, a hotel, waypoint, or city, for example - Garmin 2620 | Owners Manual - Page 34
Finding a City' in this section of this manual for more instructions if necessary. Touch the name of the city so that the Fraser. Your StreetPilot will return the names of places to lodge. Touch the name Fraser 26 You can also find entertainment, services, and a host of other places near your - Garmin 2620 | Owners Manual - Page 35
recently found, touch Recent Finds from the Find menu. Or, press down and hold the FIND key on your StreetPilot or remote control. Your 30 most recent finds will appear. The most recently-reviewed item will be delete the actual city from your detail map nor does it remove waypoints you created. 27 - Garmin 2620 | Owners Manual - Page 36
saving routes before you travel. See Saving a Route in this section of the manual. The Route Menu lists many options for creating routes. To access the Route Menu, press and hold the MENU/ROUTE key on your StreetPilot or remote for two seconds. You can also press MENU, then select the Route icon - Garmin 2620 | Owners Manual - Page 37
Setup to navigate the new route. Current Location, Use Map, and Find Thumbnail route map Your StreetPilot attempts to help you find your location (you are at work, home, at an out-of-town conference, for example). Use Map - Choose this option if you want to find your location by panning on the Map - Garmin 2620 | Owners Manual - Page 38
destination point. Then, tap the check mark that's located at the top right-hand corner of the Map page. Find - Choose this option if you want "HOME." For example, if you are driving in a new city or down an unknown street and you want to easily find your way home, simply press your StreetPilot's - Garmin 2620 | Owners Manual - Page 39
FIND from your StreetPilot, and then selecting the Waypoints icon. Find and select your HOME waypoint. When the Waypoint Review page appears, touch Delete. Select Yes to confirm that you really want to delete your HOME waypoint. Create a new HOME waypoint by following instructions above. Reference - Garmin 2620 | Owners Manual - Page 40
the route is complete. In either case, simply press and hold the MENU/ROUTE key on your StreetPilot or remote control to access the Route menu. Route List from the Route menu. A list of your saved routes will appear. Touch the name of your desired route. A new page will appear which gives you the - Garmin 2620 | Owners Manual - Page 41
StreetPilot or remote current location to your destination. The StreetPilot will recalculate and update your instructions. Note that, on some routes, the route you are currently taking might be the only reasonable option. In this case, you will not be able to take a detour. Also, your StreetPilot - Garmin 2620 | Owners Manual - Page 42
two options for finding your location: 'Use Map' or 'Find.' 3. Select an option from the 'Add Via Point' page. For more help on using these options, see Finding Places Using the FIND Menu in the previous section of this manual. When you have entered the desired location, an information page about - Garmin 2620 | Owners Manual - Page 43
nal destination (Kansas Speedway) by manually moving a via point into the via points, simply touch that point to Map or Find), select the location, and information about it will appear. Select Add As Via, and the location will appear as a via point, shown below. When you opt to have the StreetPilot - Garmin 2620 | Owners Manual - Page 44
the Midland Theater. Item under your map pointer Coordinates of your map pointer Distance and direction from the thumb tack to the map pointer . Touch a point anywhere on line that extends from the on-screen pointer to your new point will appear: The new location, the Bistro, is .1 miles and 244 - Garmin 2620 | Owners Manual - Page 45
To move the thumb tack to the new location (Bistro), touch the check mark at the top right of the Map page. The on-screen pointer (blue thumb tack) will appear at the new location. In our example below, then, the Bistro becomes the current point. Reference Measuring Distances You can measure - Garmin 2620 | Owners Manual - Page 46
screen contrast are adjustable. When operating the StreetPilot at extreme temperatures, you may find that minor adjustments are needed to obtain the clearest screen. To adjust screen backlighting and contrast: 1. Press the remote option stops satellite reception, speeds Map page drawing, and is used - Garmin 2620 | Owners Manual - Page 47
StreetPilot. If you do not like your trial settings, you can change some or all of them. See the following page for instructions on resetting all of your customized settings on the Map Setup page. Map tab Map North Up. To quickly change the map orientation, touch the Orientation icon in the upper - Garmin 2620 | Owners Manual - Page 48
You may reset (restore) map settings for each individual setup tab or for all tabs. First, make certain you are on the Map Setup page. If you want to reset one tab setting, make certain that tab is highlighted on the Map Setup page. Then, press the MENU key from your StreetPilot or remote. A Menu - Garmin 2620 | Owners Manual - Page 49
route (routing mode), you will see Routing tabs. Reference Hiding/Showing Data Tabs Mapping tabs are displayed when you are merely driving down the road with your StreetPilot turned on (driving mode). Use the Tab Setup and Hide Tab icons to customize and display/hide your data tabs. Access the - Garmin 2620 | Owners Manual - Page 50
StreetPilot (or remote) to access a Menu page. At the Menu page, select Tab Setup. A Tab Setup page that displays both a Mapping and a Routing tab will appear. Follow the instructions have selected types for all tabs, press QUIT on the remote or touch the X in the upper right corner. Note: When - Garmin 2620 | Owners Manual - Page 51
and driving instructions for the next turn when navigating a route. Odometer - Running total of distance traveled, based upon the distance between second-by-second location readings, since the Trip Computer was last reset. Satellite Status - Indicates your StreetPilot's current position fix with GPS - Garmin 2620 | Owners Manual - Page 52
settings: Menu page 1. From the 'System Setup Options' page, select the desired tab whose original settings you wish to restore by touching the tab name. 2. Press the unit or remote MENU key. A 'Menu' page will appear. 3. Select 'Reset Settings.' The original settings for that particular tab - Garmin 2620 | Owners Manual - Page 53
Recording, Percentage Full, Clear Track Language - Text Language, Voice Language Interface (2660 Only) - USB Format, Serial Format The following describes, (see page 43). Reference Customizing the Overall Setup Customize a setting by simply touching the white arrow associated with that setting. - Garmin 2620 | Owners Manual - Page 54
beep confirms that a key (such as MENU, FIND, SPEAK) on the unit or remote has been pressed. Guidance tab Off-Route Recalculation - Controls how the StreetPilot recalculates the route when you depart from its original instructions. • Prompted: You will be asked if you want the unit to recalculate the - Garmin 2620 | Owners Manual - Page 55
drive. • Off Road: A direct line from your current physical location to your destination is displayed. This may be useful when you are travelling outside of detailed map Route Preference page will not appear. Instead, your StreetPilot will use your current Route Reference Customizing Route Settings - Garmin 2620 | Owners Manual - Page 56
built into the StreetPilot's mapping software. Some roads have vehicle-based restrictions. For example, a street or gate may be accessible by emergency vehicles only, or a residential street may not allow commercial trucking traffic. By specifying which vehicle type you are driving, you optimize the - Garmin 2620 | Owners Manual - Page 57
box in the top right-hand corner of the page. A map of the avoided roads appears, along with a default name (usually street names). You can change this name by touching it and entering a new name by using the mini keyboard that appears. Place the map pointer over the "start point" as shown at left - Garmin 2620 | Owners Manual - Page 58
when navigating a route. Go to the Avoidance tab on the Routing Setup page. The example above shows two parts of a road that the driver corner." Position your map pointer onto the ending section of an area and touch the check box in the top right-hand corner of the page. A map of the avoided area - Garmin 2620 | Owners Manual - Page 59
continue to drive with your StreetPilot, it remembers and stores your driving habits. drive slower than expected on minor roads, then the Auto Set option should move the Minor Road Category preference bar towards Avoid to cause the unit to avoid these roads even more than normal. Select the Reset - Garmin 2620 | Owners Manual - Page 60
Setup Many time zones are pre-programmed into your StreetPilot eld appears in the Time Zone field. Touch UTC Offset and then manually enter the difference between UTC and the local StreetPilot functions that require significant operator attention and could become a distraction while driving such as map - Garmin 2620 | Owners Manual - Page 61
StreetPilot language setup feature allows you to change the languages used for on-screen text and for voice prompting. Text Language - This changes all on-screen setting does not affect the display of map data or user-entered data. Map data such as city, street, and point of interest names is always - Garmin 2620 | Owners Manual - Page 62
of the available settings below: • Garmin: The proprietary format used to exchange waypoint, route, track log data with a PC via serial connection. Use this format for software updates and to save mapping software to the StreetPilot's pre-programmed hard drive. • NMEA: Supports the input/output of - Garmin 2620 | Owners Manual - Page 63
icon, and an Info page will appear. Select the System Info icon and the System Info page will appear. Software updates for your StreetPilot can be found periodically at our Web site at www.garmin.com. Always check to make sure the version you wish to download is more current than the one you - Garmin 2620 | Owners Manual - Page 64
. GPS works in any weather condition, anywhere in the world, 24 hours a day. There are no subscription fees or setup charges to use GPS. GPS satellites circle the earth twice a day in a very precise orbit and transmit signal information to Earth. The GPS receiver that is located in your StreetPilot - Garmin 2620 | Owners Manual - Page 65
view is highlighted in pink. • Solid green signal strength bar: The GPS receiver has collected the necessary data and the satellite(s) is ready for signal strength bar). Once a fix has been calculated, the StreetPilot then updates your position, ground track, and ground speed by selecting and using - Garmin 2620 | Owners Manual - Page 66
antenna (such as driving between buildings) Not Usable - The StreetPilot is unusable, possibly due to incorrect initialization or abnormal satellite conditions. Turn the unit off and back on to reset and re-initialize the receiver if necessary. GPS is Off - The StreetPilot is being used indoors - Garmin 2620 | Owners Manual - Page 67
Up orientation to Track Up, which aligns the Map page to the current direction of travel (ground track). You can also touch the sky view on the GPS Information page to toggle between Track Up and North Up. New Location - Forces the StreetPilot to search for any available satellite to determine its - Garmin 2620 | Owners Manual - Page 68
corrected via WAAS satellites even before your StreetPilot communicates with the GPS satellites, as is the case with Satellite 5, above. 60 To select a new location: 1. Select 'New Location.' A window appears with two options ('Automatic' and 'Use Map'). 2. Select either 'Automatic' or 'Use - Garmin 2620 | Owners Manual - Page 69
Do not mount in front of an airbag field of deployment Select a suitable location for installation that allows routing of an external power cord and/or antenna cable (if needed) to the StreetPilot. If you are NOT using a remote antenna, be certain to select a location where the StreetPilot's antenna - Garmin 2620 | Owners Manual - Page 70
The non-skid friction mount base is designed to fit an uneven surface. Each of the four weighted tabs can be bent to fit the shape of your vehicle's dash. By fitting the base to your vehicle's dash, you maximize the contact area and minimize the likelihood that the StreetPilot will slide when making - Garmin 2620 | Owners Manual - Page 71
steps apply to both the non-skid friction mount base and the adhesive dash mount. 1. Slide the locking lever on the mounting base, to the left (unlocked position). 2. Attach the StreetPilot to the mounting base by sliding the disk on the bottom of the StreetPilot into the base until it clicks into - Garmin 2620 | Owners Manual - Page 72
the StreetPilot 2620/2660 Your vehicle adapter is a 12/24 volt DC adapter with an external speaker system. This adapter is your StreetPilot's power source when you are in a vehicle (the StreetPilot does not use batteries). Use the AC adapter (included) when using the StreetPilot indoors. 1. Locate - Garmin 2620 | Owners Manual - Page 73
OK to cut or splice past limiter. DR 1 - ORANGE Do NOT cut or splice the cable between the limiter and plug. DR 1 DR 2 Attaching the Dead Reckoning Cable to the Vehicle Adapter (StreetPilot 2660 only) 1. Locate the DR connector on the side of the vehicle adapter. The connector is "keyed" with - Garmin 2620 | Owners Manual - Page 74
OK, and then select the desired name. An information page will appear. 66 Using Diacritical Marks The European version of the StreetPilot 2620/2660 supports diacritical marks commonly used in many European languages. Diacritical marks are added to letters to indicate a special phonetic value that - Garmin 2620 | Owners Manual - Page 75
sterås, Sweden: 1. Press the unit or remote FIND key then select 'Cities.' 2. Touch the 'Filter' tab to display the mini StreetPilot assigns a waypoint name to this location. Keep in mind that, although diacritical marks appear when using the FIND key, they are not supported in most other StreetPilot - Garmin 2620 | Owners Manual - Page 76
your unit. Follow the instructions that came with your new mapping software to ensure proper installation of the maps to your computer and StreetPilot. In order to transfer maps to the pre-programmed hard drive in your unit, use the Garmin USB cable that came with your StreetPilot. Open the USB kit - Garmin 2620 | Owners Manual - Page 77
(Lodging, Services, Cities, etc.). The StreetPilot returns a list of results from one map family. For example, if you are searching for a restaurant in Paris, the StreetPilot will search from the City Select Europe map family and not the North American City Navigator map family. In this case, you - Garmin 2620 | Owners Manual - Page 78
you want the StreetPilot to use for the search, and it will return a list of cities or places only from this map family. Purchasing Additional MapSource Maps You can purchase additional MapSource mapping software from Garmin and download the maps to your pre-programmed hard drive. Your pre-installed - Garmin 2620 | Owners Manual - Page 79
data to the unit from the PC software has been completed. Database Error - A waypoint or route failed to store in memory. If the problem persists, return the unit to Garmin for service. Map Storage Error - Error with data on the internal disk drive. Return for repair. Map Storage Error: Bad Format - Garmin 2620 | Owners Manual - Page 80
Route Waypoint Memory is Full - The unit has no more space for map-based route waypoints (used for turns). Sunrise, Switching to Day Mode - The map is switching to the Day Mode display. Sunset, Switching to Night Mode - The map is switching to the Night Mode display. That Route Name is Already - Garmin 2620 | Owners Manual - Page 81
; no memory battery required Map Storage: Pre-Programmed Hard Drive Performance Receiver: 12 parallel channel receiver Acquisition Times* Warm: Approximately 15 seconds Cold: Approximately 45 seconds AutoLocate: Approximately 2 minutes Update Rate: Once per second, continuous GPS Accuracy - Garmin 2620 | Owners Manual - Page 82
.8v DC Fuse: AGC/3AG - 1.0 Amp Remote Control: Two AAA alkaline batteries (not included) Features Waypoints: 500 with name and graphic symbol Routes: Up to 50 stored Track Log: 2000 track log points Dead Reckoning: (StreetPilot 2660 only) Internal angular rate sensor, external speed sensor - Garmin 2620 | Owners Manual - Page 83
StreetPilot 2620/2660 complies with Part 15 of the FCC interference limits for Class B digital devices FOR HOME with the instructions, may cause StreetPilot 2620/2660 does not contain any user-serviceable parts. Repairs should only be made by an authorized Garmin service center. Unauthorized repairs - Garmin 2620 | Owners Manual - Page 84
review and understand all aspects of this owner's manual. Thoroughly practice operation using the simulator mode prior to actual use. When in actual use, carefully compare indications from the StreetPilot 2620/2660 to all available navigation sources, including the information from other street - Garmin 2620 | Owners Manual - Page 85
of the owner/operator of the StreetPilot 2620/2660 to secure the unit so that it will not interfere with the vehicle's operating controls, obstruct the driver's view of driving conditions, or cause damage or personal injury in the event of an accident. Do not mount the StreetPilot 2620/2660 over - Garmin 2620 | Owners Manual - Page 86
Appendix Software License Agreement Software License Agreement BY USING THE STREETPILOT 2620/2660, YOU AGREE TO BE BOUND BY THE TERMS AND CONDITIONS OF THE FOLLOWING SOFTWARE LICENSE AGREEMENT. PLEASE READ THIS AGREEMENT CAREFULLY. Garmin grants you a limited license to use the software embedded in - Garmin 2620 | Owners Manual - Page 87
to repair or replace the unit or software or offer a full refund of the purchase price at its sole discretion. SUCH REMEDY SHALL BE YOUR SOLE AND EXCLUSIVE REMEDY FOR ANY BREACH OF WARRANTY. To obtain warranty service, call your local Garmin-authorized dealer. Or call Garmin Customer Service at - Garmin 2620 | Owners Manual - Page 88
Remote 61 Antenna, Internal Manual vi Current Location 29 Current Route Page 15 Custom Avoids 49 Custom Routing Tab 47 D Dash Mount 61 Installing 62 Data Tabs 41 Date 52 Daylight Savings 52 DC Adapter 64 Dead Reckoning 65 Attaching DR Cable to Vehicle Adapter 65 Cable Wiring Installation 65 Driving - Garmin 2620 | Owners Manual - Page 89
24 FIND Key 3 Friction Mount 61 Installing 62 Fuse, Vehicle Adapter 64 G Garmin Web Site 79 General Tab 45 Getting Started Tutorial iv GPS Info Page 56, 57, 58, 59, 60 GPS is Off 58 Guidance Tab 46 H Hard Drive 1 Available Space In 70 Caring For 2 Heading 43 HOME Waypoint 30 I Information Icon - Garmin 2620 | Owners Manual - Page 90
List ii 82 PAGE Key 3 Panning 7 Panning Hand 7 Places, Finding 19 Planning a Trip 26 Poor GPS Coverage 58 Poor Satellite Reception 59 Power On/Off 5 Pre-Programmed Hard Drive. See Hard Drive Preface i Product Registration i Product Safety Information 75 R Recalculating a Route 33 Receiver Status 58 - Garmin 2620 | Owners Manual - Page 91
Software Upgrades 55 Software Version 55 Speaker Adapter 64 Speaker Volume 5 SPEAK Key 3 Specifications 74 Speed 16, 43 Stop Route 28 Storage 2 StreetPilot Caring For 2 Front and Rear View 1 Keypad Usage 3 Specs 73 Turning On or Off 3 Using Indoors 6 Sunrise 52 Sunset 52 System Info 55 System Setup - Garmin 2620 | Owners Manual - Page 92
- Garmin 2620 | Owners Manual - Page 93
For the latest free software updates (excluding map data) throughout the life of your Garmin products, visit the Garmin Web site at www.garmin.com. Copyright 2004, 2005 Garmin Ltd. or its subsidiaries Garmin International, Inc. 1200 East 151st Street, Olathe, Kansas 66062, U.S.A. Garmin (Europe) Ltd
-
 1
1 -
 2
2 -
 3
3 -
 4
4 -
 5
5 -
 6
6 -
 7
7 -
8
-
9
-
10
-
11
-
12
-
13
-
14
-
15
-
16
-
17
-
18
-
19
-
20
-
21
-
22
-
23
-
24
-
25
-
26
-
27
-
28
-
29
-
30
-
31
-
32
-
33
-
34
-
35
-
36
-
37
-
38
-
39
-
40
-
41
-
42
-
43
-
44
-
45
-
46
-
47
-
48
-
49
-
50
-
51
-
52
-
53
-
54
-
55
-
56
-
57
-
58
-
59
-
60
-
61
-
62
-
63
-
64
-
65
-
66
-
67
-
68
-
69
-
70
-
71
-
72
-
73
-
74
-
75
-
76
-
77
-
78
-
79
-
80
-
81
-
82
-
83
-
84
-
85
-
86
-
87
-
88
-
89
-
90
-
91
-
92
-
93
 |
 |
StreetPilot
®
2620/2660
portable car navigation
owner’s manual
StreetPilot 2660 pictured
StreetPilot 2620 not shown