Garmin GPSMAP 541s Owner's Manual - Page 37
Using Tracks, Navigate To, Guide To, Route To, Information, User Data, Routes, Edit Route, Delete
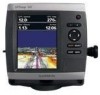 |
UPC - 753759096045
View all Garmin GPSMAP 541s manuals
Add to My Manuals
Save this manual to your list of manuals |
Page 37 highlights
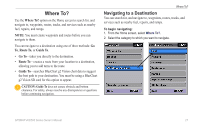
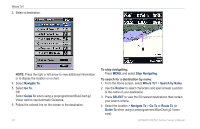
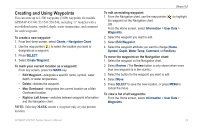
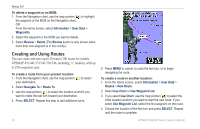
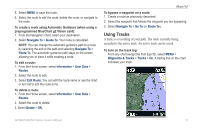
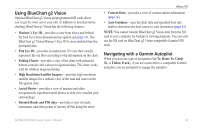
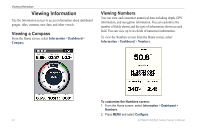
5. Select MENU to save the route. 6. Select the route to edit the route, delete the route, or navigate to the route. To create a route using Automatic Guidance (when using a preprogrammed BlueChart g2 Vision card): 1. From the Navigation chart, select your destination. 2. Select Navigate To > Guide To. Your route is calculated. NOTE: You can change the automatic guidance path to a route by selecting the end of the path and selecting Navigate To > Route To. The automatic guidance path stays on the screen, allowing you to trace it while creating a route. To edit a route: 1. From the Home screen, select Information > User Data > Routes. 2. Select the route to edit. 3. Select Edit Route. You can edit the route name or use the chart or turn list to edit the route turns. To delete a route: 1. From the Home screen, select Information > User Data > Routes. 2. Select the route to delete. 3. Select Delete > OK. Where To? To bypass a waypoint on a route: 1. Create a route as previously described. 2. Select the waypoint that follows the waypoint you are bypassing. 3. Select Navigate To > Go To (or Route To). Using Tracks A track is a recording of your path. The track currently being recorded is the active track. An active track can be saved. To turn on the track log: From any chart except the Fish Eye 3D, select MENU > Waypoints & Tracks > Tracks > On. A trailing line on the chart indicates your track. GPSMAP 400/500 Series Owner's Manual 31
-
 1
1 -
2
-
3
-
4
-
5
-
6
-
7
-
8
-
9
-
10
-
11
-
12
-
13
-
14
-
15
-
16
-
17
-
18
-
19
-
20
-
21
-
22
-
23
-
24
-
25
-
26
-
27
-
28
-
29
-
30
-
31
-
 32
32 -
 33
33 -
 34
34 -
 35
35 -
 36
36 -
 37
37 -
 38
38 -
 39
39 -
 40
40 -
 41
41 -
 42
42 -
43
-
44
-
45
-
46
-
47
-
48
-
49
-
50
-
51
-
52
-
53
-
54
-
55
-
56
-
57
-
58
-
59
-
60
-
61
-
62
-
63
-
64
-
65
-
66
-
67
-
68
-
69
-
70
-
71
-
72
-
73
-
74
-
75
-
76
-
77
-
78
-
79
-
80
-
81
-
82
-
83
-
84
-
85
-
86
-
87
-
88
 |
 |
