HP 300X HP Jetdirect Print Server Administrator's Guide (300x, 510x) - Page 50
h2:Head 2 - Configuring a Network Printer for Windows 2000/Server 2003 Systems
 |
UPC - 882780300842
View all HP 300X manuals
Add to My Manuals
Save this manual to your list of manuals |
Page 50 highlights
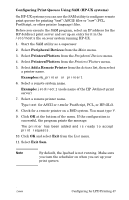
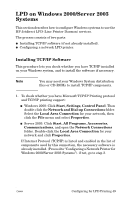
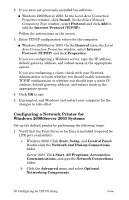
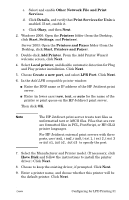
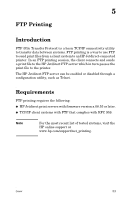
2. If you have not previously installed the software: ■ Windows 2000/Server 2003: In the Local Area Connection Properties window, click Install. In the Select Network Component Type window, select Protocol and click Add to add the Internet Protocol (TCP/IP). Follow the instructions on the screen. 3. Enter TCP/IP configuration values for the computer: ■ Windows 2000/Server 2003: On the General tab in the Local Area Connection Properties window, select Internet Protocol (TCP/IP) and click Properties. If you are configuring a Windows server, type the IP address, default gateway address, and subnet mask in the appropriate spaces. If you are configuring a client, check with your Network Administrator to learn whether you should enable automatic TCP/IP configuration or whether you should type a static IP address, default gateway address, and subnet mask in the appropriate spaces. 4. Click OK to exit 5. If prompted, exit Windows and restart your computer for the changes to take effect. Configuring a Network Printer for Windows 2000/Server 2003 Systems Set up the default printer by performing the following steps. 1. Verify that the Print Services for Unix is installed (required for LPR port availability): a. Windows 2000: Click Start, Setup, and Control Panel. Double-click the Network and Dial-up Connections folder. Server 2003: Click Start, All Programs, Accessories, Communications, and open the Network Connections folder. b. Click the Advanced menu and select Optional Networking Components. 50 Configuring for LPD Printing ENWW
-
 1
1 -
2
-
3
-
4
-
5
-
6
-
7
-
8
-
9
-
10
-
11
-
12
-
13
-
14
-
15
-
16
-
17
-
18
-
19
-
20
-
21
-
22
-
23
-
24
-
25
-
26
-
27
-
28
-
29
-
30
-
31
-
32
-
33
-
34
-
35
-
36
-
37
-
38
-
39
-
40
-
41
-
42
-
43
-
44
-
 45
45 -
 46
46 -
 47
47 -
 48
48 -
 49
49 -
 50
50 -
 51
51 -
 52
52 -
 53
53 -
 54
54 -
 55
55 -
56
-
57
-
58
-
59
-
60
-
61
-
62
-
63
-
64
-
65
-
66
-
67
-
68
-
69
-
70
-
71
-
72
-
73
-
74
-
75
-
76
-
77
-
78
-
79
-
80
-
81
-
82
-
83
-
84
-
85
-
86
-
87
-
88
-
89
-
90
-
91
-
92
-
93
-
94
-
95
-
96
-
97
-
98
-
99
-
100
-
101
-
102
 |
 |