HP 695c (English) Windows Users Guide - C4562-60287 - Page 75
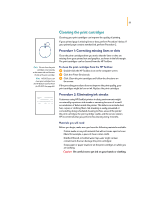
Steps to clean your printer
 |
View all HP 695c manuals
Add to My Manuals
Save this manual to your list of manuals |
Page 75 highlights
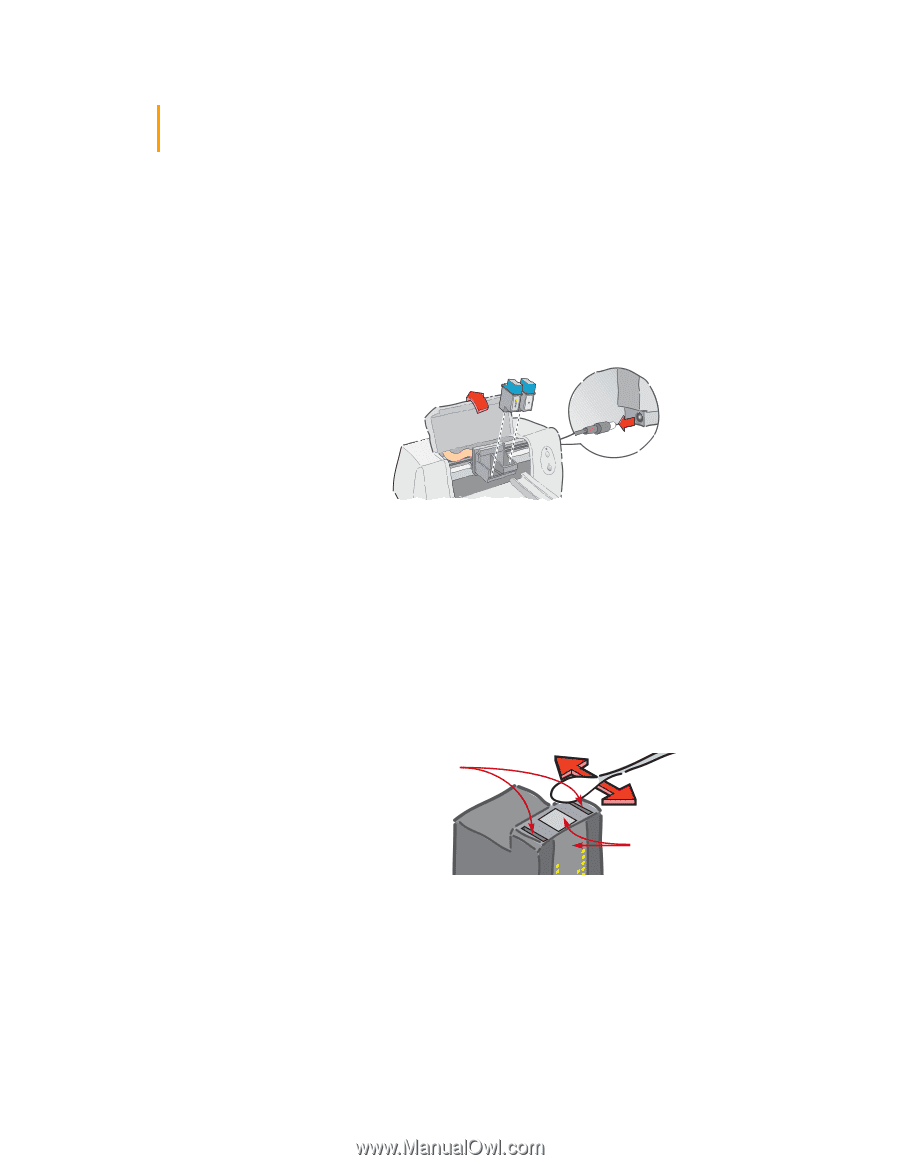
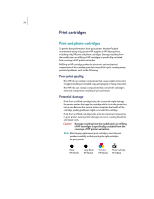
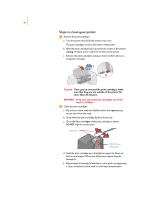
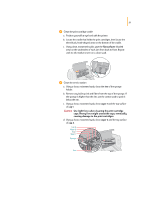
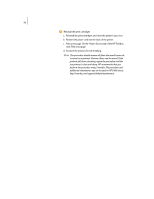
56 Steps to clean your printer ᕡ Remove the print cartridges a. Turn the printer on and lift the printer's top cover. The print cartridges move to the center of the printer. b. After the print cartridges have moved to the center of the printer, unplug the black power cord from the back of the printer. c. Remove the print cartridges and place them on their sides on a scrap piece of paper. a c b Caution Once you've removed the print cartridges, make sure that they are not outside of the printer for more than 30 minutes. WARNING Keep new and used print cartridges out of the reach of children. ᕢ Clean the print cartridges a. Dip a clean cotton swab into distilled water and squeeze any excess water from the swab. b. Grasp the black print cartridge by the colored cap. c. Clean the face and edges of the print cartridge as shown. DO NOT wipe the nozzle plate. Clean here. DO NOT clean nozzle plate. d. Hold the print cartridge up to the light to inspect for fibers on the face and edges. If fibers are still present, repeat steps 2a through 2c. e. Repeat steps 2a through 2d with the tri-color print cartridge using a clean, moistened cotton swab to avoid any contamination.
-
 1
1 -
2
-
3
-
4
-
5
-
6
-
7
-
8
-
9
-
10
-
11
-
12
-
13
-
14
-
15
-
16
-
17
-
18
-
19
-
20
-
21
-
22
-
23
-
24
-
25
-
26
-
27
-
28
-
29
-
30
-
31
-
32
-
33
-
34
-
35
-
36
-
37
-
38
-
39
-
40
-
41
-
42
-
43
-
44
-
45
-
46
-
47
-
48
-
49
-
50
-
51
-
52
-
53
-
54
-
55
-
56
-
57
-
58
-
59
-
60
-
61
-
62
-
63
-
64
-
65
-
66
-
67
-
68
-
69
-
 70
70 -
 71
71 -
 72
72 -
 73
73 -
 74
74 -
 75
75 -
 76
76 -
 77
77 -
 78
78 -
 79
79 -
 80
80 -
81
-
82
-
83
-
84
-
85
-
86
-
87
-
88
-
89
-
90
-
91
-
92
-
93
-
94
-
95
 |
 |