HP A6430f Getting Started - Page 155
Copying a disc, Copying a disc using two disc drives
 |
UPC - 883585738946
View all HP A6430f manuals
Add to My Manuals
Save this manual to your list of manuals |
Page 155 highlights
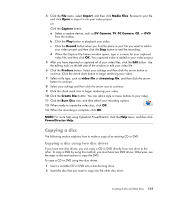
4 Click the File menu, select Import, and then click Media Files. Browse to your file and click Open to import it into your video project. Or Click the Capture button: a Select a capture device, such as DV Camera, TV, PC Camera, CD, or DVD from the toolbar. b Click the Play button to playback your video. c Click the Record button when you find the place in your file you want to add to your video project and then click the Stop button to end the recording. d When the Capture File Name window opens, type in a name for your captured video file, and then click OK. Your captured video is added to your video project. 5 After you have imported or captured all of your video files, click the Edit button. Use the editing tools on the left side of the window to edit your video file. 6 Click the Produce button. Select your settings and then click the arrow button to continue. Click the check mark button to begin rendering your video. 7 Select a file type, such as video file or streaming file, and then click the arrow button to continue. 8 Select your settings and then click the arrow icon to continue. 9 Click the check mark icon to begin rendering your video. 10 Click the Create Disc button. You can add a style or menu buttons to your video. 11 Click the Burn Disc icon, and then select your recording options. 12 When ready to create the video disc, click OK. 13 When the recording is complete, click OK. NOTE: For more help using CyberLink PowerDirector, click the Help menu, and then click PowerDirector Help. Copying a disc The following section explains how to make a copy of an existing CD or DVD. Copying a disc using two disc drives If you have two disc drives, you can copy a CD or DVD directly from one drive to the other. To copy a DVD by using this method, you must have two DVD drives. Otherwise, use the steps in the next section to copy the DVD. To copy a CD or DVD using two disc drives: 1 Insert a writable CD or DVD into a disc-burning drive. 2 Insert the disc that you want to copy into the other disc drive. Creating Audio and Data Discs 145
-
 1
1 -
2
-
3
-
4
-
5
-
6
-
7
-
8
-
9
-
10
-
11
-
12
-
13
-
14
-
15
-
16
-
17
-
18
-
19
-
20
-
21
-
22
-
23
-
24
-
25
-
26
-
27
-
28
-
29
-
30
-
31
-
32
-
33
-
34
-
35
-
36
-
37
-
38
-
39
-
40
-
41
-
42
-
43
-
44
-
45
-
46
-
47
-
48
-
49
-
50
-
51
-
52
-
53
-
54
-
55
-
56
-
57
-
58
-
59
-
60
-
61
-
62
-
63
-
64
-
65
-
66
-
67
-
68
-
69
-
70
-
71
-
72
-
73
-
74
-
75
-
76
-
77
-
78
-
79
-
80
-
81
-
82
-
83
-
84
-
85
-
86
-
87
-
88
-
89
-
90
-
91
-
92
-
93
-
94
-
95
-
96
-
97
-
98
-
99
-
100
-
101
-
102
-
103
-
104
-
105
-
106
-
107
-
108
-
109
-
110
-
111
-
112
-
113
-
114
-
115
-
116
-
117
-
118
-
119
-
120
-
121
-
122
-
123
-
124
-
125
-
126
-
127
-
128
-
129
-
130
-
131
-
132
-
133
-
134
-
135
-
136
-
137
-
138
-
139
-
140
-
141
-
142
-
143
-
144
-
145
-
146
-
147
-
148
-
149
-
 150
150 -
 151
151 -
 152
152 -
 153
153 -
 154
154 -
 155
155 -
 156
156 -
 157
157 -
 158
158 -
 159
159 -
 160
160 -
161
-
162
-
163
-
164
-
165
-
166
-
167
-
168
-
169
-
170
-
171
-
172
-
173
-
174
-
175
-
176
-
177
-
178
-
179
-
180
-
181
-
182
-
183
-
184
-
185
-
186
-
187
-
188
-
189
-
190
-
191
-
192
-
193
-
194
-
195
-
196
-
197
-
198
-
199
-
200
-
201
-
202
-
203
-
204
-
205
-
206
-
207
-
208
-
209
-
210
-
211
-
212
-
213
-
214
-
215
-
216
 |
 |