HP Dc5000 Desktop Management Guide
HP Dc5000 - Compaq Business Desktop Manual
 |
UPC - 829160313740
View all HP Dc5000 manuals
Add to My Manuals
Save this manual to your list of manuals |
HP Dc5000 manual content summary:
- HP Dc5000 | Desktop Management Guide - Page 1
Desktop Management Guide Business Desktops Document Part Number: 312947-002 September 2003 This guide provides definitions and instructions for using security and Intelligent Manageability features that are preinstalled on select models. - HP Dc5000 | Desktop Management Guide - Page 2
, L.P. HP, Hewlett Packard, and the Hewlett-Packard logo are trademarks of Hewlett-Packard Company in the U.S. and other countries. Compaq and the Compaq logo are trademarks of Hewlett-Packard Development Company, L.P. in the U.S. and other countries. Microsoft, MS-DOS, Windows, and Windows NT are - HP Dc5000 | Desktop Management Guide - Page 3
Contents Desktop Management Guide Initial Configuration and Deployment 2 Remote System Installation 3 Software Updating and Management 4 HP Client Manager Software 4 Altiris Solutions 4 Altiris PC Transplant Pro 5 System Software Manager 6 Proactive Change Notification 6 ActiveUpdate 6 ROM - HP Dc5000 | Desktop Management Guide - Page 4
Contents Fingerprint Identification Technology 48 Fault Notification and Recovery 48 Drive Protection System 48 Surge-Tolerant Power Supply 49 Thermal Sensor 49 Index iv www.hp.com Desktop Management Guide - HP Dc5000 | Desktop Management Guide - Page 5
, and manage desktops, workstations, and notebook PCs. HP works closely with leading management software solution providers in the tracking and security ■ Fault notification and recovery ✎ Support for specific features described in this guide may vary by model or software version. Desktop Management - HP Dc5000 | Desktop Management Guide - Page 6
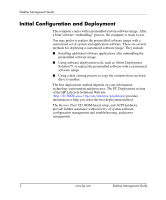
the best deployment method. The Restore Plus! CD, ROM-based setup, and ACPI hardware provide further assistance with recovery of system software, configuration management and troubleshooting, and power management. 2 www.hp.com Desktop Management Guide - HP Dc5000 | Desktop Management Guide - Page 7
BIOS settings To initiate Remote System Installation, press F12 when the F12 = Network Service Boot message appears in the lower-right corner of the HP logo screen. Follow the instructions HP PCs the most manageable client PCs in the enterprise environment. Desktop Management Guide www.hp.com 3 - HP Dc5000 | Desktop Management Guide - Page 8
drivers and ROM BIOS ■ Remote changing of boot order For more information on the HP Client Manager, visit http://h18000.www1.hp.com/im/client_mgr.html. Altiris Solutions HP Migration ❏ Microsoft Windows 2000 or Windows XP Professional or Home Edition migration 4 www.hp.com Desktop Management Guide - HP Dc5000 | Desktop Management Guide - Page 9
Desktop Management Guide ❏ System deployment ❏ Personality migrations ■ Help Desk and Problem Resolution ❏ Managing help desk tickets ❏ Remote troubleshooting ❏ Remote problem resolution ❏ Client disaster recovery ■ Software and Operations Management ❏ Ongoing desktop management ❏ HP system SW - HP Dc5000 | Desktop Management Guide - Page 10
Desktop Management Guide System Software Manager System Software Manager (SSM) is a utility that lets you a special icon on the driver download Web site and on the Support Software CD. To download the utility or to obtain more information on SSM, visit http://h18000.www1.hp.com/im/ssmwp.html. - HP Dc5000 | Desktop Management Guide - Page 11
personal computers, results in a consistent deployment of and greater control over HP PC ROM images over the network. It also results in greater refer to the HP Client Manager Software or System Software Manager at http://h18000.www1.hp.com/im/prodinfo.html. Desktop Management Guide www.hp.com 7 - HP Dc5000 | Desktop Management Guide - Page 12
Desktop Management Guide HPQFlash The HPQFlash utility is used to locally update or restore the System ROM on individual PCs through a Windows operating system. For more information on HPQFlash, visit http://h18000.www1.hp.com/support/files/hpcpqdt/us/download/ 18607.html. FailSafe Boot Block ROM - HP Dc5000 | Desktop Management Guide - Page 13
Desktop Management Guide 7. If the system successfully starts from the diskette and successfully reprograms the ROM, then the three keyboard lights will turn successful. Turn power off, then on to reboot. ✎ Diagnostic lights do not flash on USB keyboards. Desktop Management Guide www.hp.com 9 - HP Dc5000 | Desktop Management Guide - Page 14
a diskette drive or a supported USB flash media device, such as an HP Drive Key. Copying to configuration to copy. Turn on or restart the computer. If you are in Windows, click Start > Shut Down > Restart the Computer. 2. Press the instructions on the screen. 10 www.hp.com Desktop Management Guide - HP Dc5000 | Desktop Management Guide - Page 15
Windows XP is not available to use to create a bootable diskette, use the method for copying to a single computer instead (see "Copying to Single Computer" on page 10). 1. Create a bootable diskette or USB flash media device. See "Bootable Diskette" on page 12, "Supported Guide www.hp.com 11 - HP Dc5000 | Desktop Management Guide - Page 16
Restart the computer when the configuration is complete. Creating a Bootable Device Bootable Diskette ✎ These instructions are for Windows XP Professional and Home Edition. Windows 2000 does not support the creation of bootable diskettes. 1. Insert a diskette into the diskette drive. 2. Click Start - HP Dc5000 | Desktop Management Guide - Page 17
or N1000c Notebooks ❏ Compaq Presario 1500 or 2800 Notebooks Depending on the individual BIOS, future systems may also support booting to the HP Drive Key. Ä CAUTION ❏ 16MB HP Drive Key ❏ 32MB HP Drive Key ❏ 32MB DiskOnKey ❏ 64MB HP Drive Key ❏ 64MB DiskOnKey Desktop Management Guide www.hp.com 13 - HP Dc5000 | Desktop Management Guide - Page 18
Desktop Management Guide ❏ 128MB HP Drive Key ❏ 128MB DiskOnKey ■ A bootable DOS diskette with the , reboot the computer, and proceed from step 4. If none are found, either the system does not support the Drive Key or the Drive Key is defective. DO NOT proceed in attempting to make the Drive Key - HP Dc5000 | Desktop Management Guide - Page 19
Desktop Management Guide After the system files have been transferred, SYS will return to the A:\ be changed in the Computer Setup (F10) Utility. If you have used a DOS version from Windows 9x, you may see a brief Windows logo screen. If you do not want this screen, add a zero-length file named LOGO. - HP Dc5000 | Desktop Management Guide - Page 20
Guide HP Compaq Business Desktop d530 Series - Ultra-slim Desktop, Small Form Factor, or Convertible Minitower ❏ Compaq Evo N400c, N410c, N600c, N610c, N620c, N800c, or N1000c Notebooks ❏ Compaq Presario 1500 or 2800 Notebooks Depending on the individual BIOS, future systems may also support - HP Dc5000 | Desktop Management Guide - Page 21
Desktop Management Guide 4. Plug in the power cord and turn on the computer. As soon as the monitor light turns green, press the F10 key to go on its original IRQ. 15. Save the changes and exit. The computer will boot to the USB flash media device as drive C. Desktop Management Guide www.hp.com 17 - HP Dc5000 | Desktop Management Guide - Page 22
. If you have used a DOS version from Windows 9x, you may see a brief Windows logo screen. If you do not want this screen, add a zero-length file named LOGO.SYS to the root directory of the Drive Key. Return to "Copying to Multiple Computers" on page 11. 18 www.hp.com Desktop Management Guide - HP Dc5000 | Desktop Management Guide - Page 23
Desktop Management Guide Dual-State Power Button With Advanced Configuration and Power Interface (ACPI) enabled for Windows 2000 and Windows XP Professional and Home Edition, the power button can function either as an on to or loss of data on the hard drive. Desktop Management Guide www.hp.com 19 - HP Dc5000 | Desktop Management Guide - Page 24
download the software from http://www.hp.com/support. The Web site contains the latest device drivers, utilities, and flashable ROM images needed to run the latest Microsoft Windows operating system on the HP computer. Building Blocks and Partners HP management solutions integrate with other systems - HP Dc5000 | Desktop Management Guide - Page 25
, using the Computer Setup Utilities. See the Computer Setup (F10) Utility Guide included with the computer for additional information and instructions on using the Computer Setup Utilities. ■ Remotely, using HP Client Manager or System Software Manager. This software enables the secure, consistent - HP Dc5000 | Desktop Management Guide - Page 26
Desktop Management Guide The following table and sections refer to managing security features of the menu. ✎ For more information about Computer Setup, see the Computer Setup (F10) Utility Guide. Support for security features may vary depending on the specific computer configuration. 22 www - HP Dc5000 | Desktop Management Guide - Page 27
Management Guide Security cover or side panel has been removed. Refer to the Hardware Reference Guide on the Documentation Library CD for more information about this feature. This feature Guide. ✎ For more information about Computer Setup, see the Computer Setup (F10) Utility Guide. Support - HP Dc5000 | Desktop Management Guide - Page 28
Desktop Management Guide Security Features Overview (Continued) Feature Purpose How It Is Established Ownership For more information about Computer Setup, see the Computer Setup (F10) Utility Guide. Support for security features may vary depending on the specific computer configuration. 24 www - HP Dc5000 | Desktop Management Guide - Page 29
Management Guide Password the password is entered. 1. Turn on or restart the computer. If you are in Windows, click Start > Shut Down > Restart the Computer. 2. Press the F10 key as Password and follow the instructions on the screen. 4. Before exiting, click File > Save Changes and Exit. - HP Dc5000 | Desktop Management Guide - Page 30
rebooted. 1. Turn on or restart the computer. If you are in Windows, click Start > Shut Down > Restart the Computer. 2. Press the utility. 3. Select Security, then Power-On Password and follow the instructions on the screen. 4. Before exiting, click File > Save Changes hp.com Desktop Management Guide - HP Dc5000 | Desktop Management Guide - Page 31
to enter it each time you run Computer Setup. 1. Turn on or restart the computer. If you are in Windows, click Start > Shut Down > Restart the Computer. 2. Press the F10 key as soon as the monitor light , then turn it on again before you can continue. Desktop Management Guide www.hp.com 27 - HP Dc5000 | Desktop Management Guide - Page 32
Guide Changing a Power-On or Setup Password If the system is equipped with an embedded security device, refer to "Embedded Security" on page 30. 1. Turn on or restart the computer. If you are in Windows, using the Security options in Computer Setup. 28 www.hp.com Desktop Management Guide - HP Dc5000 | Desktop Management Guide - Page 33
Guide Deleting a Power-On or Setup Password If the system is equipped with an embedded security device, refer to "Embedded Security" on page 30. 1. Turn on or restart the computer. If you are in Windows Bosnia-Herzegovina, Croatia, Slovenia, and Yugoslavia Desktop Management Guide www.hp.com 29 - HP Dc5000 | Desktop Management Guide - Page 34
, you cannot access the computer. Refer to the Troubleshooting Guide for instructions on clearing passwords. If the system is equiped with desktops as Configured-To-Order (CTO) options. It is intended for HP customers for whom compromised data is the paramount concern: unauthorized access to - HP Dc5000 | Desktop Management Guide - Page 35
Desktop Management Guide A ProtectTools Embedded Security-enabled computer complements and enhances the security capabilities inherent in Microsoft Windows 2000 or Windows XP Professional or Home Edition. For key to move to Setup Password. Press Enter. Desktop Management Guide www.hp.com 31 - HP Dc5000 | Desktop Management Guide - Page 36
up (see "Take Ownership and Emergency Recovery Token"). Only select Reset when instructed to do so in the procedure to recover encrypted data (see "Recovering Encrypted 1. If you are using Windows XP Professional or Home Edition, click Start > All Programs > HP ProtectTools Embedded Security Tools > - HP Dc5000 | Desktop Management Guide - Page 37
Desktop Management Guide ✎ Type carefully; for security reasons, the characters typed do not appear on the screen. 4. Click Next to accept Wizard check box is selected, then click Finish. The User Initialization Wizard starts now automatically. Desktop Management Guide www.hp.com 33 - HP Dc5000 | Desktop Management Guide - Page 38
Desktop Management Guide Basic User During user initialization, the Basic User Password is created. Windows XP Professional or Home Edition, click Start > All Programs > HP ProtectTools Embedded Security Tools > User Initialization Wizard. If you are using Windows 2000, click Start > Programs > HP - HP Dc5000 | Desktop Management Guide - Page 39
Desktop Management Guide Recovering Encrypted Data To recover data after replacement of the ProtectTools chip, you must have the following: ■ SPEmRecToken.xml-the key to move to Save Changes and Exit. Press Enter, then press F10 to confirm. c. Go to step 1. Desktop Management Guide www.hp.com 35 - HP Dc5000 | Desktop Management Guide - Page 40
Desktop Management Guide If two selections are available, go to step 7. 7. Use the up or down arrow key to move to Reset to Factory Settings-Do Not File. Use the up or down arrow key to move to Save Changes and Exit. Press Enter, then press F10 to confirm. 36 www.hp.com Desktop Management Guide - HP Dc5000 | Desktop Management Guide - Page 41
Desktop Management Guide 17. After Windows opens: If you are using Windows XP Professional or Home Edition, click Start > All Programs > HP ProtectTools Embedded Security Tools > Embedded Security Initialization Wizard. If you are using Windows 2000, click Start > Programs > HP ProtectTools - HP Dc5000 | Desktop Management Guide - Page 42
Click Finish. 40. If you are using Windows XP Professional or Home Edition, click Start > All Programs > HP ProtectTools Embedded Security Tools > User Initialization Wizard. If you are using Windows 2000, click Start > Programs > HP ProtectTools Embedded Security Tools > User Initialization Wizard - HP Dc5000 | Desktop Management Guide - Page 43
Setup. It is only available when DriveLock-capable hard drives are detected. DriveLock is intended for HP customers for whom data security is the paramount concern. For such customers, the cost of the corporate information system or is regularly backed up. Desktop Management Guide www.hp.com 39 - HP Dc5000 | Desktop Management Guide - Page 44
Desktop Management Guide In the event that both DriveLock passwords are lost, the hard can always be used to reset the user password and regain access to the hard drive. HP recommends that corporate system administrators who choose to enable DriveLock also establish a corporate policy for setting - HP Dc5000 | Desktop Management Guide - Page 45
checks for unauthorized software, other asset control functions, and support. For users with less stringent security requirements, HP does not recommend enabling DriveLock. Users in this category Computer Setup, see the Computer Setup (F10) Utility Guide. Desktop Management Guide www.hp.com 41 - HP Dc5000 | Desktop Management Guide - Page 46
Guide Setting the Smart Cover Sensor Protection Level To set the Smart Cover Sensor protection level, complete the following steps: 1. Turn on or restart the computer. If you are in Windows Smart Cover, and follow the instructions on the screen. 4. Before featured on select HP computers. This - HP Dc5000 | Desktop Management Guide - Page 47
Desktop Management Guide Locking the Smart Cover Lock To activate and lock the Smart Cover Lock, complete the following steps: 1. Turn on or restart the computer. If you are in Windows, click Start > Shut 4. Before exiting, click File > Save Changes and Exit. Desktop Management Guide www.hp.com 43 - HP Dc5000 | Desktop Management Guide - Page 48
a specialized tool available from HP. Be prepared; order this key before you need one at an authorized reseller or service provider. To obtain the FailSafe Key, do any one of the following: ■ Contact an authorized HP reseller or service provider. ■ - HP Dc5000 | Desktop Management Guide - Page 49
the current bootable disk while in MS-DOS or Windows Safe Mode. ✎ Most operating systems control access to the MBR of the current bootable disk; the BIOS cannot prevent changes that may occur while the operating key to enter Setup to configure MBR Security. Desktop Management Guide www.hp.com 45 - HP Dc5000 | Desktop Management Guide - Page 50
Desktop Management Guide Upon entering Computer Setup, you must ■ Save the MBR of the current bootable disk; ■ Restore the previously saved MBR; or current bootable disk; or ■ Disable the MBR Security feature. You must know the setup password, if one exists. 46 www.hp.com Desktop Management Guide - HP Dc5000 | Desktop Management Guide - Page 51
the following steps: 1. Turn on or restart the computer. If you are in Windows, click Start > Shut Down > Restart the Computer. 2. Press the F10 key as For illustrated instructions, please see the Hardware Reference Guide on the Documentation Library CD. Desktop Management Guide www.hp.com 47 - HP Dc5000 | Desktop Management Guide - Page 52
onto the drive. Each time DPS is run, test results are written to the hard drive. The service provider can use this information to help diagnose conditions that caused you to run the DPS software. Refer to the Troubleshooting Guide for instructions on using DPS. 48 www.hp.com Desktop Management - HP Dc5000 | Desktop Management Guide - Page 53
Desktop Management Guide Surge-Tolerant Power Supply An integrated surge-tolerant power supply provides greater reliability when the computer is hit with an exceeded, which gives you time to take action before internal components are damaged or data is lost. Desktop Management Guide www.hp.com 49 - HP Dc5000 | Desktop Management Guide - Page 54
Desktop Management Guide 50 www.hp.com Desktop Management Guide - HP Dc5000 | Desktop Management Guide - Page 55
Pro 5 asset tracking 21 B bootable device creating 12 to 17 diskette 12 DiskOnKey 13 to 18 HP Drive Key 13 to 18 USB flash media device 13 to 18 bootable disk, important information 47 technology 48 formatting disk, important information 47 Desktop Management Guide www.hp.com Index-1 - HP Dc5000 | Desktop Management Guide - Page 56
Index H hard drives, diagnostic tool 48 HP Client Manager 4 HP Drive Key see also DiskOnKey bootable 13 to 18 I initial configuration 2 System Installation, accessing 3 ROM invalid 8 keyboard lights, table 9 Remote Flash 7 upgrading 7 S security Index-2 www.hp.com Desktop Management Guide - HP Dc5000 | Desktop Management Guide - Page 57
Technology 48 Finterprint Identification Technology 48 HP Client Manager 4 HPQFlash 8 PC deployment 2 Proactive Change Notification 6 Remote ROM Flash 7 replicating setup 12 ROM Flash 7 ROMPaq images 7 software support 20 System Software Manager (SSM) 6 Desktop Management Guide www.hp.com Index-3 - HP Dc5000 | Desktop Management Guide - Page 58
Index Index-4 www.hp.com Desktop Management Guide
-
 1
1 -
 2
2 -
 3
3 -
 4
4 -
 5
5 -
 6
6 -
 7
7 -
8
-
9
-
10
-
11
-
12
-
13
-
14
-
15
-
16
-
17
-
18
-
19
-
20
-
21
-
22
-
23
-
24
-
25
-
26
-
27
-
28
-
29
-
30
-
31
-
32
-
33
-
34
-
35
-
36
-
37
-
38
-
39
-
40
-
41
-
42
-
43
-
44
-
45
-
46
-
47
-
48
-
49
-
50
-
51
-
52
-
53
-
54
-
55
-
56
-
57
-
58
 |
 |

Desktop Management Guide
Business Desktops
Document Part Number: 312947-002
September 2003
This guide provides definitions and instructions for using security and
Intelligent Manageability features that are preinstalled on select
models.