HP Integrity rx8620 Installation Guide, Sixth Edition - HP Integrity rx8620 Se - Page 45
Attaching a Caster Wheel to the Server, Front Caster
 |
View all HP Integrity rx8620 manuals
Add to My Manuals
Save this manual to your list of manuals |
Page 45 highlights
Installation Wheel Kit Installation 7. Remove two of the eight screws from the plastic pouch. Attach one wheel caster to the front of the server. Figure 2-9 Attaching a Caster Wheel to the Server Front Caster 8. Attach the remaining front caster to the server using two more screws supplied in the plastic pouch. 9. Remove the rear cushion at the rear of the server. Do not remove the remaining cushions. 10. Mount the two rear casters to the server using the remaining four screws. 11. Obtain the plywood ramp from the wheel kit. Chapter 2 45
-
 1
1 -
2
-
3
-
4
-
5
-
6
-
7
-
8
-
9
-
10
-
11
-
12
-
13
-
14
-
15
-
16
-
17
-
18
-
19
-
20
-
21
-
22
-
23
-
24
-
25
-
26
-
27
-
28
-
29
-
30
-
31
-
32
-
33
-
34
-
35
-
36
-
37
-
38
-
39
-
 40
40 -
 41
41 -
 42
42 -
 43
43 -
 44
44 -
 45
45 -
 46
46 -
 47
47 -
 48
48 -
 49
49 -
 50
50 -
51
-
52
-
53
-
54
-
55
-
56
-
57
-
58
-
59
-
60
-
61
-
62
-
63
-
64
-
65
-
66
-
67
-
68
-
69
-
70
-
71
-
72
-
73
-
74
-
75
-
76
-
77
-
78
-
79
-
80
-
81
-
82
-
83
-
84
-
85
-
86
-
87
-
88
-
89
-
90
-
91
-
92
-
93
-
94
-
95
-
96
 |
 |

Chapter 2
Installation
Wheel Kit Installation
45
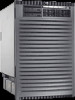
7. Remove two of the eight screws from the plastic pouch. Attach one wheel caster to the front of the server.
Figure 2-9
Attaching a Caster Wheel to the Server
8. Attach the remaining front caster to the server using two more screws supplied in the plastic pouch.
9. Remove the rear cushion at the rear of the server. Do not remove the remaining cushions.
10. Mount the two rear casters to the server using the remaining four screws.
11. Obtain the plywood ramp from the wheel kit.
Front Caster