HP Integrity rx8620 Installation Guide, Sixth Edition - HP Integrity rx8620 Se - Page 51
Installing the Top Cover, Step 5.
 |
View all HP Integrity rx8620 manuals
Add to My Manuals
Save this manual to your list of manuals |
Page 51 highlights
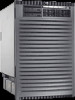
Step 5. Place the cover in a safe location. Figure 2-15 Top Cover Detail Installation Wheel Kit Installation Retaining Screw Installing the Top Cover Step 1. Orient the cover according to its position on the chassis. Step 2. Slide the cover into position using a slow, firm pressure to properly seat the cover. Step 3. Tighten the blue retaining screws securing the cover to the chassis. Chapter 2 51
-
 1
1 -
2
-
3
-
4
-
5
-
6
-
7
-
8
-
9
-
10
-
11
-
12
-
13
-
14
-
15
-
16
-
17
-
18
-
19
-
20
-
21
-
22
-
23
-
24
-
25
-
26
-
27
-
28
-
29
-
30
-
31
-
32
-
33
-
34
-
35
-
36
-
37
-
38
-
39
-
40
-
41
-
42
-
43
-
44
-
45
-
 46
46 -
 47
47 -
 48
48 -
 49
49 -
 50
50 -
 51
51 -
 52
52 -
 53
53 -
 54
54 -
 55
55 -
 56
56 -
57
-
58
-
59
-
60
-
61
-
62
-
63
-
64
-
65
-
66
-
67
-
68
-
69
-
70
-
71
-
72
-
73
-
74
-
75
-
76
-
77
-
78
-
79
-
80
-
81
-
82
-
83
-
84
-
85
-
86
-
87
-
88
-
89
-
90
-
91
-
92
-
93
-
94
-
95
-
96
 |
 |

Chapter 2
Installation
Wheel Kit Installation
51
Step 5.
Place the cover in a safe location.
Figure 2-15
Top Cover Detail
Installing the Top Cover
Step 1.
Orient the cover according to its position on the chassis.
Step 2.
Slide the cover into position using a slow, firm pressure to properly seat the cover.
Step 3.
Tighten the blue retaining screws securing the cover to the chassis.
Retaining Screw