HP Photosmart All-in-One Printer - B109 User Guide - Page 49
Print and evaluate a print quality report
 |
View all HP Photosmart All-in-One Printer - B109 manuals
Add to My Manuals
Save this manual to your list of manuals |
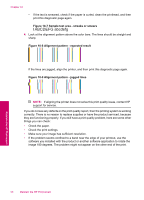
Page 49 highlights
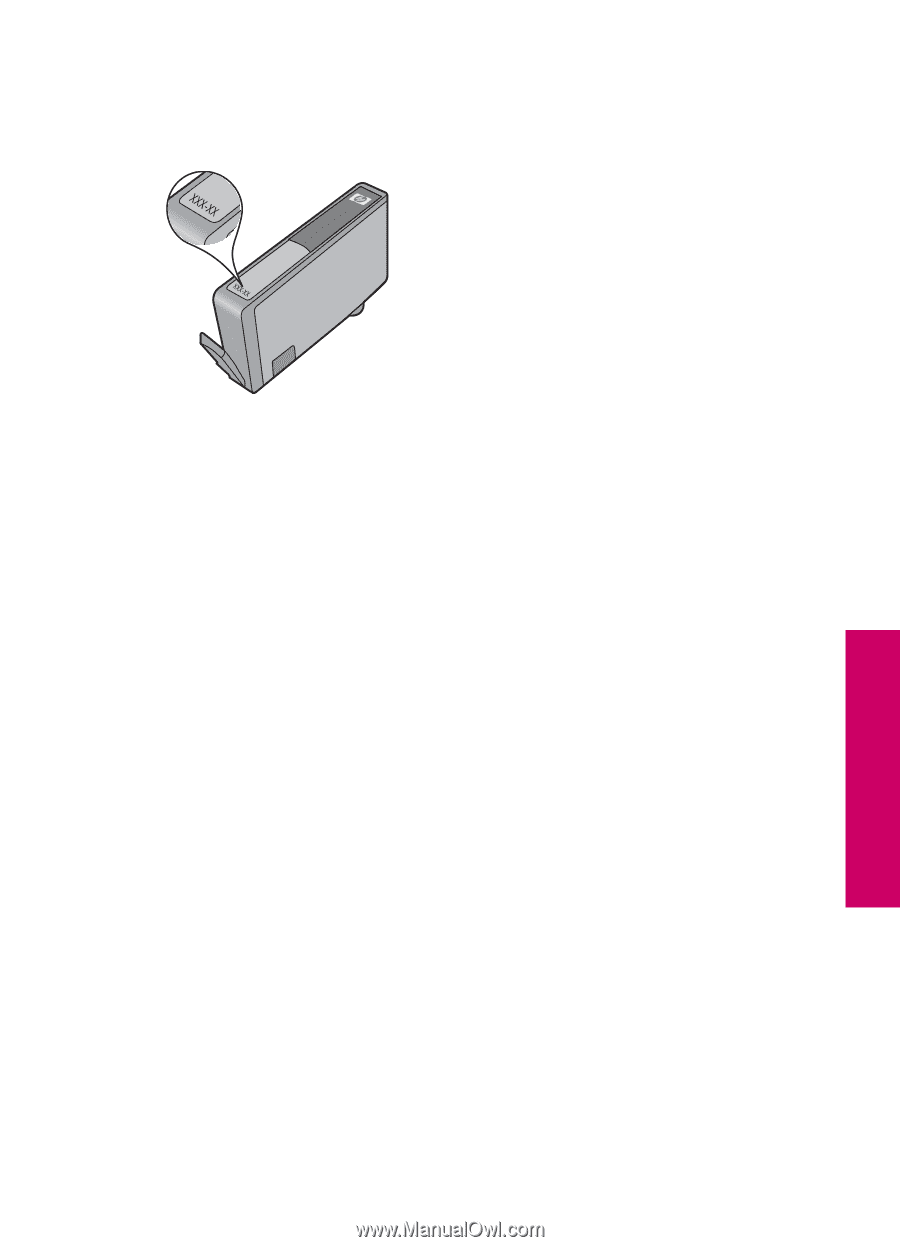
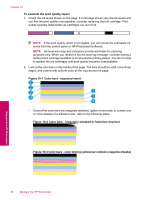
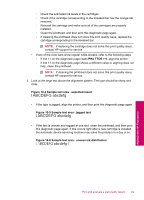
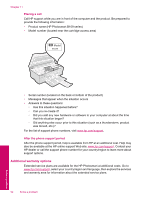
During the warranty period the product is covered as long as the HP ink is not depleted and the end of warranty date has not been reached. The end of warranty date, in YYYY/ MM/DD format, may be found on the product as indicated: Maintain the HP Photosmart For a copy of the HP Limited Warranty Statement, see the printed documentation that came with the product. Print and evaluate a print quality report Print quality issues can occur for a variety of reasons. You might be using the wrong software settings or printing a poor quality source file, or there might be a problem with the printing system in the HP Photosmart. If you are unhappy with the quality of your prints, you can print a print quality report to help you determine if the printing system is working properly. To print a print quality report 1. Load letter or A4 unused plain white paper into the paper tray. 2. Press the top-left, bottom-left, top-left, and top-left buttons in sequence. The Engineering Menu appears. 3. Press OK to select Manufacturing Menu. 4. Press OK to select reports menu. 5. Press OK to select print-mech tap tests. 6. Press the top-right button until the code displayed changes to 72. 7. Press OK. The product prints a print quality report that you can use to diagnose print quality issues. Print and evaluate a print quality report 47
-
 1
1 -
2
-
3
-
4
-
5
-
6
-
7
-
8
-
9
-
10
-
11
-
12
-
13
-
14
-
15
-
16
-
17
-
18
-
19
-
20
-
21
-
22
-
23
-
24
-
25
-
26
-
27
-
28
-
29
-
30
-
31
-
32
-
33
-
34
-
35
-
36
-
37
-
38
-
39
-
40
-
41
-
42
-
43
-
 44
44 -
 45
45 -
 46
46 -
 47
47 -
 48
48 -
 49
49 -
 50
50 -
 51
51 -
 52
52 -
 53
53 -
 54
54 -
55
-
56
-
57
-
58
-
59
-
60
-
61
-
62
-
63
-
64
-
65
-
66
-
67
-
68
-
69
-
70
-
71
-
72
-
73
-
74
-
75
-
76
-
77
-
78
-
79
-
80
-
81
-
82
-
83
-
84
-
85
-
86
-
87
-
88
-
89
-
90
-
91
-
92
-
93
-
94
-
95
-
96
-
97
-
98
-
99
-
100
-
101
-
102
-
103
-
104
-
105
-
106
-
107
-
108
-
109
-
110
-
111
-
112
 |
 |