HP t505 ThinPro 4.3 Administrator s Guide - Page 24
Adding an HP TeemTalk connection manually, Finish, Connections > Add, HP TeemTalk
 |
View all HP t505 manuals
Add to My Manuals
Save this manual to your list of manuals |
Page 24 highlights
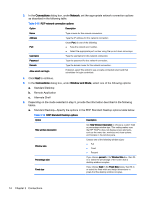
Table 3-25 HP TeemTalk preferences Option Description Show Configuration Bar Displays the Configuration Bar. Save Current Window Position Saves current window's size and position when you click Save Preferences. It will be restored on the next system launch. NOTE: Click Save Preferences each time you change the window size or position to save the new values. Run in Full Screen Mode Select to make the window full screen and remove the frame, soft buttons, menu, and configuration bars. NOTE: This option does not become effective until the next system launch and overrides the Show Configuration Bar and Save Current Window Position options. Browser Command In the box, type the command that runs your web browser, such as: / display html links Firefox Command Line Start Up Options Use to specify an alternate location for the startup options. NOTE: For specific information on HP TeemTalk Command Line Startup Options, see the HP TeemTalk Terminal Emulator User Guide. 6. Click Next to continue. 7. Set the appropriate finalization options: Table 3-26 HP TeemTalk finalization options Option Create an icon on the desktop Summary Session Information Description Creates a desktop icon for this connection. Displays a summary of the session that is to be created. 8. Click Finish to save your settings and close the wizard. Adding an HP TeemTalk connection manually 1. Click Connections > Add. 2. Select HP TeemTalk and set the appropriate configuration options: Table 3-27 HP TeemTalk manual connection configuration settings Option Description Name The connection name. System beep Enables the system beep sound. Click Next to continue. 3. Set the appropriate advanced options (refer to Table 3-10 New connection advanced settings on page 9). 4. Click Finish to save your settings and exit the wizard. 18 Chapter 3 Connections
-
 1
1 -
2
-
3
-
4
-
5
-
6
-
7
-
8
-
9
-
10
-
11
-
12
-
13
-
14
-
15
-
16
-
17
-
18
-
 19
19 -
 20
20 -
 21
21 -
 22
22 -
 23
23 -
 24
24 -
 25
25 -
 26
26 -
 27
27 -
 28
28 -
 29
29 -
30
-
31
-
32
-
33
-
34
-
35
-
36
-
37
-
38
-
39
-
40
-
41
-
42
-
43
-
44
-
45
-
46
-
47
-
48
-
49
-
50
-
51
-
52
-
53
-
54
-
55
-
56
-
57
-
58
-
59
-
60
-
61
-
62
-
63
-
64
-
65
-
66
 |
 |
