HP t505 ThinPro 4.3 Administrator s Guide - Page 45
Date and time, Time Servers > Time
 |
View all HP t505 manuals
Add to My Manuals
Save this manual to your list of manuals |
Page 45 highlights
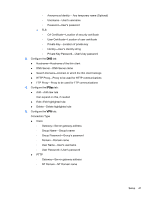
a. In HP Background Manager, alongside File, click Browse. b. Under Find a Background Image, select a new image and click Open. NOTE: Be sure to select an image file in one of the following formats: *.jpg, *.jpeg, *.png, *.niff, *.tiff, *.pbm c. Click Apply. 3. To change the desktop background color: a. Select Color. b. Under the Select Color dialog box, choose a new Basic Color or define a Custom Color. c. Click Apply. 4. To change the desktop background orientation or style: a. Under Style, select one of the following settings: Center, Tile, Stretch, Fit, or Fill. b. Click Apply. 5. To restore the default background images, select Restore Default and click Apply . 6. To save your changes and close the HP Background Manager, click OK. Date and time To set date, time, and time zone information: 1. In the HP ThinPro Control Panel, double-click Date and Time. 2. In the Time Settings screen, do one of the following: ● Using the world map, select a time zone. ● Under Timezone set the following options: ◦ Country ◦ Linux Timezone ◦ Windows Timezone 3. If desired, display week numbers in the calendar by clicking Show Week Numbers under Time Servers in the Time Settings screen. 4. To manually set the time of day, under Time Servers > Time, use the arrow keys. 5. To display the time in a 24 hour clock format, under Time Servers, select 24 hours format. 6. To use network time server settings instead of a selected time zone, under Date and Time > Time Servers, choose one of the following options: ● Use DHCP Time Servers ● Use these Time Servers ● Use No Time Servers 7. Click Apply. 8. To save your changes and close the Time Settings dialog box, click OK. Setup 39
-
 1
1 -
2
-
3
-
4
-
5
-
6
-
7
-
8
-
9
-
10
-
11
-
12
-
13
-
14
-
15
-
16
-
17
-
18
-
19
-
20
-
21
-
22
-
23
-
24
-
25
-
26
-
27
-
28
-
29
-
30
-
31
-
32
-
33
-
34
-
35
-
36
-
37
-
38
-
39
-
 40
40 -
 41
41 -
 42
42 -
 43
43 -
 44
44 -
 45
45 -
 46
46 -
 47
47 -
 48
48 -
 49
49 -
 50
50 -
51
-
52
-
53
-
54
-
55
-
56
-
57
-
58
-
59
-
60
-
61
-
62
-
63
-
64
-
65
-
66
 |
 |
