JVC GY-DV500U GY-DV500 User Manual - PDF (4,089KB) - Page 5
Introduction, Basic Operations, Application, Preparations - viewfinder
 |
View all JVC GY-DV500U manuals
Add to My Manuals
Save this manual to your list of manuals |
Page 5 highlights
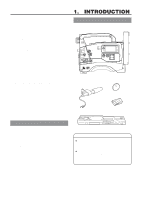
CONTENTS INTRODUCTION MAIN FEATURES 4 1. INTRODUCTION 1-1 Main Unit Configuration 6 1-2 Precautions for Proper Use 7 1-3 Routine and Periodical Maintenance 8 1-4 Videocassette to be Used 8 1-5 Battery Pack to be Used 9 1-6 Condensation 9 1-7 Characteristic CCD Phenomena 9 2. CONTROLS, INDICATORS AND CONNECTORS 2-1 Front Section 10 2-2 Right Side Section 12 2-3 Left Side Section 18 2-4 Top Section 19 2-5 Rear Section 20 2-6 Counter Display Contents 22 2-7 Lens (optional 23 2-8 1.5-Inch Viewfinder (optional 24 2-9 Indications in Viewfinder 25 • Warning LED Indicators Inside the Viewfinder ....... 25 • Viewfinder Screen Display 25 PREPARATIONS 3. BASIC SYSTEM CONNECTIONS AND ADJUSTMENTS 3-1 Basic System 30 3-2 Attaching the Zoom Lens (optional 31 3-3 Attaching the Viewfinder 31 3-4 Attaching the Microphone (provided 32 3-5 Attaching the Microphone (optional 32 3-6 Attaching the Tripod Base (provided 33 3-7 Inserting and Replacing Backup Lithium Batteries .. 34 4. POWER SUPPLY 4-1 AC Operation 35 4-2 Battery Pack Operation 35 • Attaching a Flat Shape Type Battery Pack 36 • Using an Anton-Bauer Battery Pack 37 • Remaining Battery Power Display/Precautions for the Battery Pack 38 BASIC OPERATIONS 5. PREPARATIONS 5-1 Turning the Power ON 39 5-2 Cassette Loading and Unloading 40 5-3 Setting the Date and Time 41 6. SETTING AND ADJUSTMENTS BEFORE SHOOTING 6-1 Camera Settings 42 6-2 Viewfinder Adjustment 43 6-3 External Monitor Adjustment 43 6-4 Back Focus Adjustment 44 6-5 White Balance Adjustment 45 • White Balance Adjustment 45 • Full-Time Auto White Balance (FAW 45 6-6 Switch Settings of the VCR Section 46 6-7 Audio Input Signal Selection 47 6-8 Recording Level Adjustment 48 6-9 Monitoring Audio during Recording 49 7. SHOOTING OPERATION 7-1 Basic Recording Operation 50 7-2 VCR Save Mode 52 7-3 If Unit is Left in Record-Pause (Standby) Mode ....... 52 7-4 Checking Recorded Contents in Record-Pause Mode (Recording Check Function 53 8. PLAYBACK MODE 8-1 Playback Procedure 54 8-2 Fast-Forward, Rewind 55 8-3 Search 55 APPLICATION 9. TIME CODE OPERATION 9-1 Displaying Time Code 56 9-2 Presetting and Recording of Time Code 56 • Time Code Presetting Procedure 57 • Presetting User's Bit Data 57 9-3 Recording Time Codes in Continuation of Time Codes Recorded on Tape 58 9-4 Reproducing Time Codes 59 10. S.S.F. (Super Scene Finder) FUNCTION 10-1 Explanation of the S.S.F. Function 60 10-2 How to Use the S.S.F. Function 61 10-3 Deleting S.S.F. Data 62 10-4 Resetting S.S.F. Data 62 10-5 Writing S.S.F. Data to Tape 63 10-6 Outputting S.S.F. Data 63 5
-
 1
1 -
 2
2 -
 3
3 -
 4
4 -
 5
5 -
 6
6 -
 7
7 -
 8
8 -
 9
9 -
 10
10 -
 11
11 -
12
-
13
-
14
-
15
-
16
-
17
-
18
-
19
-
20
-
21
-
22
-
23
-
24
-
25
-
26
-
27
-
28
-
29
-
30
-
31
-
32
-
33
-
34
-
35
-
36
-
37
-
38
-
39
-
40
-
41
-
42
-
43
-
44
-
45
-
46
-
47
-
48
-
49
-
50
-
51
-
52
-
53
-
54
-
55
-
56
-
57
-
58
-
59
-
60
-
61
-
62
-
63
-
64
-
65
-
66
-
67
-
68
-
69
-
70
-
71
-
72
-
73
-
74
-
75
-
76
-
77
-
78
-
79
-
80
-
81
-
82
-
83
-
84
-
85
-
86
-
87
-
88
-
89
-
90
-
91
-
92
-
93
-
94
-
95
-
96
 |
 |