JVC SR-V10U SR-V10U Instruction manual (1MB, PDF)
JVC SR-V10U - S-vhs Hi-fi Stereo Videocassette Recorder Manual
 |
View all JVC SR-V10U manuals
Add to My Manuals
Save this manual to your list of manuals |
JVC SR-V10U manual content summary:
- JVC SR-V10U | SR-V10U Instruction manual (1MB, PDF) - Page 1
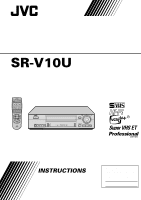
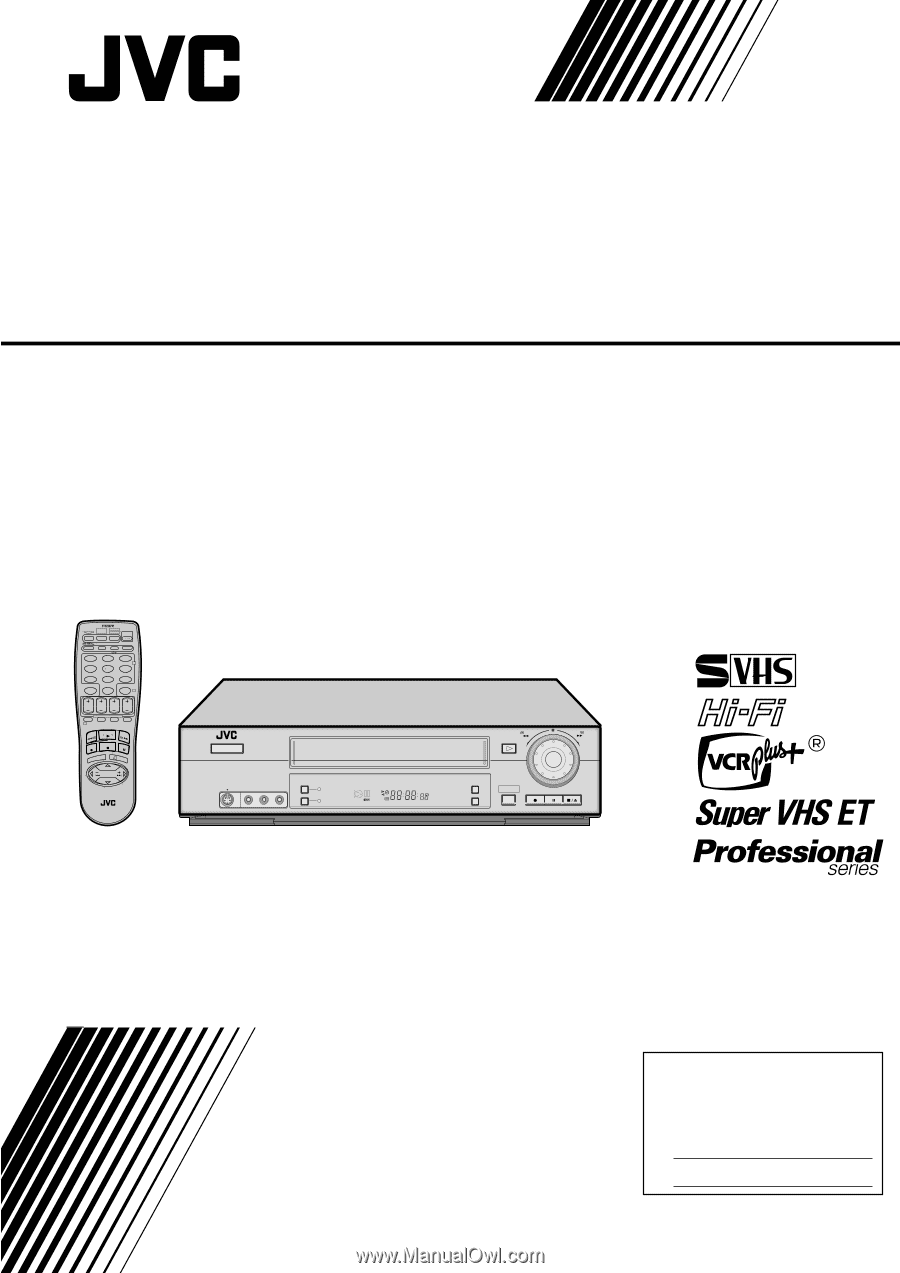
VIDEO CASSETTE RECORDER SR-V10U CABLE/ MBR SET TV DBS A/B POWER TV/VCR A. MONITOR DISPLAY REMOTE CONTROL UNIT POWER S VIDEO VIDEO (MONO)L-AUDIO-R REC LINK DIGITAL TBC/NR SP EP VCR A.DUB INSERT PLAY REW - FF + CH- /+ PUSH / TURN 24HR QUICK PROGRAM REC PAUSE STOP/EJECT INSTRUCTIONS - JVC SR-V10U | SR-V10U Instruction manual (1MB, PDF) - Page 2
. The VCR Plus+ system is manufactured under license from Gemstar Development Corporation. CAUTION: Changes or modifications not approved by JVC could void user's authority to operate the equipment. Ⅲ Cassettes marked "S-VHS" and "VHS" can be used with this video cassette recorder. However, S-VHS - JVC SR-V10U | SR-V10U Instruction manual (1MB, PDF) - Page 3
INSTRUCTIONS servicing. ATTENTION: Follow and obey all warnings and instructions marked on your product and its operating instructions. For your safety, please read all the safety and operating instructions instructions. 's instructions have INSTRUCTIONS supporting SERVICE EQUIPMENT ANTENNA DISCHARGE - JVC SR-V10U | SR-V10U Instruction manual (1MB, PDF) - Page 4
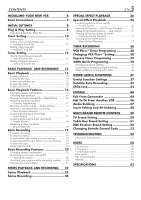
shock or other hazards. 4. Safety Check Upon completion of any service or repairs to this product, ask the service technician to perform safety checks to determine that the product is in safe operating condition. HOW TO USE THIS INSTRUCTION MANUAL ● The Index on pages 58 - 62 lists frequently-used - JVC SR-V10U | SR-V10U Instruction manual (1MB, PDF) - Page 5
TV Brand Setting 50 Cable Box Brand Setting 51 DBS Receiver Brand Setting 52 Changing Remote Control Code 53 TROUBLESHOOTING 54 Questions and answers 57 INDEX 58 List of terms 58 Front panel 59 Front display panel 60 Rear panel 61 On-screen display 61 Remote 62 SPECIFICATIONS 63 - JVC SR-V10U | SR-V10U Instruction manual (1MB, PDF) - Page 6
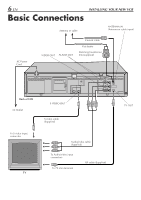
transformer (Not supplied) Back of VCR AC Outlet To S-video input connector TV S IN V I D E O REMOTE OUT OUT S VIDEO OUT S-video cable (Supplied) REMOTE IN IN OUT ANTENNA IN R AUDIO VIDEO L VHF/UHF TV OUT TV OUT Audio/video cable (Supplied) To Audio/video input connectors To 75 ohm - JVC SR-V10U | SR-V10U Instruction manual (1MB, PDF) - Page 7
, the battery's service life will be drastically shortened. S IN V I D E O REMOTE OUT OUT REMOTE IN IN OUT ANTENNA IN R AUDIO VIDEO L VHF/UHF TV OUT Installing/Removing the lithium battery 1 Make sure that the power plug is connected to an AC outlet and turn off the VCR power. 2 Open - JVC SR-V10U | SR-V10U Instruction manual (1MB, PDF) - Page 8
panel or on the Remote while Plug & Play is in progress. POWER S VIDEO VIDEO (MONO)L-AUDIO-R REC LINK DIGITAL TBC/NR SP EP VCR A.DUB INSERT PLAY REW settings. If, however, you want to add or delete channels, refer to Manual Channel Set on page 14. During Initial Auto Clock Set "Auto" blinks - JVC SR-V10U | SR-V10U Instruction manual (1MB, PDF) - Page 9
system. In this case, perform the Semiauto (੬ pg. 11) or Manual Clock Set (੬ pg. 12) procedure. ● If "- -:- -" appears on the memory. These settings will resume when the VCR is turned on again. a- Input Selection (channel or auxiliary input; L-1 or F-1) b- Recording tape speed (੬ pg. 19) c- "ON - JVC SR-V10U | SR-V10U Instruction manual (1MB, PDF) - Page 10
10 EN Clock Setting Turn on the VCR and the TV, and select the VCR channel 3 or 4 (or AV mode) on the TV. 1 2 3 2 finished. If you use a cable box, set the clock manually. (੬ pg. 12) Preparations 1 Access Main Menu screen GUIDE CHANNEL SET SELECT WITH (5,∞) AND (OK) PRESS (MENU) TO END 2 - 7 - JVC SR-V10U | SR-V10U Instruction manual (1MB, PDF) - Page 11
"AUTO" for the host channel in step 5, be sure to select the correct time zone manually. 8 Return to normal screen Press MENU. * Auto Daylight Saving Time This function enables automatic adjustment of the VCR's clock at the start and end of Daylight Saving Time. With Auto DST activated on the - JVC SR-V10U | SR-V10U Instruction manual (1MB, PDF) - Page 12
any time during the process Press OK or SHUTTLE PLUS # repeatedly until the item you want to change blinks, then press SHUTTLE PLUS %fi. Setting clock manually - Manual Clock Set First follow steps 1 to 3 on page 10, then go to the following steps. 4 Set time Press SHUTTLE PLUS %fi until the desired - JVC SR-V10U | SR-V10U Instruction manual (1MB, PDF) - Page 13
by the Plug & Play setting. If you want to add or delete channels, use Manual Channel Set (੬ pg. 14). 1 Access Main Menu screen Press MENU. 2 Access and start again. 4 Return to normal screen Press MENU. INFORMATION The VCR selects the correct band (TV or CATV) automatically during Auto Channel - JVC SR-V10U | SR-V10U Instruction manual (1MB, PDF) - Page 14
Number keys to input a channel number you want to add. 2 Press OK or SHUTTLE PLUS # to set to "ADD". 3 Repeat 1 and 2 to add other channels. MANUAL CHANNEL SET (CATV) CH 45 ADD PRESS NUMBER KEY (0-9) OR (5,∞), THEN (OK) PRESS (MENU) TO END To skip channels 1 Press the Number keys or SHUTTLE - JVC SR-V10U | SR-V10U Instruction manual (1MB, PDF) - Page 15
The VCR turns on automatically. ● The counter is automatically reset to "0:00:00". ● If the cassette's record safety tab has been removed and "REC SAFETY" is set to "ON", playback begins automatically. 2 Start playback Press PLAY ( 3 ). ● Tape speed (SP or EP) is automatically detected. ● The S-VHS - JVC SR-V10U | SR-V10U Instruction manual (1MB, PDF) - Page 16
Remote. The counter reading becomes "0:00:00". It is also reset when a tape is inserted. POWER S VIDEO VIDEO (MONO)L-AUDIO-R REC LINK DIGITAL TBC/NR SP EP VCR pg. 17) or Instant Review (੬ pg. 18). The Remote or STOP/EJECT ( 7 / 0 ) on the front panel. ● To select the returning point (recording - JVC SR-V10U | SR-V10U Instruction manual (1MB, PDF) - Page 17
to select the Automatic Timer Standby function if the cassette's record safety tab is removed. G Locating beginning of recordings - Index Search Index codes are placed on the tape at the beginning of each recording when recording on this VCR. You can find and automatically play back from the - JVC SR-V10U | SR-V10U Instruction manual (1MB, PDF) - Page 18
18 EN I BASIC PLAYBACK AND RECORDING (cont.) H Locating beginning of timer recordings - Instant Review POWER S VIDEO VIDEO (MONO)L-AUDIO-R REC LINK DIGITAL TBC/NR SP EP VCR A.DUB INSERT PLAY REW - FF + CH- /+ PUSH / TURN 24HR QUICK PROGRAM REC PAUSE STOP/EJECT H 1 2 3 2 4 5 6 7 - JVC SR-V10U | SR-V10U Instruction manual (1MB, PDF) - Page 19
Set tape speed Press SP/EP to set the recording speed. 4 Start recording On the front panel: Press REC ( ¶ ). On the Remote: While holding REC ( ¶ ), press PLAY ( 3 ). ● If "VIDEO CALIBRATION" is set to "ON" (default setting: ੬ pg. 37, 38), this VCR checks the tape condition for about seven seconds - JVC SR-V10U | SR-V10U Instruction manual (1MB, PDF) - Page 20
during recording or recording pause. Each time you press the button, the front display panel shows the time counter, tape remaining time, channel number and the clock time in sequence. Time Counter Tape Remaining Time POWER S VIDEO VIDEO (MONO)L-AUDIO-R REC LINK DIGITAL TBC/NR SP EP VCR STOP - JVC SR-V10U | SR-V10U Instruction manual (1MB, PDF) - Page 21
pg. 41) This function allows you to record on VHS tapes with SVHS picture quality. Tapes recorded using this function can be played back on a VCR equipped with the S-VHS ET function. To prohibit operations during recording (Mode Lock) Press and hold OK on the Remote for more than 5 seconds. " " and - JVC SR-V10U | SR-V10U Instruction manual (1MB, PDF) - Page 22
22 EN SERIES PLAYBACK AND RECORDING Series Playback To REMOTE OUT SR-V10U-1 To S VIDEO OUT S IN V I D E O REMOTE OUT OUT To REMOTE IN S-Video Cable (Supplied) Mini-plug cable (Not supplied) To S VIDEO IN To REMOTE OUT REMOTE IN IN OUT ANTENNA IN R AUDIO VIDEO L VHF/UHF TV OUT - JVC SR-V10U | SR-V10U Instruction manual (1MB, PDF) - Page 23
After completing the connections, turn on all the components. ● Set the TV to video input mode or A/V input mode. Refer to the TV instruction manual. 3 Load cassettes Insert the playback cassette into each SR-V10U. ● Set SR-V10U-2 to "AUX". Press CH + or - to select the input mode depending on the - JVC SR-V10U | SR-V10U Instruction manual (1MB, PDF) - Page 24
PLAYBACK AND RECORDING (cont.) Series Recording Camcorder or Another VCR To S Video Output To Audio/Video Output Audio/Video Cable (Not supplied) S-Video Cable (Not supplied) To S VIDEO IN To AUDIO/ VIDEO IN To REMOTE OUT SR-V10U-1 To S VIDEO OUT S-Video Cable (Supplied) To S VIDEO IN S IN - JVC SR-V10U | SR-V10U Instruction manual (1MB, PDF) - Page 25
Set recording VCR's input mode Set to "AUX". Press CH + or - to select the input mode depending on the connector being used - "L-1" for the rear AUDIO/VIDEO IN connector, or "F-1" for the front AUDIO/VIDEO input connector. 4 Prepare for recording Insert the recording cassette into each SR-V10U, and - JVC SR-V10U | SR-V10U Instruction manual (1MB, PDF) - Page 26
26 EN Special Effect Playback ABDE PLAY ( 3 ) POWER S VIDEO VIDEO (MONO)L-AUDIO-R REC LINK DIGITAL TBC/NR SP EP VCR A.DUB INSERT PLAY REW - FF + CH- /+ PUSH If you release the dial, picture search continues. On the Remote: Possible during normal playback or still picture playback. To do - JVC SR-V10U | SR-V10U Instruction manual (1MB, PDF) - Page 27
right. To reverse a still picture, turn the JOG dial to the left. On the Remote: During normal playback: Press PAUSE ( 8 ) to pause. To advance a still playback. To resume normal playback, press PLAY ( 3 ). NOTE: Manual tracking is possible during slow motion playback. During slow motion playback, - JVC SR-V10U | SR-V10U Instruction manual (1MB, PDF) - Page 28
pg. 37, 41). ● The VCR turns on, and the counter is reset, automatically. ● You can also record onto a cassette without a record safety tab by covering the hole with adhesive tape before inserting the cassette. 2 Access PlusCode No. screen Press PROG. on the Remote. PLUSCODE NO. ● The clock must - JVC SR-V10U | SR-V10U Instruction manual (1MB, PDF) - Page 29
on the Program screen in step 5. When this happens, set the correct guide channel number for that station. (੬ pg. 30, "Changing VCR Plus+ Setting") NOTES: ● In case of a power failure after programming, the recorder's memory backup keeps your selections (if the lithium battery is not exhausted - JVC SR-V10U | SR-V10U Instruction manual (1MB, PDF) - Page 30
5 on page 29). When this happens, perform the following steps to set the correct guide channel number for that station. To ensure that VCR Plus+ timer recording operates correctly, it is necessary to set the VCR Plus+ "Guide Channel Set" for each station. Read the following information carefully - JVC SR-V10U | SR-V10U Instruction manual (1MB, PDF) - Page 31
PLUS %fi (Ex.) If WNJU(Ind.) is to input the number of received on channel 47 the channel on which GUIDE CHANNEL SET the guide channel's broadcasts are received, GUIDE CH : 6 VCR CH : 47 then press OK or SHUTTLE PLUS #. ● Repeat steps 4 and 5 for each instance. PRESS NUMBER KEY (0-9) OR - JVC SR-V10U | SR-V10U Instruction manual (1MB, PDF) - Page 32
program the timer (੬ pg. 8 or 10). 1 Load a cassette Make sure the record safety tab is intact. If not, set "REC SAFETY" to "OFF" ( ੬ pg. 37, 41). ● The VCR turns on, and the counter is reset, automatically. ● You can also record onto a cassette without a record safety tab by covering the hole with - JVC SR-V10U | SR-V10U Instruction manual (1MB, PDF) - Page 33
Programs that start after midnight must have the next day's date. ● After timer recording is completed, the VCR turns off automatically. ● You can program the timer recording while a regular recording is in progress. ● To timer-record cable channels, be sure to keep the cable box turned on with the - JVC SR-V10U | SR-V10U Instruction manual (1MB, PDF) - Page 34
EN 24HR Quick Programing JOG dial POWER S VIDEO VIDEO (MONO)L-AUDIO-R REC LINK DIGITAL TBC/NR SP EP VCR A.DUB INSERT PLAY REW - FF + CH- /+ PUSH / TURN 24HR QUICK PROGRAM REC PAUSE STOP/EJECT TIMER RECORDING (cont.) You can program a timer recording that starts within 24␣ hours. Up to - JVC SR-V10U | SR-V10U Instruction manual (1MB, PDF) - Page 35
EP Timer (੬ pg. 39) If there is not enough tape to record the entire broadcast for recording in SP mode, the VCR automatically switches to EP mode to allow complete recording. This feature is especially handy when recording a broadcast of more than 2 hours in length. 1 Access Program screen Repeat - JVC SR-V10U | SR-V10U Instruction manual (1MB, PDF) - Page 36
Without doing anything for about 1 minute, the VCR will finish the timer programing. TIMER RECORDING (cont.) 3 Cancel or change program setting To another, only the parts shown below in gray will be recorded. Pattern 1: The program with the lower program number will be recorded. 10:00 Program - JVC SR-V10U | SR-V10U Instruction manual (1MB, PDF) - Page 37
Useful Function Settings Turn on the VCR and the TV, and select the VCR channel 3 or 4 (or AV VIDEO PICTURE CONTROL AUTVOIDEO STABILIZER OSF-VFHS ET OFF AUTO TIMER OF2FND AUDIO RECORD ORFEFTURN POINT TAPE END ON SCREEN (REC) AUDIO MONITOR HDI-AFYI /TIME INSERT OFF ON SCREEN (PLAY) S-VHS - JVC SR-V10U | SR-V10U Instruction manual (1MB, PDF) - Page 38
When you play back rental tapes or tapes recorded on other VCRs, set this function either "ON" or "OFF" whichever gives you the best picture. Ⅵ PICTURE CONTROL AUTO (NORM): Normally select this. Picture quality is adjusted automatically. When "VIDEO CALIBRATION" is "OFF", "NORM" will appear instead - JVC SR-V10U | SR-V10U Instruction manual (1MB, PDF) - Page 39
starts. NOTES: ● If you have programed the VCR to timer-record 2 or more programs, the second program and those thereafter may not fit on the tape with this function set to "ON". In this case, do not use this function, but change the tape speed manually during timer programing. ● In order to ensure - JVC SR-V10U | SR-V10U Instruction manual (1MB, PDF) - Page 40
VHS VCR without SQPB cannot play back S-VHS tapes recorded in S-VHS mode.) • S-VHS MODE setting does not affect recording on VHS tapes. Recording on VHS tapes is always performed in VHS mode except when using S-VHS ET mode (੬ pg. 41). You have to select which terminal - either VIDEO (composite - JVC SR-V10U | SR-V10U Instruction manual (1MB, PDF) - Page 41
you can use one cassette repeatedly. If you select "AUTO REW", the VCR rewinds tape each time after timer recording and the timer mode is engaged. If you select "NORM", the VCR turns off after timer recording. Rewinds the tape or replace it, and engage timer recording standby mode manually. Refer to - JVC SR-V10U | SR-V10U Instruction manual (1MB, PDF) - Page 42
42 EN Satellite Auto Recording REC LINK lamp POWER S VIDEO VIDEO (MONO)L-AUDIO-R REC LINK DIGITAL TBC/NR 4 SP EP VCR A.DUB INSERT PLAY REW - FF + programing method, refer to the manual supplied with the DBS receiver. 2 Load a cassette Make sure the record safety tab is intact. 3 Set tape speed - JVC SR-V10U | SR-V10U Instruction manual (1MB, PDF) - Page 43
by pressing POWER on the front panel. To release the child lock, press and hold POWER on the Remote until the VCR turns on. ● Pressing TIMER during timer recording, unplugging the AC power cord or a power outage also releases the child lock. NOTES: ● When the child lock function is in use, keep the - JVC SR-V10U | SR-V10U Instruction manual (1MB, PDF) - Page 44
44 EN Edit From Camcorder Connection This VCR (for recording) POWER S VIDEO VIDEO (MONO)L-AUDIO-R REC LINK DIGITAL TBC/NR SP EP VCR To AUDIO/ VIDEO Input Audio/video cable (supplied) To S VIDEO Input* S-video cable (supplied) To Audio/video output A.DUB INSERT PLAY REW - FF + CH- /+ - JVC SR-V10U | SR-V10U Instruction manual (1MB, PDF) - Page 45
the camcorder to the left audio input connector on this VCR. 2 Load a cassette Insert the cassette to be recorded on into this VCR (for recording). 3 Select input mode on this VCR Select "L-1" - when connecting the camcorder to the audio/video input connectors on the rear panel. Select "F-1" - when - JVC SR-V10U | SR-V10U Instruction manual (1MB, PDF) - Page 46
) REMOTE IN IN OUT ANTENNA IN R AUDIO VIDEO L VHF/UHF TV OUT To AUDIO/ VIDEO OUT Audio/video cable (supplied) To S-video Input To Audio/ video Input Another VCR (for recording) You can use your VCR as the playback or recording VCR. ● Refer also to the other VCR's instruction manual for - JVC SR-V10U | SR-V10U Instruction manual (1MB, PDF) - Page 47
can replace sounds recorded on the normal track with new sounds - for example, your favorite song played back on the CD player. ● Refer also to the other audio component's instruction manual for connection and its operations. Normal track Before audio dubbing After audio dubbing Video and Hi-Fi - JVC SR-V10U | SR-V10U Instruction manual (1MB, PDF) - Page 48
Supplied) To AUDIO/ VIDEO input Audio/video cable (Supplied) To S-video output To Audio/ video output EDITING (cont.) Refer also to the other component's instruction manual for connection and its operations. Insert Editing: You can replace a recorded scene with new scene recorded on another tape - JVC SR-V10U | SR-V10U Instruction manual (1MB, PDF) - Page 49
00:00", editing automatically stops, and the VCR starts normal playback. To stop editing any time during recording Press STOP ( 7 ) on the Remote or STOP/EJECT ( 7 / 0 ) on the front panel. NOTES: ● Be sure to select "AUTO" for "PICTURE CONTROL" (or "NORM" when "VIDEO CALIBRATION" is set to "OFF - JVC SR-V10U | SR-V10U Instruction manual (1MB, PDF) - Page 50
TV/VCR 2 -2 POWER 1 2 3 4 5 2 6 2 -3 7 8 9 Number 0 4 1 2 -4 ENTER 3 TV VOL +/- TV CH +/- TV BRAND NAME JVC HITACHI MAGNAVOX MITSUBISHI PANASONIC RCA SHARP SONY SAMSUNG SANYO SEARS TOSHIBA ZENITH BRAND CODE 01, 03 10 02 03 04, 11 05 06 07 12 13 13 08 09 MULTI-BRAND REMOTE CONTROL - JVC SR-V10U | SR-V10U Instruction manual (1MB, PDF) - Page 51
to change the VCR's channels only.) NOTES: ● Depending on the type Remote. ● It's not possible to operate a cable box not equipped with a remote sensor. ● It's not possible to set the Remote for both your cable box and a DBS receiver at the same time. You can only set the Remote control - JVC SR-V10U | SR-V10U Instruction manual (1MB, PDF) - Page 52
MULTI-BRAND REMOTE CONTROL (cont.) DBS Receiver Brand Setting This Remote can control some functions of the DBS (Direct Broadcast Satellite) receivers of the brands listed below. 1 Turn on the DBS receiver Turn on the DBS receiver using the Power button on the DBS receiver or its Remote. 2 -14 - JVC SR-V10U | SR-V10U Instruction manual (1MB, PDF) - Page 53
Changing Remote Control Code 2 POWER S VIDEO VIDEO (MONO)L-AUDIO-R REC LINK DIGITAL TBC/NR SP EP VCR A.DUB INSERT PLAY REW - FF + CH- /+ PUSH / TURN 24HR QUICK PROGRAM REC PAUSE STOP/EJECT 1 -1, 3 1 2 3 4 5 2 6 1 -2 7 8 9 0 4 1 EN 53 This Remote is capable of transmitting - JVC SR-V10U | SR-V10U Instruction manual (1MB, PDF) - Page 54
54 EN TROUBLESHOOTING Before requesting service, use this chart and see if you can repair the trouble yourself. Small problems are often easily corrected, and this can save you from the trouble of sending your VCR off for repair. POWER SYMPTOM 1. The power will not come on. 2. The clock works, - JVC SR-V10U | SR-V10U Instruction manual (1MB, PDF) - Page 55
set-up procedures. Make sure you have compensated for guide channel and VCR or cable box channel number mismatches (੬ pg. 30). Timer programing cannot be performed when timer recording is in progress. Wait until it finishes. Load a cassette with the record safety tab intact. If the tab is removed - JVC SR-V10U | SR-V10U Instruction manual (1MB, PDF) - Page 56
Remote will not operate your TV or cable box or DBS receiver. 4. Even though Auto or Semiauto Clock Set has been performed, the clock is incorrect. 5. Buttons and controls do not function at all. TROUBLESHOOTING (cont.) POSSIBLE CAUSE ● Those channels have been preset to be skipped. ● Recording - JVC SR-V10U | SR-V10U Instruction manual (1MB, PDF) - Page 57
minutes to . . . p. r.o.te. c. t. t.h.e.h.e.a.d.s Q. What happens if the tape reaches its end during recording? A. The VCR automatically rewinds it to the beginning. TIMER RECORDING Q. REC and ‰ remain lit on the front display panel. Is there a problem? A. No. This is a normal condition for a timer - JVC SR-V10U | SR-V10U Instruction manual (1MB, PDF) - Page 58
recording Canceling 35 Changing 35 Checking 35 Express 32 Guide channel setting 30 VCR Plus+ 28 Timer warning display 34 Tracking 17 Troubleshooting 54 Tuner setting Adding channels 14 Auto Channel Set 13 Deleting channels 14 Manual Channel Set 14 V VCR Plus+ timer programing 28 VIDEO CALIBRATION - JVC SR-V10U | SR-V10U Instruction manual (1MB, PDF) - Page 59
Front panel 1 POWER S VIDEO VIDEO (MONO)L-AUDIO-R REC LINK DIGITAL TBC/NR 2 SP EP VCR EN 59 34 A.DUB INSERT PLAY REW - FF + CH - /+ PUSH / TURN 24HR QUICK PROGRAM REC PAUSE STOP/EJECT 5 6 78 9 0 ! @# $ % ^ 1 POWER button : ੬ pg. 15, 19 2 Cassette loading slot 3 PLAY ( # ) button : - JVC SR-V10U | SR-V10U Instruction manual (1MB, PDF) - Page 60
VCR 6 78 1 Symbolic Mode Indicators PLAY: FF/REW VARIABLE SHUTTLE SEARCH: STILL: SLOW: RECORD: RECORD remaining time indicator : ੬ pg. 16, 20 6 S-VHS indicator : ੬ pg. 15, 41 7 VCR mode indicator : ੬ pg. 19, 20 8 Cassette mark 9 Channel and auxiliary input ("L-1" and "F-1") Counter reading - JVC SR-V10U | SR-V10U Instruction manual (1MB, PDF) - Page 61
REMOTE OUT OUT REMOTE IN IN OUT ANTENNA IN R AUDIO VIDEO L VHF/UHF TV OUT 5 67 89 0 1 AC power cord : ੬ pg. 6 2REMOTE OUT terminal : ੬ pg. 22, 24 3 REMOTE IN terminal : ੬ pg. 22, 24 *For the Remote Control 34 8 VCR operation mode indication 9 Tape speed indication 0 Cassette indication ! - JVC SR-V10U | SR-V10U Instruction manual (1MB, PDF) - Page 62
compartment or on the lid. The Remote can operate most of your VCR's functions, as well as basic functions of TV sets, cable boxes and DBS receivers. ● Point the Remote toward the remote sensor on the target component. ● The maximum operating distance of the remote control is about 8 m. NOTE: If the - JVC SR-V10U | SR-V10U Instruction manual (1MB, PDF) - Page 63
remote control unit, "AA" battery x 2, Lithium battery CR2025, S-video cable (4-pin), RF cable (F-type), Audio/video cable, BNC/RCA adapter x 2 Specifications shown are for SP mode unless specified otherwise. E. & O.E. Design and specifications subject to change without notice. Usable cassettes - JVC SR-V10U | SR-V10U Instruction manual (1MB, PDF) - Page 64
SR-V10U VICTOR COMPANY OF JAPAN, LIMITED COPYRIGHT © 2001 VICTOR COMPANY OF JAPAN, LTD. U Printed in Malaysia * * 1001 MNV ID PJ
-
 1
1 -
 2
2 -
 3
3 -
 4
4 -
 5
5 -
 6
6 -
 7
7 -
8
-
9
-
10
-
11
-
12
-
13
-
14
-
15
-
16
-
17
-
18
-
19
-
20
-
21
-
22
-
23
-
24
-
25
-
26
-
27
-
28
-
29
-
30
-
31
-
32
-
33
-
34
-
35
-
36
-
37
-
38
-
39
-
40
-
41
-
42
-
43
-
44
-
45
-
46
-
47
-
48
-
49
-
50
-
51
-
52
-
53
-
54
-
55
-
56
-
57
-
58
-
59
-
60
-
61
-
62
-
63
-
64
 |
 |
VIDEO (MONO)L—AUDIO—R
S VIDEO
A.DUB
DIGITAL TBC/NR
FF
REW
POWER
SP
EP
VCR
REC
PAUSE
STOP/EJECT
PLAY
–
+
CH– /+
PUSH / TURN
INSERT
24HR QUICK
PROGRAM
REC LINK
SR-V10U
VIDEO CASSETTE RECORDER
INSTRUCTIONS
LPT0604-001A
For Customer Use:
Enter below the Model No. and
Serial No. which are located on the
rear of cabinet. Retain this
information for future reference.
Model No.
Serial No.
T
V
C
H
+
T
V
V
O
L
–
T
V
C
H
–
T
V
V
O
L
+
TV
CANCEL
TIMER
START
STOP
DATE
PLAY
REW
REC
STOP
SHUTTLE
PLUS
PAUSE
FF
MENU
OK
CH
POWER
TV/VCR
C.RESET
DBS
DAILY
AUX
WEEKLY
PROG
CHECK
PROG
SP/EP
SKIP SEARCH
DISPLAY
A. MONITOR
CABLE/
DBS
1
2
3
4
5
6
7
8
9
0
2
4
1
3
MULTI BRAND
REMOTE CONTROL UNIT
MBRSET
A/B