JVC SR-V10U SR-V10U Instruction manual (1MB, PDF) - Page 8
Plug & Play, Setting - manual
 |
View all JVC SR-V10U manuals
Add to My Manuals
Save this manual to your list of manuals |
Page 8 highlights
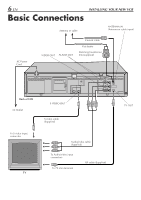
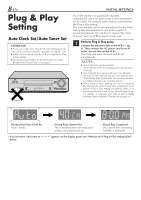
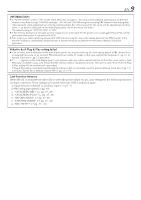
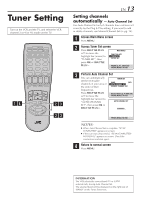
8 EN Plug & Play Setting Auto Clock Set/Auto Tuner Set ATTENTION ● If you use a cable box, Plug & Play will not function; set the clock and tuner channels separately. (੬ pg.10 - 14) ● It takes several minutes for the VCR to complete the Plug & Play setting. ● Do not press any buttons on the front panel or on the Remote while Plug & Play is in progress. POWER S VIDEO VIDEO (MONO)L-AUDIO-R REC LINK DIGITAL TBC/NR SP EP VCR A.DUB INSERT PLAY REW - FF + CH- /+ PUSH / TURN 24HR QUICK PROGRAM REC PAUSE STOP/EJECT INITIAL SETTINGS This VCR sets the clock and tuner channels automatically when AC power cord is first connected to an AC outlet. The antenna cable must be connected for the Plug & Play setting. The time and date can be set automatically by the clock setting data transmitted from one of the regular TV broadcast channels. We call this TV channel the "host channel" and it is a PBS channel in your area. 1 Perform Plug & Play setup Connect the antenna cable to the VCR (੬ pg. 6). Then connect the AC power cord to an AC outlet. Do not turn on the VCR. The clock and tuner channels will be set automatically. NOTES: ● Auto Clock Set is performed first. "Auto" blinks on the front display panel during Auto Clock Set. ● Auto Channel Set is performed next. Auto Channel Set scans all the channels that are receivable by your VCR. During Auto Channel Set, the channel numbers are displayed as they are scanned and set. ● When Plug & Play setting has been complete successfully, the correct clock time is displayed. If you perform Plug & Play setting successfully, there is no need to perform the clock (੬ pg. 10) and tuner (੬ pg. 13) settings. If, however, you want to add or delete channels, refer to Manual Channel Set on page 14. During Initial Auto Clock Set "Auto" blinks. During Auto Channel Set The channel numbers are displayed as they are scanned and set. Plug & Play Completed The current time (including AM/PM) is displayed. * If an incorrect clock time or "- -:- -" appears on the display panel, see "What to do if Plug & Play setting failed" below.
-
 1
1 -
2
-
 3
3 -
 4
4 -
 5
5 -
 6
6 -
 7
7 -
 8
8 -
 9
9 -
 10
10 -
 11
11 -
 12
12 -
 13
13 -
14
-
15
-
16
-
17
-
18
-
19
-
20
-
21
-
22
-
23
-
24
-
25
-
26
-
27
-
28
-
29
-
30
-
31
-
32
-
33
-
34
-
35
-
36
-
37
-
38
-
39
-
40
-
41
-
42
-
43
-
44
-
45
-
46
-
47
-
48
-
49
-
50
-
51
-
52
-
53
-
54
-
55
-
56
-
57
-
58
-
59
-
60
-
61
-
62
-
63
-
64
 |
 |