Konica Minolta bizhub 283 bizhub 423/363/283/223 Print Operations User Guide - Page 63
For network connection (IPP/IPPS), Settings for the machine
 |
View all Konica Minolta bizhub 283 manuals
Add to My Manuals
Save this manual to your list of manuals |
Page 63 highlights
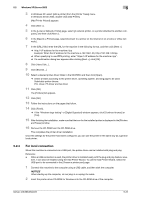
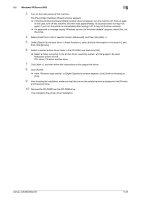
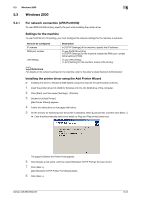
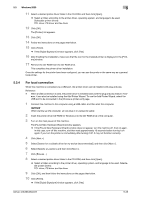
5.3 Windows 2000 5 16 Click [Finish]. % If the [Digital Signature] window appears, click [Yes]. 17 After finishing the installation, make sure that the icon for the installed printer is displayed in the [Print- ers] window. 18 Remove the CD-ROM from the CD-ROM drive. This completes the printer driver installation. 5.3.3 For network connection (IPP/IPPS) For IPP printing, configure the network settings before installing the printer driver. Settings for the machine To use IPP printing, you must configure the network settings for the machine in advance. Items to be configured IP address IPP Setting Description In [TCP/IP Settings] of the machine, specify the IP address. In [IPP Settings] for the machine, enable IPP printing. d Reference For details on the network settings for the machine, refer to the [User's Guide Network Administrator]. Before you can use IPPS printing, you must register a certificate with this machine. You can use the selfsigned certificate that is preinstalled in this machine. For details, refer to [User's Guide Network Administrator]. Installing the printer driver using the Add Printer Wizard 0 Installing the driver to Windows 2000-based computers requires the administrator authority. 1 Insert the printer driver CD-ROM for Windows into the CD-ROM drive of the computer. 2 Click [Start], and then select [Settings] - [Printers]. 3 Double-click the [Add Printer] icon. [Add Printer Wizard] appears. 4 Click [Next]. 5 In the [Local or Network Printer] page, select [Network printer], and then click [Next >]. 6 In the [Locate Your Printer] page, select [Connect to a printer on the Internet or your intranet]. 7 In the [URL:] field, enter the URL for the machine in the following format, and then click [Next]. % http:///ipp Example: When the IP address for the machine is 192.168.1.20, http://192.168.1.20/ipp % When specifying to use IPPS printing, enter "https:///ipp". 8 When the confirmation dialog box appears, click [OK]. 9 Click [Have Disk...]. 10 Click [Browse...]. bizhub 423/363/283/223 5-27
-
 1
1 -
2
-
3
-
4
-
5
-
6
-
7
-
8
-
9
-
10
-
11
-
12
-
13
-
14
-
15
-
16
-
17
-
18
-
19
-
20
-
21
-
22
-
23
-
24
-
25
-
26
-
27
-
28
-
29
-
30
-
31
-
32
-
33
-
34
-
35
-
36
-
37
-
38
-
39
-
40
-
41
-
42
-
43
-
44
-
45
-
46
-
47
-
48
-
49
-
50
-
51
-
52
-
53
-
54
-
55
-
56
-
57
-
 58
58 -
 59
59 -
 60
60 -
 61
61 -
 62
62 -
 63
63 -
 64
64 -
 65
65 -
 66
66 -
 67
67 -
 68
68 -
69
-
70
-
71
-
72
-
73
-
74
-
75
-
76
-
77
-
78
-
79
-
80
-
81
-
82
-
83
-
84
-
85
-
86
-
87
-
88
-
89
-
90
-
91
-
92
-
93
-
94
-
95
-
96
-
97
-
98
-
99
-
100
-
101
-
102
-
103
-
104
-
105
-
106
-
107
-
108
-
109
-
110
-
111
-
112
-
113
-
114
-
115
-
116
-
117
-
118
-
119
-
120
-
121
-
122
-
123
-
124
-
125
-
126
-
127
-
128
-
129
-
130
-
131
-
132
-
133
-
134
-
135
-
136
-
137
-
138
-
139
-
140
-
141
-
142
-
143
-
144
-
145
-
146
-
147
-
148
-
149
-
150
-
151
-
152
-
153
-
154
-
155
-
156
-
157
-
158
-
159
-
160
-
161
-
162
-
163
-
164
-
165
-
166
-
167
-
168
-
169
-
170
-
171
-
172
-
173
-
174
-
175
-
176
-
177
-
178
-
179
-
180
-
181
-
182
-
183
-
184
-
185
-
186
-
187
-
188
-
189
-
190
-
191
-
192
-
193
-
194
-
195
-
196
-
197
-
198
-
199
-
200
-
201
-
202
-
203
-
204
-
205
-
206
-
207
-
208
-
209
-
210
-
211
-
212
-
213
-
214
-
215
-
216
-
217
-
218
-
219
-
220
-
221
-
222
-
223
-
224
-
225
-
226
-
227
-
228
-
229
-
230
-
231
-
232
-
233
-
234
-
235
-
236
-
237
-
238
-
239
-
240
-
241
-
242
-
243
-
244
-
245
-
246
-
247
-
248
-
249
-
250
-
251
-
252
-
253
-
254
-
255
-
256
-
257
-
258
-
259
-
260
-
261
-
262
-
263
-
264
-
265
-
266
-
267
-
268
-
269
-
270
-
271
-
272
-
273
-
274
-
275
-
276
-
277
-
278
-
279
-
280
-
281
-
282
-
283
-
284
-
285
-
286
-
287
-
288
-
289
-
290
-
291
-
292
-
293
-
294
 |
 |