Konica Minolta bizhub C550 bizhub C203/C253/C353/C451/C550/C650 Advanced Funct - Page 19
How to type in characters, Display mode
 |
View all Konica Minolta bizhub C550 manuals
Add to My Manuals
Save this manual to your list of manuals |
Page 19 highlights
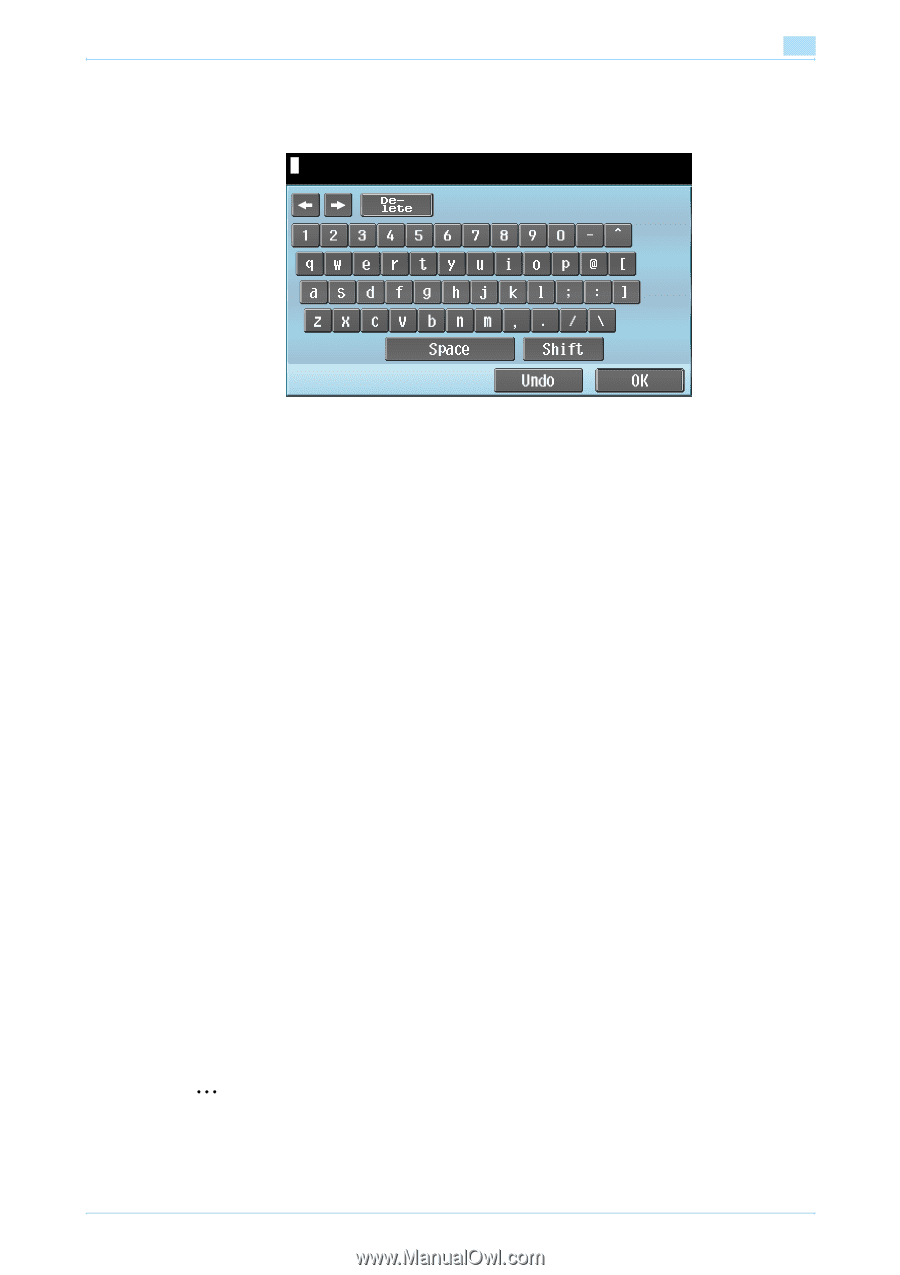
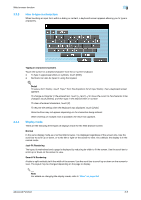
Web browser function 3 3.3.3 How to type in characters When touching an input form within a dialog or content, a keyboard screen appears allowing you to type in characters. 3.3.4 Typing in characters/numbers Touch the button for a desired character from the on-screen keyboard. - To type in uppercase letters or symbols, touch [Shift]. - Numbers can also be typed in using the keypad. ! Detail To save a form history, touch "Input" from the dropdown list of Input history, then a keyboard screen appears. To change a character in the entered text, touch [←] and [→] to move the cursor to the character to be changed, touch [Delete], and then type in the desired letter or number. To clear all entered characters, touch [C]. To resume the setting when the keyboard was displayed, touch [Undo]. Some buttons may not appear depending on the characters being entered. When entering on multiple rows is available, the return key appears. Display mode There are the following three types of displays mode for the Web browser screen. Normal In the same display mode as a normal Web browser, it is displayed regardless of the screen size. Use the scroll bar to scroll up or down, or to the left or right on the screen to view. As a default, the display is in the normal mode. Just-Fit Rendering The layout is maintained and a page is displayed by reducing its width to fit the screen. Use the scroll bar to scroll up or down on the screen to view. Smart-Fit Rendering A table is split vertically to fit the width of the screen. Use the scroll bar to scroll up or down on the screen to view. The layout may be changed depending on the page to display. 2 Note For details on changing the display mode, refer to "View" on page 3-9. Advanced Function 3-5
-
 1
1 -
2
-
3
-
4
-
5
-
6
-
7
-
8
-
9
-
10
-
11
-
12
-
13
-
 14
14 -
 15
15 -
 16
16 -
 17
17 -
 18
18 -
 19
19 -
 20
20 -
 21
21 -
 22
22 -
 23
23 -
 24
24 -
25
-
26
-
27
-
28
-
29
-
30
-
31
-
32
-
33
-
34
-
35
-
36
-
37
-
38
-
39
-
40
-
41
-
42
-
43
-
44
-
45
-
46
-
47
-
48
-
49
-
50
-
51
-
52
-
53
-
54
-
55
-
56
-
57
-
58
-
59
-
60
-
61
-
62
-
63
-
64
-
65
-
66
-
67
-
68
-
69
-
70
-
71
-
72
-
73
-
74
-
75
-
76
-
77
-
78
-
79
-
80
-
81
-
82
 |
 |