Konica Minolta bizhub C550 bizhub C203/C253/C353/C451/C550/C650 Advanced Funct - Page 40
Operation flow - memory
 |
View all Konica Minolta bizhub C550 manuals
Add to My Manuals
Save this manual to your list of manuals |
Page 40 highlights
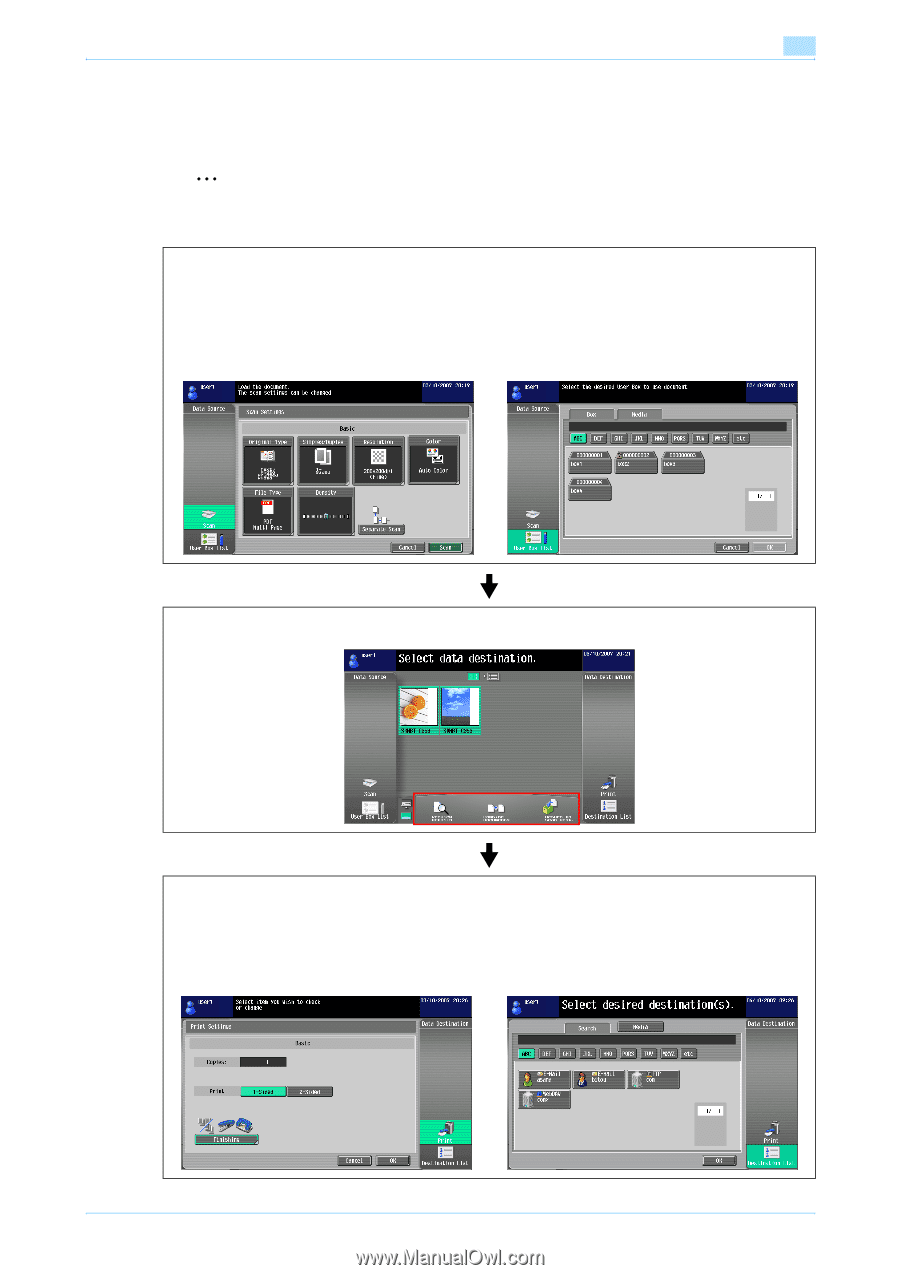
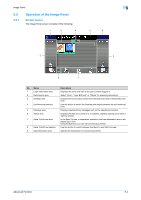
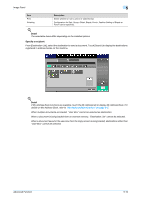
Image Panel 5 5.3.2 Operation flow This section describes the operation flow from scanning documents until sending them, by operating the Image Panel in the order of "scanning documents", "editing" and "specifying the destination". 2 Note It is also possible to specify the destination first, and then scan documents. Scan the document in the Data Source area. • To scan an original, position the original and then touch [Scan]. Specify the scan settings as required, and then start scanning. For details, refer to "Scan" on page 5-6. • To use a document saved in a user box, select a user box from [User Box List], and select a document to be loaded. For details, refer to "Load from user box" on page 5-7. • To use a document saved in an external memory, select the Media tab in the User Box List screen, and then select a document to be loaded. For details, refer to "Load from external memory" on page 5-7. Select [Scan] Select [User Box List] Edit the scanned document in the Edit tool area as necessary. For details, refer to "Edit" on page 5-8. Specify the destination of scanned documents in the Data destination area. • To print a document, touch [Print]. For details, refer to "Print" on page 5-9. • To send a document, select the destination from [Destination List]. For details, refer to "Specify a recipient" on page 5-10. • To save in an external memory, touch [Media] in the Destination List screen. For details, refer to "Save in external memory" on page 5-11. Select [Print] Select [Destination List] Advanced Function 5-5
-
 1
1 -
2
-
3
-
4
-
5
-
6
-
7
-
8
-
9
-
10
-
11
-
12
-
13
-
14
-
15
-
16
-
17
-
18
-
19
-
20
-
21
-
22
-
23
-
24
-
25
-
26
-
27
-
28
-
29
-
30
-
31
-
32
-
33
-
34
-
 35
35 -
 36
36 -
 37
37 -
 38
38 -
 39
39 -
 40
40 -
 41
41 -
 42
42 -
 43
43 -
 44
44 -
 45
45 -
46
-
47
-
48
-
49
-
50
-
51
-
52
-
53
-
54
-
55
-
56
-
57
-
58
-
59
-
60
-
61
-
62
-
63
-
64
-
65
-
66
-
67
-
68
-
69
-
70
-
71
-
72
-
73
-
74
-
75
-
76
-
77
-
78
-
79
-
80
-
81
-
82
 |
 |