Konica Minolta bizhub C550 bizhub C203/C253/C353/C451/C550/C650 Advanced Funct - Page 39
Operation of the Image Panel
 |
View all Konica Minolta bizhub C550 manuals
Add to My Manuals
Save this manual to your list of manuals |
Page 39 highlights
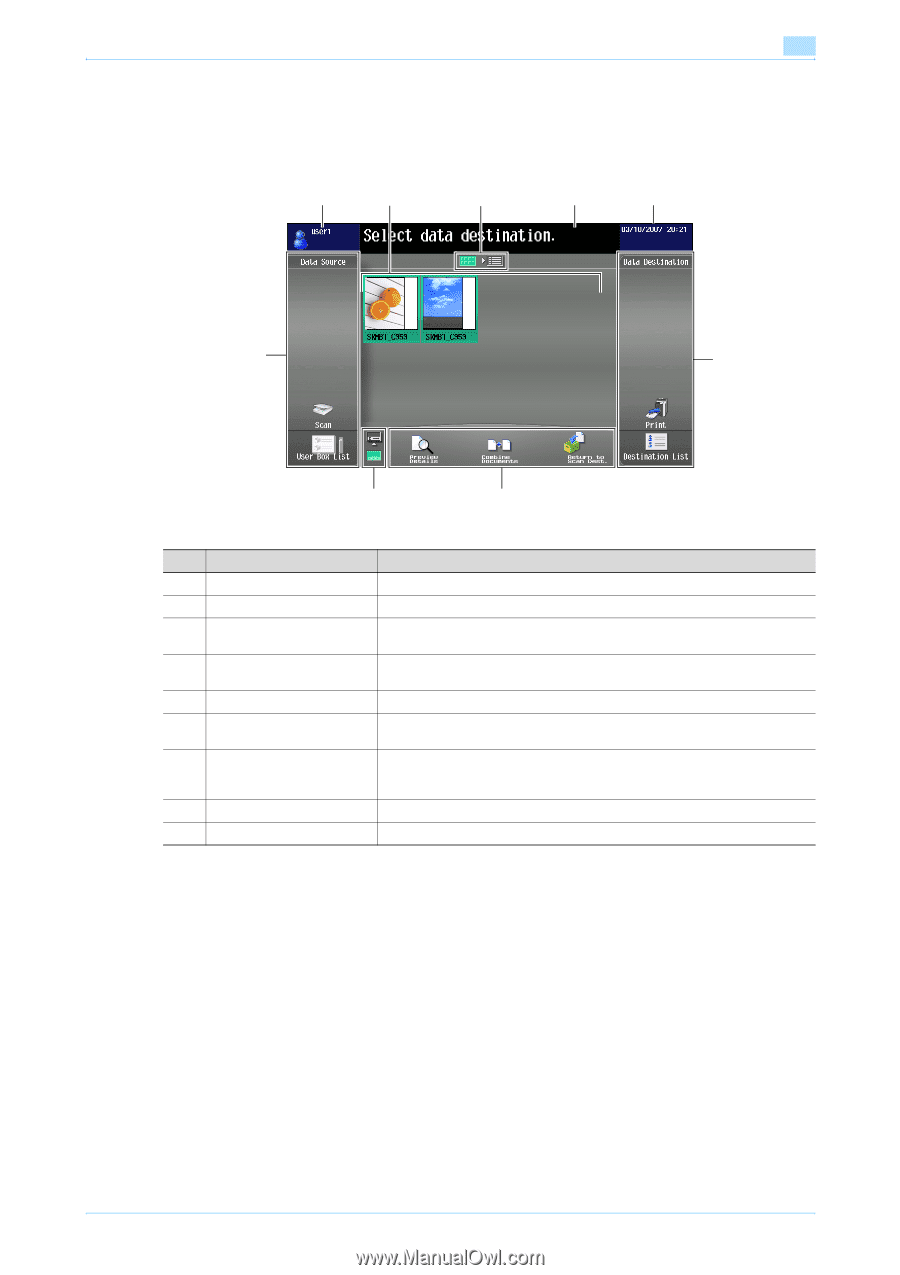
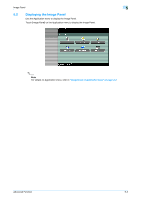
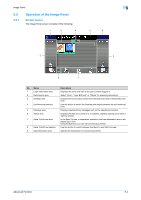
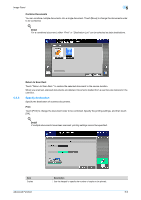
Image Panel 5 5.3 5.3.1 Operation of the Image Panel Screen layout The Image Panel screen consists of the following: 1 3 4 5 6 2 9 8 7 No. Name 1 Login information area 2 Data Source area 3 Desktop area 4 List/thumbnail selector 5 Message area 6 Status area 7 Send To/Edit tool area 8 Send To/Edit tool selector 9 Data destination area Description Displays the name and icon of the user currently logged in. Select "Scan", "User BOX List" or "Media" for scanning documents. Displays the scanned documents from the Data scan area in thumbnails or list form. Use this button to switch the Desktop area display between list and thumbnail form. Displays supplementary messages such as the operation procedure. Displays the date and current time. In addition, displays warning icons when a warning occurs. In the Send To area, a destination selected in the Data destination area is displayed as an icon. Using the Edit tool, you can edit scanned documents. Use this button to switch between the Send To and Edit tool area. Specify the destination for scanned documents. Advanced Function 5-4
-
 1
1 -
2
-
3
-
4
-
5
-
6
-
7
-
8
-
9
-
10
-
11
-
12
-
13
-
14
-
15
-
16
-
17
-
18
-
19
-
20
-
21
-
22
-
23
-
24
-
25
-
26
-
27
-
28
-
29
-
30
-
31
-
32
-
33
-
 34
34 -
 35
35 -
 36
36 -
 37
37 -
 38
38 -
 39
39 -
 40
40 -
 41
41 -
 42
42 -
 43
43 -
 44
44 -
45
-
46
-
47
-
48
-
49
-
50
-
51
-
52
-
53
-
54
-
55
-
56
-
57
-
58
-
59
-
60
-
61
-
62
-
63
-
64
-
65
-
66
-
67
-
68
-
69
-
70
-
71
-
72
-
73
-
74
-
75
-
76
-
77
-
78
-
79
-
80
-
81
-
82
 |
 |