Konica Minolta bizhub C550 bizhub C203/C253/C353/C451/C550/C650 Advanced Funct - Page 21
Favorites Add, Address, History, Print - staples
 |
View all Konica Minolta bizhub C550 manuals
Add to My Manuals
Save this manual to your list of manuals |
Page 21 highlights
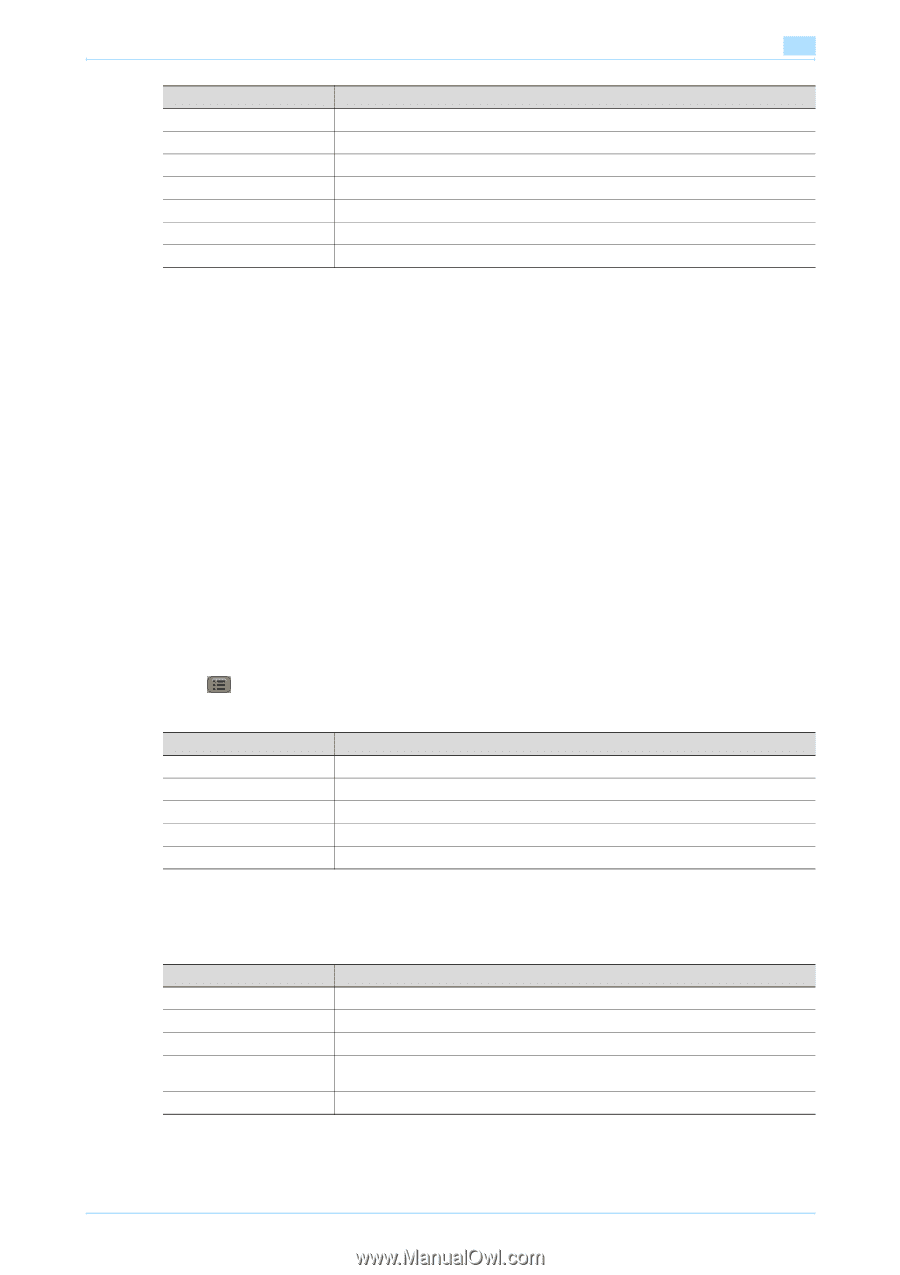
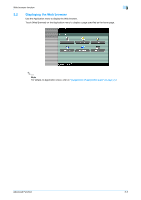
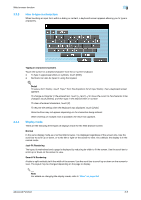
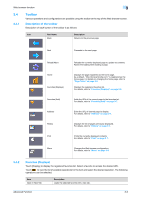
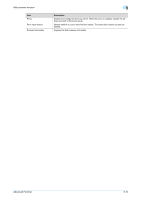
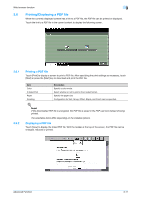
Web browser function 3 3.4.3 3.4.4 3.4.5 Item Edit Display by Address Display by Title Move Up Move Down Delete Delete All Description Edits the title and address of the selected favorite. Displays the favorites list by address. Displays the favorites list by title. Moves the selected favorite upward. Moves the selected favorite downward. Deletes the selected favorite. Deletes all the registered favorites. Favorites (Add) Touch [Add] to add the URL of the current page to the favorites list. The title registered is that given to the content in advance. To change the title, edit the title from the favorites list after adding it once to the list. Address Touch [Address] to display the address input screen. Touch the input form to display a keyboard screen. Type in the desired URL, and then touch [OK] or [Open in New Tab]. Touch [Input History] to display the list for input history and refer to your previous inputs. ! Detail You can see that the URL of the current page has been entered in the address input screen. The URL can be deleted by touching [Delete] after displaying a keyboard screen. All the entered URLs can be deleted by pressing the [C] (clear) key from the control panel. History Touch [History] to display the screen that lists the display history. You can select the page you desire to access again from the list. Touch to view the list of available operations for the item and select the desired operation. The following operations can be selected. 3.4.6 Item Open in New Tab Display by Address Display by Title Delete Delete All Description Loads the selected history with a new tab. Displays the history list by address. Displays the history list by title. Deletes the selected history. Deletes all the histories. Print Touch [Print] to display a screen to print a Web page. Touch [Start] or press the [Start] key after specifying the print settings prints the current contents. Item Color 2-Sided Print Paper Printing Finishing Description Specify a color mode. Select whether or not to print in the 2-sided format. Specify the paper size. Select whether or not to print the title, date, or URL. Title and date are printed on the header, while URL on the footer. Configuration for Sort, Group, Offset, Staple, and Punch can be specified. Advanced Function 3-7
-
 1
1 -
2
-
3
-
4
-
5
-
6
-
7
-
8
-
9
-
10
-
11
-
12
-
13
-
14
-
15
-
 16
16 -
 17
17 -
 18
18 -
 19
19 -
 20
20 -
 21
21 -
 22
22 -
 23
23 -
 24
24 -
 25
25 -
 26
26 -
27
-
28
-
29
-
30
-
31
-
32
-
33
-
34
-
35
-
36
-
37
-
38
-
39
-
40
-
41
-
42
-
43
-
44
-
45
-
46
-
47
-
48
-
49
-
50
-
51
-
52
-
53
-
54
-
55
-
56
-
57
-
58
-
59
-
60
-
61
-
62
-
63
-
64
-
65
-
66
-
67
-
68
-
69
-
70
-
71
-
72
-
73
-
74
-
75
-
76
-
77
-
78
-
79
-
80
-
81
-
82
 |
 |