LG PM-225 User Guide - Page 128
Taking Pictures
 |
UPC - 652810513586
View all LG PM-225 manuals
Add to My Manuals
Save this manual to your list of manuals |
Page 128 highlights
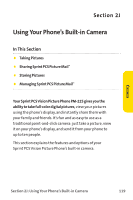
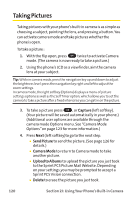
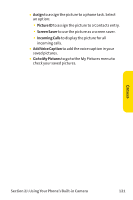
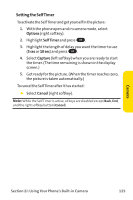
Taking Pictures Taking pictures with your phone's built-in camera is as simple as choosing a subject, pointing the lens, and pressing a button. You can activate camera mode and take pictures whether the phone is open. To take a picture : 1. With the flip open, press OK twice to activate Camera mode. (The camera is now ready to take a picture.) 2. Using the phone's LCD as a viewfinder, aim the camera lens at your subject. Tip: While in camera mode, press the navigation key up and down to adjust the brightness level; press the navigation key right and left to adjust the zoom settings. In camera mode, the right softkey (Options) displays a menu of picture settings options as well as the SelfTimer option, which allows you to set the camera to take a picture after a fixed interval so you can get in on the picture. 3. To take a picture press OK , or Capture (left softkey). (Your picture will be saved automatically in your phone.) (Additional user options are available through the camera mode Options menu. See "Camera Mode Options"on page 123 for more information.) 4. Press Next (left softkey)to go to the next step. Ⅲ Send Picture to send the picture. (See page 126 for details.) Ⅲ Camera Mode to return to Camera mode to take another picture. Ⅲ Upload to Albums to upload the picture you just took to the Sprint PCS Picture Mail Website. Depending on your settings,you may be prompted to accept a Sprint PCS Vision connection. Ⅲ Delete to erase the picture you just took. 120 Section 2J: Using Your Phone's Built-in Camera
-
 1
1 -
2
-
3
-
4
-
5
-
6
-
7
-
8
-
9
-
10
-
11
-
12
-
13
-
14
-
15
-
16
-
17
-
18
-
19
-
20
-
21
-
22
-
23
-
24
-
25
-
26
-
27
-
28
-
29
-
30
-
31
-
32
-
33
-
34
-
35
-
36
-
37
-
38
-
39
-
40
-
41
-
42
-
43
-
44
-
45
-
46
-
47
-
48
-
49
-
50
-
51
-
52
-
53
-
54
-
55
-
56
-
57
-
58
-
59
-
60
-
61
-
62
-
63
-
64
-
65
-
66
-
67
-
68
-
69
-
70
-
71
-
72
-
73
-
74
-
75
-
76
-
77
-
78
-
79
-
80
-
81
-
82
-
83
-
84
-
85
-
86
-
87
-
88
-
89
-
90
-
91
-
92
-
93
-
94
-
95
-
96
-
97
-
98
-
99
-
100
-
101
-
102
-
103
-
104
-
105
-
106
-
107
-
108
-
109
-
110
-
111
-
112
-
113
-
114
-
115
-
116
-
117
-
118
-
119
-
120
-
121
-
122
-
 123
123 -
 124
124 -
 125
125 -
 126
126 -
 127
127 -
 128
128 -
 129
129 -
 130
130 -
 131
131 -
 132
132 -
 133
133 -
134
-
135
-
136
-
137
-
138
-
139
-
140
-
141
-
142
-
143
-
144
-
145
-
146
-
147
-
148
-
149
-
150
-
151
-
152
-
153
-
154
-
155
-
156
-
157
-
158
-
159
-
160
-
161
-
162
-
163
-
164
-
165
-
166
-
167
-
168
-
169
-
170
-
171
-
172
-
173
-
174
-
175
-
176
-
177
-
178
-
179
-
180
-
181
-
182
-
183
-
184
-
185
-
186
-
187
-
188
-
189
-
190
-
191
-
192
-
193
-
194
-
195
-
196
-
197
-
198
-
199
-
200
-
201
-
202
-
203
-
204
-
205
-
206
-
207
-
208
-
209
-
210
-
211
-
212
-
213
-
214
-
215
-
216
 |
 |