Lexmark E260dn Service Manual - Page 83
Solving print quality problems - printer user guide
 |
View all Lexmark E260dn manuals
Add to My Manuals
Save this manual to your list of manuals |
Page 83 highlights
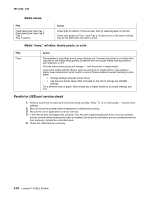
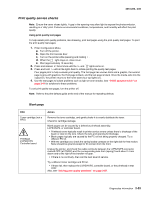
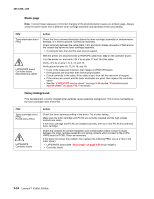
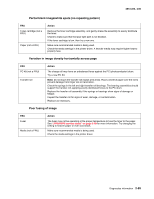
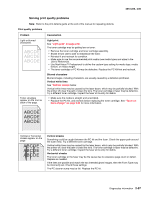
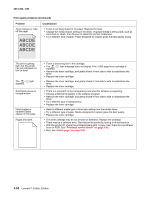
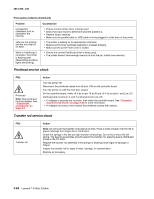
4513-220, -230 Solving print quality problems Note: Refer to the print defects guide at the end of the manual for repeating defects. Print quality problems Problem Light or blurred characters. Toner smudges appear on the front or back of the page. Cause/action Light print See "Light print" on page 2-56. The toner cartridge may be getting low on toner: • Remove the toner cartridge and toner cartridge assembly. • Shake it from side to side to redistribute the toner. • Reinstall it and recheck for condition. • Make sure to use the recommended print media (see media types and sizes in the User's Reference). • Use MarkVision™ Professional to define the custom type setting for media type, media texture, or media weight. • The toner cartridge or PC Kit may be defective. Replace the PC Kit first and recheck. Blurred characters Blurred images, including characters, are usually caused by a defective printhead. Vertical white lines See "Vertical streaks below. Vertical white lines may be caused by the laser beam, which may be partially blocked. With the printer off, clear the path or clean the lens. The toner cartridge or fuser may be defective. Try a different toner cartridge. Inspect the fuser at its entry for debris. • Make sure the media is straight and unwrinkled. • Replace the PC Kit, and recheck before replacing the toner cartridge. See "Toner on back of page" on page 2-56 for more information. Vertical or horizontal streaks appear on the page. Vertical streaks Something could be caught between the PC kit and the fuser. Check the paper path around the fuser entry. Try a different toner cartridge. Vertical white lines may be caused by the laser beam, which may be partially blocked. With the printer off, clear the path or clean the lens. The toner cartridge or fuser may be defective. Try a different toner cartridge. Inspect the fuser at its entry for debris. Horizontal streaks The toner cartridge or the fuser may be the cause due to excessive page count or defect. Replace as needed. If the lines are parallel and match the two intended ghost images, then the Form Type may be incorrectly set. Check those settings. The PC cleaner sump may be full. Replace the PC kit. Diagnostics information 2-57
-
 1
1 -
2
-
3
-
4
-
5
-
6
-
7
-
8
-
9
-
10
-
11
-
12
-
13
-
14
-
15
-
16
-
17
-
18
-
19
-
20
-
21
-
22
-
23
-
24
-
25
-
26
-
27
-
28
-
29
-
30
-
31
-
32
-
33
-
34
-
35
-
36
-
37
-
38
-
39
-
40
-
41
-
42
-
43
-
44
-
45
-
46
-
47
-
48
-
49
-
50
-
51
-
52
-
53
-
54
-
55
-
56
-
57
-
58
-
59
-
60
-
61
-
62
-
63
-
64
-
65
-
66
-
67
-
68
-
69
-
70
-
71
-
72
-
73
-
74
-
75
-
76
-
77
-
 78
78 -
 79
79 -
 80
80 -
 81
81 -
 82
82 -
 83
83 -
 84
84 -
 85
85 -
 86
86 -
 87
87 -
 88
88 -
89
-
90
-
91
-
92
-
93
-
94
-
95
-
96
-
97
-
98
-
99
-
100
-
101
-
102
-
103
-
104
-
105
-
106
-
107
-
108
-
109
-
110
-
111
-
112
-
113
-
114
-
115
-
116
-
117
-
118
-
119
-
120
-
121
-
122
-
123
-
124
-
125
-
126
-
127
-
128
-
129
-
130
-
131
-
132
-
133
-
134
-
135
-
136
-
137
-
138
-
139
-
140
-
141
-
142
-
143
-
144
-
145
-
146
-
147
-
148
-
149
-
150
-
151
-
152
-
153
-
154
-
155
-
156
-
157
-
158
-
159
-
160
-
161
-
162
-
163
-
164
-
165
-
166
-
167
-
168
-
169
-
170
-
171
-
172
-
173
-
174
-
175
-
176
 |
 |
