Lexmark X864 PKI-Enabled Device Installation and Configuration Guide - Page 16
Configuring PKI Scan to Network
 |
View all Lexmark X864 manuals
Add to My Manuals
Save this manual to your list of manuals |
Page 16 highlights
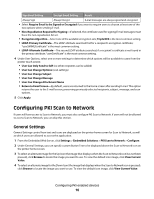
Sign Email Setting Encrypt Email Setting Result Always Sign Always Encrypt E-mail messages are always signed and encrypted. • Select Require Email to be Signed or Encrypted if you want to require users to choose at least one of the two options when sending E-mail. • Non-Repudiation Required for Signing-If selected, the certificate used for signing E-mail messages must have the non-repudiation bit set. • Encryption Algorithm-Select one of the available encryption sets; Triple DES is the most common setting. • LDAP-Primary Certificate-The LDAP attribute searched first for a recipient's encryption certificate; "userSMIMECertificate" is the most common setting. • LDAP-Alternate Certificate-The second LDAP attribute searched, if a recipient's certificate is not found in the primary attribute; "userCertificate" is the most common setting. 4 Under User Options, select one or more settings to determine which options will be available to users from the printer touch screen: • User Can Only Send to Self (no other recipients can be added) • User Can Change Options (scan settings) • User Can Change Subject • User Can Change Message • User Can Change Attachment Name • Return to Email Screen-By default, users are returned to the home screen after sending E-mail. This option returns the user to the E-maill screen, preserving previously selected recipients, subject, message, and scan options. 5 Click Apply. Configuring PKI Scan to Network If users will have access to Scan to Network, you must also configure PKI Scan to Network. If users will not be allowed to access Scan to Network, you can skip this section. General Settings General Settings control how text and icons are displayed on the printer home screen for Scan to Network, as well as which users are allowed to access the application. 1 From the Embedded Web Server, click Settings > Embedded Solutions > PKI Scan to Network > Configure. 2 Under General Settings, you can specify custom Button Text to be displayed above the Scan to Network icon on the printer home screen. 3 To select an alternate image for the Up Icon (the image that displays when the Scan to Network icon has not been pressed), click Browse to locate the image you want to use. To view the default icon image, click View Current Value. 4 To select an alternate image for the Down Icon (the image that displays when the Scan to Network icon is pressed), click Browse to locate the image you want to use. To view the default icon image, click View Current Value. Configuring PKI-enabled devices 16
-
 1
1 -
2
-
3
-
4
-
5
-
6
-
7
-
8
-
9
-
10
-
 11
11 -
 12
12 -
 13
13 -
 14
14 -
 15
15 -
 16
16 -
 17
17 -
 18
18 -
 19
19 -
 20
20 -
 21
21 -
22
-
23
-
24
-
25
-
26
-
27
-
28
-
29
-
30
-
31
-
32
-
33
-
34
-
35
-
36
-
37
-
38
 |
 |