Lexmark Xs463de User Guide - Page 68
In Windows Vista, In Windows XP, Add Printer, Add Port, Finish, Control Panel, System and Maintenance - driver windows 7
 |
UPC - 734646309271
View all Lexmark Xs463de manuals
Add to My Manuals
Save this manual to your list of manuals |
Page 68 highlights
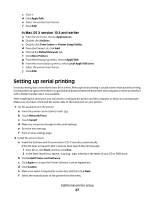
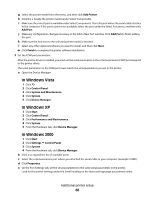
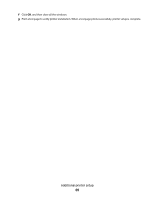
g Select the printer model from the menu, and then click Add Printer. h Click the + beside the printer model under Select Components. i Make sure the correctport is available under SelectComponents. This is the port where the serial cable attaches to the computer. If the correct port is not available, select the port under the Select Port menu, and then click Add Port. j Make any configuration changes necessary in the Add a New Port window. Click Add Port to finish adding the port. k Make sure the box next to the selected printer model is checked. l Select any other optional software you want to install, and then click Next. m Click Finish to complete the printer software installation. 3 Set the COM port parameters: After the printer driver is installed, you must set the serial parameters in the communications (COM) port assigned to the printer driver. The serial parameters in the COM port must match the serial parameters you set in the printer. a Open the Device Manager: In Windows Vista 1 Click . 2 Click Control Panel. 3 Click System and Maintenance. 4 Click System. 5 Click Device Manager. In Windows XP 1 Click Start. 2 Click Control Panel. 3 Click Performance and Maintenance. 4 Click System. 5 From the Hardware tab, click Device Manager. In Windows 2000 1 Click Start. 2 Click Settings Control Panel. 3 Click System. 4 From the Hardware tab, click Device Manager. b Click + to expand the list of available ports. c Select the communications port where you attached the serial cable to your computer (example: COM1). d Click Properties. e On the Port Settings tab, set the serial parameters to the same serial parameters in the printer. Look for the printer settings under the Serial heading on the menu settings page you printed earlier. Additional printer setup 68
-
 1
1 -
2
-
3
-
4
-
5
-
6
-
7
-
8
-
9
-
10
-
11
-
12
-
13
-
14
-
15
-
16
-
17
-
18
-
19
-
20
-
21
-
22
-
23
-
24
-
25
-
26
-
27
-
28
-
29
-
30
-
31
-
32
-
33
-
34
-
35
-
36
-
37
-
38
-
39
-
40
-
41
-
42
-
43
-
44
-
45
-
46
-
47
-
48
-
49
-
50
-
51
-
52
-
53
-
54
-
55
-
56
-
57
-
58
-
59
-
60
-
61
-
62
-
 63
63 -
 64
64 -
 65
65 -
 66
66 -
 67
67 -
 68
68 -
 69
69 -
 70
70 -
 71
71 -
 72
72 -
 73
73 -
74
-
75
-
76
-
77
-
78
-
79
-
80
-
81
-
82
-
83
-
84
-
85
-
86
-
87
-
88
-
89
-
90
-
91
-
92
-
93
-
94
-
95
-
96
-
97
-
98
-
99
-
100
-
101
-
102
-
103
-
104
-
105
-
106
-
107
-
108
-
109
-
110
-
111
-
112
-
113
-
114
-
115
-
116
-
117
-
118
-
119
-
120
-
121
-
122
-
123
-
124
-
125
-
126
-
127
-
128
-
129
-
130
-
131
-
132
-
133
-
134
-
135
-
136
-
137
-
138
-
139
-
140
-
141
-
142
-
143
-
144
-
145
-
146
-
147
-
148
-
149
-
150
-
151
-
152
-
153
-
154
-
155
-
156
-
157
-
158
-
159
-
160
-
161
-
162
-
163
-
164
-
165
-
166
-
167
-
168
-
169
-
170
-
171
-
172
-
173
-
174
-
175
-
176
-
177
-
178
-
179
-
180
-
181
-
182
-
183
-
184
-
185
-
186
-
187
-
188
-
189
-
190
-
191
-
192
-
193
-
194
-
195
-
196
-
197
-
198
-
199
-
200
-
201
-
202
-
203
-
204
-
205
-
206
-
207
-
208
-
209
-
210
-
211
-
212
-
213
-
214
-
215
-
216
-
217
-
218
-
219
-
220
-
221
-
222
-
223
-
224
-
225
-
226
-
227
-
228
-
229
-
230
-
231
-
232
-
233
-
234
-
235
-
236
-
237
-
238
-
239
-
240
-
241
-
242
-
243
-
244
-
245
-
246
-
247
-
248
-
249
-
250
-
251
-
252
-
253
-
254
-
255
-
256
-
257
-
258
-
259
-
260
-
261
-
262
-
263
-
264
-
265
-
266
-
267
-
268
-
269
-
270
-
271
-
272
-
273
-
274
-
275
-
276
-
277
-
278
-
279
-
280
-
281
-
282
-
283
-
284
-
285
-
286
-
287
-
288
-
289
-
290
-
291
-
292
-
293
-
294
-
295
-
296
-
297
-
298
-
299
-
300
-
301
-
302
-
303
-
304
-
305
-
306
-
307
-
308
-
309
-
310
-
311
-
312
-
313
-
314
-
315
-
316
-
317
 |
 |