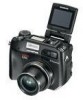
Olympus 5060 C-5060 Wide Zoom Reference Manual (9.6 MB) - Page 23
How to use this manual - c mode dial
 |
View all Olympus 5060 manuals
Add to My Manuals
Save this manual to your list of manuals |
Page 23 highlights
How to use this manual Flash Set the mode dial to any of the marks shown here. Flash intensity control You can adjust the amount of light emitted by the flash. In some situations, you may get better results by adjusting the light emission. Examples include small subjects, distant backgrounds, or situations when increased contrast is desired. Mode dial 1 Adjust the brightness by turning Control dial the control dial while holding F Exposure compensation down # and F at the same time. button • The exposure value is displayed on the control panel while the flash intensity control function is set. 4 Turning to the left decreases the light emission. Min. setting is -2.0. #Flash mode button Turning to the right increases the light emission. Max. setting is +2.0. The buttons for the function and their location are clearly illustrated. TIPS • The flash intensity can be set in 1/3EV steps or 1/2EV steps This shows control dial operations. Follow the arrows to perform menu operations. For details on operating procedures, see "How to use the menus" (P.49). SHARPNESS This function adjusts the sharpness of the image. Mode dial 1 In the top menu, select MODE MENU → PICTURE → SHARPNESS, and press d. g"How to use the menus" (P.49) 2 Press ac to adjust the sharpness between +5 and -5. • To increase the sharpness (+) : Press a. The image contours are 6 emphasized, making the image appear sharper and more vivid. Use Et CARD PICtURE CAM Arrow pad OK button SHARPNESS CONtRASt SAtURAtION This represents the arrow pad. Only arrows applicable to the operation are shown. This sample page is only for your reference. It may differ from the actual page in this manual. 22
-
 1
1 -
2
-
3
-
4
-
5
-
6
-
7
-
8
-
9
-
10
-
11
-
12
-
13
-
14
-
15
-
16
-
17
-
 18
18 -
 19
19 -
 20
20 -
 21
21 -
 22
22 -
 23
23 -
 24
24 -
 25
25 -
 26
26 -
 27
27 -
 28
28 -
29
-
30
-
31
-
32
-
33
-
34
-
35
-
36
-
37
-
38
-
39
-
40
-
41
-
42
-
43
-
44
-
45
-
46
-
47
-
48
-
49
-
50
-
51
-
52
-
53
-
54
-
55
-
56
-
57
-
58
-
59
-
60
-
61
-
62
-
63
-
64
-
65
-
66
-
67
-
68
-
69
-
70
-
71
-
72
-
73
-
74
-
75
-
76
-
77
-
78
-
79
-
80
-
81
-
82
-
83
-
84
-
85
-
86
-
87
-
88
-
89
-
90
-
91
-
92
-
93
-
94
-
95
-
96
-
97
-
98
-
99
-
100
-
101
-
102
-
103
-
104
-
105
-
106
-
107
-
108
-
109
-
110
-
111
-
112
-
113
-
114
-
115
-
116
-
117
-
118
-
119
-
120
-
121
-
122
-
123
-
124
-
125
-
126
-
127
-
128
-
129
-
130
-
131
-
132
-
133
-
134
-
135
-
136
-
137
-
138
-
139
-
140
-
141
-
142
-
143
-
144
-
145
-
146
-
147
-
148
-
149
-
150
-
151
-
152
-
153
-
154
-
155
-
156
-
157
-
158
-
159
-
160
-
161
-
162
-
163
-
164
-
165
-
166
-
167
-
168
-
169
-
170
-
171
-
172
-
173
-
174
-
175
-
176
-
177
-
178
-
179
-
180
-
181
-
182
-
183
-
184
-
185
-
186
-
187
-
188
-
189
-
190
-
191
-
192
-
193
-
194
-
195
-
196
-
197
-
198
-
199
-
200
-
201
-
202
-
203
-
204
-
205
-
206
-
207
-
208
-
209
-
210
-
211
-
212
-
213
-
214
-
215
-
216
-
217
-
218
-
219
-
220
-
221
-
222
-
223
-
224
-
225
-
226
-
227
-
228
-
229
-
230
-
231
-
232
-
233
-
234
-
235
-
236
-
237
-
238
-
239
-
240
-
241
-
242
-
243
-
244
-
245
-
246
-
247
-
248
-
249
-
250
-
251
-
252
-
253
-
254
-
255
-
256
-
257
-
258
-
259
-
260
-
261
-
262
-
263
-
264
-
265
-
266
-
267
-
268
-
269
-
270
-
271
-
272
-
273
-
274
-
275
-
276
-
277
-
278
-
279
-
280
-
281
-
282
-
283
-
284
-
285
-
286
-
287
-
288
-
289
 |
 |
