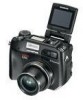
Olympus 5060 C-5060 Wide Zoom Reference Manual (9.6 MB) - Page 36
Startup/Shutdown screen, If the card is not recognized (card check), Control panel, Monitor
 |
View all Olympus 5060 manuals
Add to My Manuals
Save this manual to your list of manuals |
Page 36 highlights
Getting started Turning the power on/off Startup/Shutdown screen You can select a picture and sound so that when the power is turned on/off, a startup/shutdown image is displayed on the monitor and the startup/shutdown sound is played (P.188). You can register a picture for the startup/shutdown screen (P.189) and adjust the volume of the sound (P.187). 1 Startup/Shutdown screen (Factory default setting) If the card is not recognized (card check) When the power is turned on, the camera checks the card automatically. If there is no card in the camera or a card that is not supported by this camera is inserted, the following screen is displayed. Control panel Monitor indication NO CARD CARD%SEtUP POWER%OFF SELECt FORMAt GO Corrective action There is no card in the camera or the card is not inserted properly. → Insert a card. If a card is already inserted, remove it and insert it again correctly. The card cannot record, play back or erase pictures. Replace the card. with a new one or format the card. → Press ac to select POWER OFF, then press e. Replace the card with a new one. → Format the card. Press ac to select I FORMAT, then press e to display the confirmation screen. Select YES and press e. Formatting starts. If the card was successfully formatted, the camera is ready to take pictures. • All data stored on the card is erased when the card is formatted. Note 35
-
 1
1 -
2
-
3
-
4
-
5
-
6
-
7
-
8
-
9
-
10
-
11
-
12
-
13
-
14
-
15
-
16
-
17
-
18
-
19
-
20
-
21
-
22
-
23
-
24
-
25
-
26
-
27
-
28
-
29
-
30
-
 31
31 -
 32
32 -
 33
33 -
 34
34 -
 35
35 -
 36
36 -
 37
37 -
 38
38 -
 39
39 -
 40
40 -
 41
41 -
42
-
43
-
44
-
45
-
46
-
47
-
48
-
49
-
50
-
51
-
52
-
53
-
54
-
55
-
56
-
57
-
58
-
59
-
60
-
61
-
62
-
63
-
64
-
65
-
66
-
67
-
68
-
69
-
70
-
71
-
72
-
73
-
74
-
75
-
76
-
77
-
78
-
79
-
80
-
81
-
82
-
83
-
84
-
85
-
86
-
87
-
88
-
89
-
90
-
91
-
92
-
93
-
94
-
95
-
96
-
97
-
98
-
99
-
100
-
101
-
102
-
103
-
104
-
105
-
106
-
107
-
108
-
109
-
110
-
111
-
112
-
113
-
114
-
115
-
116
-
117
-
118
-
119
-
120
-
121
-
122
-
123
-
124
-
125
-
126
-
127
-
128
-
129
-
130
-
131
-
132
-
133
-
134
-
135
-
136
-
137
-
138
-
139
-
140
-
141
-
142
-
143
-
144
-
145
-
146
-
147
-
148
-
149
-
150
-
151
-
152
-
153
-
154
-
155
-
156
-
157
-
158
-
159
-
160
-
161
-
162
-
163
-
164
-
165
-
166
-
167
-
168
-
169
-
170
-
171
-
172
-
173
-
174
-
175
-
176
-
177
-
178
-
179
-
180
-
181
-
182
-
183
-
184
-
185
-
186
-
187
-
188
-
189
-
190
-
191
-
192
-
193
-
194
-
195
-
196
-
197
-
198
-
199
-
200
-
201
-
202
-
203
-
204
-
205
-
206
-
207
-
208
-
209
-
210
-
211
-
212
-
213
-
214
-
215
-
216
-
217
-
218
-
219
-
220
-
221
-
222
-
223
-
224
-
225
-
226
-
227
-
228
-
229
-
230
-
231
-
232
-
233
-
234
-
235
-
236
-
237
-
238
-
239
-
240
-
241
-
242
-
243
-
244
-
245
-
246
-
247
-
248
-
249
-
250
-
251
-
252
-
253
-
254
-
255
-
256
-
257
-
258
-
259
-
260
-
261
-
262
-
263
-
264
-
265
-
266
-
267
-
268
-
269
-
270
-
271
-
272
-
273
-
274
-
275
-
276
-
277
-
278
-
279
-
280
-
281
-
282
-
283
-
284
-
285
-
286
-
287
-
288
-
289
 |
 |
