Ricoh Aficio SP 9100DN Hardware Guide
Ricoh Aficio SP 9100DN Manual
 |
View all Ricoh Aficio SP 9100DN manuals
Add to My Manuals
Save this manual to your list of manuals |
Ricoh Aficio SP 9100DN manual content summary:
- Ricoh Aficio SP 9100DN | Hardware Guide - Page 1
Instructions Hardware Guide 1 Guide to the Printer 2 Setting Up 3 Connecting the Printer 4 Configuration 5 Installing the Printer Driver 6 Paper and Other Media 7 Replacing Consumables 8 Cleaning and Adjusting the Printer 9 Troubleshooting 10 Removing Misfed Paper 11 Appendix Read this manual - Ricoh Aficio SP 9100DN | Hardware Guide - Page 2
Adobe Systems Incorporated. PCL® is a registered trademark of Hewlett-Packard Company. Apple, AppleTalk, EtherTalk, Macintosh, Mac OS, and True Edition Microsoft® Windows Server™ 2003 Enterprise Edition Microsoft® Windows Server™ 2003 Web Edition * The product names of Windows NT® 4.0 are as follows - Ricoh Aficio SP 9100DN | Hardware Guide - Page 3
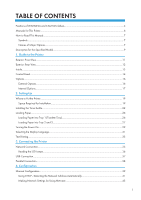
TABLE OF CONTENTS Positions of WARNING and CAUTION labels 4 Manuals for This Printer...6 How to Read This Manual...7 Symbols...7 Names of Major Options...7 Description for the Specified Model...9 1. Guide to the Printer Exterior: Front View...11 Exterior: Rear View...12 Inside...13 Control Panel... - Ricoh Aficio SP 9100DN | Hardware Guide - Page 4
LAN) Configuration 47 Setting SSID...49 Setting a WEP key...50 5. Installing the Printer Driver Quick Install...53 Install the Operating Instructions...55 6. Paper and Other Media Paper and Other Media Supported by This Printer 57 Paper Recommendations...59 Loading Paper...59 Storing Paper...59 - Ricoh Aficio SP 9100DN | Hardware Guide - Page 5
Printing Problems...108 Additional Troubleshooting...113 Pausing Print When Using Finisher...115 Removing Jammed Staples...116 Finisher SR841...116 Finisher SR4000...118 Finisher SR4000 (Saddle Stitch)...120 Removing Staple Waste...123 Removing Punch Waste Toner bottles...149 Specification... - Ricoh Aficio SP 9100DN | Hardware Guide - Page 6
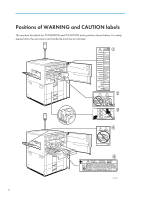
Positions of WARNING and CAUTION labels This machine has labels for WARNING and CAUTION at the positions shown below. For safety, please follow the instructions and handle the machine as indicated. AST006S 4 - Ricoh Aficio SP 9100DN | Hardware Guide - Page 7
AST007S 1. The inside of this printer becomes very hot. Do not touch parts with this label (indicating a hot surface). Touching these parts will result in burns. 2. Do not touch this section of the machine. It could cause injury. 3. Do not touch this section of the machine. It could cause injury. 4. - Ricoh Aficio SP 9100DN | Hardware Guide - Page 8
on safe usage of this machine. To avoid injury and prevent damage to the machine, be sure to read this. Hardware Guide (This manual) Contains information about paper and procedures such as installing options, replacing consumables, responding to error messages, and resolving jams. Software - Ricoh Aficio SP 9100DN | Hardware Guide - Page 9
following set of symbols is used in this manual. This symbol indicates a potentially hazardous situation that might result in death or serious injury when you misuse the machine without following the instructions under this symbol. Be sure to read the instructions, all of which are described in the - Ricoh Aficio SP 9100DN | Hardware Guide - Page 10
• [Booklet Finisher] Finisher SR4000 8 - Ricoh Aficio SP 9100DN | Hardware Guide - Page 11
Description for the Specified Model In this manual, the following items explain about the printer for the specified models: This explains about the 220 - 240 V model printer. Read if you purchase this model. - Ricoh Aficio SP 9100DN | Hardware Guide - Page 12
10 - Ricoh Aficio SP 9100DN | Hardware Guide - Page 13
1. Guide to the Printer Exterior: Front View 1 AST001S 1. Call- light Notifies you of errors during printing, such as paper jam and out of paper. 2. External Tray ( - Ricoh Aficio SP 9100DN | Hardware Guide - Page 14
1. Guide to the Printer Exterior: Rear View 1 AST002S 1. Ethernet Port Use a network interface cable to connect the printer to the network. 2. USB port Use a USB cable - Ricoh Aficio SP 9100DN | Hardware Guide - Page 15
Fusing Unit" message appears on the panel display, replace the fusing unit. For details about replacing this unit, contact your sales or service representative. 2. Toner When "Add toner" message appears on the display panel, replace a toner bottle. 3. Duplex Unit Prints on both sides of paper. 13 - Ricoh Aficio SP 9100DN | Hardware Guide - Page 16
1. Guide to the Printer Control Panel 1 AST004S 1. Display Shows the current status of the printer and error messages. 2. [Job Reset] key When the printer is online, - Ricoh Aficio SP 9100DN | Hardware Guide - Page 17
Control Panel Press this key to return to the previous condition on the display. 10. [ Enter] key Press this key to confirm or apply settings to proceed to the subsequent steps. 11. [ ] [ ] keys 1 Press these keys to increase or decrease displayed values when making settings. Keep pressed to - Ricoh Aficio SP 9100DN | Hardware Guide - Page 18
1. Guide to the Printer Options This section introduces the names and functions of main optional parts. 1 External Options This section provides explanations about external options. AST005S 1. - Ricoh Aficio SP 9100DN | Hardware Guide - Page 19
-TX. • Remove the machine's Ethernet and USB ports before connecting the Gigabit Ethernet Board. • If you want to install the unit, contact your sales or service representative. 17 - Ricoh Aficio SP 9100DN | Hardware Guide - Page 20
1. Guide to the Printer 1 18 - Ricoh Aficio SP 9100DN | Hardware Guide - Page 21
freely accessible, so that in the event of emergency, 2 it can be unplugged easily. • Only connect the machine to the power source described in the manual. • Avoid multi-wiring. • Do not damage, break or make any modifications to the power cord. Do not place heavy objects on it, pull it hard - Ricoh Aficio SP 9100DN | Hardware Guide - Page 22
2. Setting Up A: 10 cm (4 inches) or more B: 5 cm (2 inches) or more C: 4 cm (1.6 inches) or more D: 70 cm (27.6 inches) or more • Permissible and recommended temperature and humidity ranges are as follows: 2 AST101S AST102S • The machine must be level within 5 mm, 0.2" from both front to rear and - Ricoh Aficio SP 9100DN | Hardware Guide - Page 23
• frequent strong vibration • EMF from nearby electronic equipment Where to Put the Printer 2 21 - Ricoh Aficio SP 9100DN | Hardware Guide - Page 24
high standards of quality and functionality, and we recommend that you use only the expendable supplies available at an authorized dealer. • Do not open toner cartridges forcefully. Toner can spill, dirtying your clothes or hands, and possibly resulting in accidental ingestion. • Do not expose the - Ricoh Aficio SP 9100DN | Hardware Guide - Page 25
2. Take the new toner bottle from the box. Installing the Toner bottle 2 AST103S 3. Hold the bottle horizontally, and then shake it five or six times without removing the outer cap. 4. Remove the outer cap. AST104S AST105S 5. Pull the lever out toward you, until it is at 90°. 23 - Ricoh Aficio SP 9100DN | Hardware Guide - Page 26
highest standards of quality and functionality. When pur- chasing expendable supplies, we recommend using only those provided by an authorized dealer. • The toner bottles supplied with the printer allow you to print about 43,000 pages. These numbers were obtained from printing A4 5% charts, but the - Ricoh Aficio SP 9100DN | Hardware Guide - Page 27
, if there is problem, contact the store where they were purchased. • If the toner bottle does not click into position, pull it slightly back toward you, rotate it 10-20° to the right, and then re-insert it. • Do not insert and remove the toner bottle more than necessary, as toner spills may result - Ricoh Aficio SP 9100DN | Hardware Guide - Page 28
automatically shifted to the right. While the paper is moving, a message instructing you to wait appears. Do not pull out the tray at this want to load paper other then A4 or 11 × 81/2 paper, contact your service representative. • Do not stack paper over the limit mark. 1. Carefully pull out the - Ricoh Aficio SP 9100DN | Hardware Guide - Page 29
• Left half of the tray pulled out ANS052S Loading Paper 2 ANS053S 3. Carefully push the paper tray fully in. • You can load paper even while printing from Tray 1. You can pull out the left half of the tray while printing. Loading Paper into Tray 2 and 3 The following explains the procedure for - Ricoh Aficio SP 9100DN | Hardware Guide - Page 30
2. Setting Up 2 ANS054S 2. Square the paper, and then load it print side down. ANS055S 3. Carefully push the paper tray fully in. • The tray can hold up to 550 sheets. 28 - Ricoh Aficio SP 9100DN | Hardware Guide - Page 31
Turning the Power On Turning the Power On • Plug and unplug the power cable with dry hands, or an electric shock could occur. Power Switch • Power Switch (front left) 2 Setting this switch to Stand by makes the power lamp on the control panel unlit. The machine is then in stand by mode. • - Ricoh Aficio SP 9100DN | Hardware Guide - Page 32
2. Setting Up • This machine automatically enters the Energy Saver mode if you do not use it for a certain period. 2 30 - Ricoh Aficio SP 9100DN | Hardware Guide - Page 33
Selecting the Display Language Selecting the Display Language The following explains the procedure for selecting a language on the display. A message about selecting the language will appear on the display. If you want to use the display in English, the following procedures are unnecessary. 1. - Ricoh Aficio SP 9100DN | Hardware Guide - Page 34
2. Setting Up 5. Press the [ Enter] key. Wait for two seconds. The [Menu] screen appears. 6. Press the [Online] key. 2 The initial screen appears. AST010S • The default setting is English. 32 - Ricoh Aficio SP 9100DN | Hardware Guide - Page 35
Test Printing The following explains the procedure for test printing of the configuration page. 1. Press the [Menu] key. Test Printing 2 AST008S The menu appears on the display. 2. Press the [ ] or [ ] key to display [List/Test print], and then press the [ Enter] key. The menu for selecting the - Ricoh Aficio SP 9100DN | Hardware Guide - Page 36
follow contents of an error message on the display, and retry a test print. • For details about the configuration page, see "Interpreting the Configuration Page", Software Guide. 34 - Ricoh Aficio SP 9100DN | Hardware Guide - Page 37
the 10BASE-T or 100BASE-TX cable to the printer's Ethernet port. Alternatively, the optional gigabit ethernet board, which supports 1000BASE-T, is available. • Use shielded Ethernet cable. Unshielded cables create electromagnetic interference that could cause 3 malfunctions. • The Ethernet - Ricoh Aficio SP 9100DN | Hardware Guide - Page 38
board is attached to the printer. • For details about network environment settings, see Software Guide. • For details about attaching the gigabit ethernet board, contact your sales or service representative. Reading the LED Lamps 3 For standard ethernet port AQV563S 1. Green: comes on when - Ricoh Aficio SP 9100DN | Hardware Guide - Page 39
is possible under Windows Me/2000/XP, Windows Server 2003, Mac OS 9.x, and Mac OS X. • Windows Me supports USB1.1 speeds. • USB connection with Macintosh is only possible USB connection printing, see Software Guide. • For details about attaching the gigabit ethernet board, contact your sales or - Ricoh Aficio SP 9100DN | Hardware Guide - Page 40
the other end of the parallel cable to your computer's parallel port. Secure the cable. • For details about settings for parallel connection printing, see Software Guide. • For details about attaching the IEEE 1284 interface board, contact your sales or - Ricoh Aficio SP 9100DN | Hardware Guide - Page 41
to the network interface you are using. You can use SmartDeviceMonitor for Admin or a Web browser to make IP address-related settings in a TCP/IP-capable environment. The following set automatically. • Make this setting only when it is necessary. See Software Guide. 1. Press the [Menu] key. 39 - Ricoh Aficio SP 9100DN | Hardware Guide - Page 42
4. Configuration AST008S The menu appears on the display. 4 2. Press the [ ] or [ ] key to select [Host Interface], and then press the [ Enter] key. 3. Press the [ ] or [ ] key to select [Network Setup], and then press the [ Enter] key. 4. Press the [ ] or [ ] key to select [Active Protocol], - Ricoh Aficio SP 9100DN | Hardware Guide - Page 43
Ethernet Configuration 8. If you use IPv4, assign the IPv4 address to the printer. Press the [ ] or [ ] key to select [IPv4 Settings], and then press the [ Enter] key. To get the IP address for the printer, contact your network administrator. 9. To specify the IP Address, press the [ ] or [ ] key to - Ricoh Aficio SP 9100DN | Hardware Guide - Page 44
4. Configuration AST008S The menu appears on the display. 4 2. Press the [ ] or [ ] key to select [Host Interface], and then press the [ Enter] key. 3. Press the [ ] or [ ] key to select [Network Setup], and then press the [ Enter] key. 4. Press the [ ] or [ ] key to select [IPv4 Settings], - Ricoh Aficio SP 9100DN | Hardware Guide - Page 45
Ethernet Configuration • For details about printing the configuration page, see p.33 "Test Printing". Making Network Settings for Using Netware If you use NetWare, select the frame type for NetWare. Select one of the items below if necessary. • Auto Select • Ethernet II • Ethernet 802.2 • - Ricoh Aficio SP 9100DN | Hardware Guide - Page 46
4. Configuration 4. Press the [ ] or [ ] key to select [Frame Type (NW)], and then press the [ Enter] key. 5. Press the [ ] or [ ] key to select the frame type, and then press the [ Enter] key. 4 6. Press the [Menu] key to return to the initial screen. 7. Print a configuration page to confirm the - Ricoh Aficio SP 9100DN | Hardware Guide - Page 47
Ethernet Configuration Printer Router/HUB [10Mbps Half [10Mbps Full [100Mbps D.] D.] Half D.] auto-negotia- tion (auto se- - lection) [100Mbps Full [Auto Select] D.] - • Connection cannot be established if the Ethernet speed does not match your network's transmission speed. • The auto- - Ricoh Aficio SP 9100DN | Hardware Guide - Page 48
4. Configuration 5. Press the [ ] or [ ] key to select the ethernet speed, and then press the [ Enter] key. 6. Press the [Menu] key to return to the initial screen. 7. Print a configuration page to confirm the settings made. • If Ethernet and wireless LAN (IEEE 802.11b) are both connected, select - Ricoh Aficio SP 9100DN | Hardware Guide - Page 49
IEEE 802.11b (Wireless LAN) Configuration IEEE 802.11b (Wireless LAN) Configuration Configure the printer to use IEEE 802.11b (Wireless LAN). The following table shows the control panel settings and their default values. These items appear in the [Host Interface] menu. Comm.Mode Setting Name - Ricoh Aficio SP 9100DN | Hardware Guide - Page 50
not necessary, select [Ad hoc]. • The transmission mode of IEEE 802.11b can also be set using a Web browser. For details, see Web browser, and "Configuring the Network Interface Board Using Web Browser", Software Guide. 6. If [802.11 Ad hoc] or [Ad hoc] is selected for [Comm. Mode], set the channel - Ricoh Aficio SP 9100DN | Hardware Guide - Page 51
made. • SSID can also be set using a Web browser. For details, see the Web Image Monitor Help, and "Configuring the Network Interface Board Using Web Browser" Software Guide. • WEP key can also be set using a Web browser. For details, see Web Image Monitor Help. • For details about printing the - Ricoh Aficio SP 9100DN | Hardware Guide - Page 52
4. Configuration Setting a WEP key In the case of using a WEP key on a network, activate the WEP setting to be used for communication along with WEP. Consult your network administrator for the WEP key to use. 1. In the [IEEE 802.11b] menu, select [Security Method] using the [ ] or [ ] key, and then - Ricoh Aficio SP 9100DN | Hardware Guide - Page 53
IEEE 802.11b (Wireless LAN) Configuration • WEP key can also be set using a Web browser. For details, see Web Image Monitor Help. • For details about printing the configuration page, see p.33 "Test Printing". 4 51 - Ricoh Aficio SP 9100DN | Hardware Guide - Page 54
4. Configuration 4 52 - Ricoh Aficio SP 9100DN | Hardware Guide - Page 55
CD-ROM provided. Using Quick Install, the PCL printer driver and/or RPCS printer driver and DeskTopBinder will be installed under the network environment printer under USB connection. If you connect using USB, see Software Guide. 5 1. Quit all applications currently running. 2. Insert the CD- - Ricoh Aficio SP 9100DN | Hardware Guide - Page 56
] before installation is complete. Restart the computer, then reinstall other softwares or printer drivers. • Auto Run may not work under certain operating system settings. If this is from the CD-ROM provided, Software Guide, for details about bidirectional communication between the printer and - Ricoh Aficio SP 9100DN | Hardware Guide - Page 57
start the installation. • To uninstall the Operating Instructions Manual, select Programs in the Start menu, select your printer driver, and then click Uninstall. You can uninstall each Manual Guide separately. • If you are using an incompatible Web browser and the simpler version of the Operating - Ricoh Aficio SP 9100DN | Hardware Guide - Page 58
5. Installing the Printer Driver 5 56 - Ricoh Aficio SP 9100DN | Hardware Guide - Page 59
6. Paper and Other Media Paper and Other Media Supported by This Printer This section describes the paper size, feed direction, and the maximum amount of paper that can be loaded into each paper tray in this printer. Symbols In this manual (Feed direction) (Feed direction) On the display A4 (210 - Ricoh Aficio SP 9100DN | Hardware Guide - Page 60
81/2 × 11 size paper. 2,500 sheets can be loaded in this tray. Paper weight and number of sheets to be set Tray 1 Tray 2, Tray 3 LCT Supported paper weight Maximum number of sheets (plain paper) 52.3 - 127.9 g/m2 (14 - 34 3100 (1550×2) (80 g/m2, 20 lb.) lb.) 52.3 - 127.9 g/m2 (14 - 34 - Ricoh Aficio SP 9100DN | Hardware Guide - Page 61
quality cannot be guaranteed if paper other than the ones recommended is used. For details about recommended paper, contact your sales or service representative. 6 Storing Paper Paper should always be stored properly. Improperly stored paper might result in poor print quality, paper misfeeds, or - Ricoh Aficio SP 9100DN | Hardware Guide - Page 62
Input], [Paper Type], the target paper tray, and then [Thick Paper]. • The paper size settings made using the control panel have priority over the printer driver settings. Select [Thick] in the [Paper Type:] list. Any input tray can be used. Make sure paper is not stacked higher than the upper limit - Ricoh Aficio SP 9100DN | Hardware Guide - Page 63
using plain paper. • There are types of paper between 128 - 216 g/m2 in weight that are not supported. Paper Not Supported by this Printer Avoid using the following paper as they are not supported by this printer. • Paper meant for an ink-jet printer • Bent, folded, or creased paper • Curled or - Ricoh Aficio SP 9100DN | Hardware Guide - Page 64
6. Paper and Other Media 1. Print area 2. Feed direction 6 3. Approx. 4 mm (0.16 inches) 4. Approx. 2 mm (0.08 inches) • The print area may vary depending on the paper size, printer language and printer driver settings. 62 - Ricoh Aficio SP 9100DN | Hardware Guide - Page 65
automatically shifted to the right. While the paper is moving, a message instructing you to wait appears. Do not pull out the tray at this time paper. If you want to load paper other than A4 paper, contact your service representative. • Do not stack paper over the limit mark. 1. Carefully pull out - Ricoh Aficio SP 9100DN | Hardware Guide - Page 66
6. Paper and Other Media Whole tray pulled out Left half of the tray pulled out ANS052S 6 ANS053S 3. Carefully push the paper tray fully in. • You can load paper even while printing from Tray 1. You can pull out the left half of the tray while printing. Specifying the Paper Type When you load - Ricoh Aficio SP 9100DN | Hardware Guide - Page 67
seconds. The display returns to the menu. 6. Press the [Online] key. The initial screen appears. • Paper type setting can also be set using the printer driver. • The paper size settings made using the control panel have priority over the printer - Ricoh Aficio SP 9100DN | Hardware Guide - Page 68
the next setting is made. After printing on thick paper, reset it to the original setting for the next user. • For printer driver settings, see the printer driver Help. Loading Paper into Tray 2 and 3 The following explains the procedure for loading paper into Tray 2 and 3. • Various sizes of paper - Ricoh Aficio SP 9100DN | Hardware Guide - Page 69
Loading Paper Changing the Paper Size in Tray 2 and 3 The following explains the procedure for changing a paper size in Tray2 and 3. • If a paper tray is pushed vigorously when putting it back into place, the position of the tray's side fence may slip out of place. • Check the top of the paper is - Ricoh Aficio SP 9100DN | Hardware Guide - Page 70
6. Paper and Other Media ANS024S 5. Slide the end fence until it is aligned with the paper size you want to load. 6 ANS025S 6. Square the paper and load it print side up. Re-lock the side fence again. ANS026S 7. Carefully slide the paper tray fully in. 8. Check the size on the display. • If there is - Ricoh Aficio SP 9100DN | Hardware Guide - Page 71
Loading Paper Specifying Custom Size Paper When printing on custom size paper, specify the paper size using the control panel or printer driver. The following is the range of paper sizes that can be loaded in each type of the paper trays: • Vertical: 139.7 - 297.0 mm (5.5 - 11.7 inches) • - Ricoh Aficio SP 9100DN | Hardware Guide - Page 72
settings made using the control panel have priority over the printer driver settings. If the Paper Tray is set to Tray #, the paper size settings made using the control panel have priority over the printer driver settings. Specifying the Paper Type When you load translucent paper or thick - Ricoh Aficio SP 9100DN | Hardware Guide - Page 73
1. Select the paper tray where the tab stock is set. Loading Paper AST014S 2. Set tab stock so that it will be fed from the side without the tab first. 3. Adjust the back fence position so that the tab sheet fence will fit the tab stock. 6 4. Press the [Menu] key. AST015S AST008S The menu - Ricoh Aficio SP 9100DN | Hardware Guide - Page 74
6. Paper and Other Media 6. Press the [ ] or [ ] key to display [Paper Input], and then press the [ Enter] key. 7. Press the [ ] or [ ] key to display [Tray 2] or [Tray 3], and then press the [ Enter] key. 8. Press the [ ] or [ ] key to display [Tab Stock] using [ ] or [ ], and then press the [ - Ricoh Aficio SP 9100DN | Hardware Guide - Page 75
Loading Paper ANQ009S 3. Carefully slide the paper tray fully in. • The tray can hold up to 550 sheets. Loading Paper into the Large Capacity Tray (LCT) The following procedure explains loading paper into the large capacity tray (LCT). 6 • Align the paper neatly and press its edge to the right - Ricoh Aficio SP 9100DN | Hardware Guide - Page 76
6. Paper and Other Media AST110S 3. Press the [Down] key. The key blinks while the bottom plate is moving down. 6 AST111S 4. Load paper by repeating steps 2 and 3. The tray can hold up to 4,000 sheets. 5. Close the top cover of the large capacity tray (LCT). Specifying the Paper Type When you load - Ricoh Aficio SP 9100DN | Hardware Guide - Page 77
• Do not stack paper higher than the limit mark inside the tray. 1. Load the paper. Loading Paper AST112S 2. Adjust the paper guides to the paper size. 6 AST113S • Straighten curled or warped paper before loading. • Fan the paper before loading. 75 - Ricoh Aficio SP 9100DN | Hardware Guide - Page 78
6. Paper and Other Media 6 76 - Ricoh Aficio SP 9100DN | Hardware Guide - Page 79
to On. If it is set to standby, the settings are cancelled and printing cannot resume. Also, toner refill may not be recognized, and the "Add Toner" display may appear again. • Be sure to refill the toner only when instruction to do so appears on the display. • Do not remove the inner cap. • Avoid - Ricoh Aficio SP 9100DN | Hardware Guide - Page 80
Consumables 1. Open the front cover of the machine. AST016S 2. Pull out the lever under the toner bottle toward you, until it is at 90°. 7 AST163S 3. Raise the green lever, and then gently pull out the toner bottle. AST164S 4. Hold the new bottle horizontally, and then shake it five or six times - Ricoh Aficio SP 9100DN | Hardware Guide - Page 81
Replacing the Toner bottle 5. Remove the outer cap. AST104S AST105S 7 6. Place the toner bottle in position, and then push it in until the green lever clicks. AST107S 7. Return the lever under the toner bottle to its original position. 79 - Ricoh Aficio SP 9100DN | Hardware Guide - Page 82
7. Replacing Consumables AST108S 8. Close the front cover of the machine. 7 80 - Ricoh Aficio SP 9100DN | Hardware Guide - Page 83
Adding Staples Adding Staples • Keep your hands clear of the booklet finisher tray when pulling out or pushing in the finisher's staple unit. You can trap your fingers if you do not. When "Add staples" appears on the panel display, the staples are almost empty. Follow these steps to replace the - Ricoh Aficio SP 9100DN | Hardware Guide - Page 84
7. Replacing Consumables 4. Raise the cover. AST025S 7 AST116S 5. Insert the new refill, and then lower the cover until it clicks. AST117S 82 - Ricoh Aficio SP 9100DN | Hardware Guide - Page 85
Adding Staples 6. Pull out the ribbon. AST118S AST119S 7 7. Reinstall the cartridge, pushing it into the unit until it clicks. AST060S 8. Reinstall the staple unit. 9. Close the finisher's front cover. Finisher SR4000 The following procedure explains how to add staples to the Finisher SR4000. - Ricoh Aficio SP 9100DN | Hardware Guide - Page 86
7. Replacing Consumables 2. Pull out the staple unit. Pull out the cartridge gently. AST038S 3. Hold both sides of the cartridge, and then pull up the upper unit of it. 7 AST049S 4. Take out the empty refill in the arrow direction. AST050S 5. Align the arrows on the new refill and the cartridge, and - Ricoh Aficio SP 9100DN | Hardware Guide - Page 87
Adding Staples AST051S 6. Gently push down the upper unit into the cartridge. AST052S 7 7. Pull out the ribbon. AST053S 8. Hold the green lever while pushing in the cartridge until it clicks. 85 - Ricoh Aficio SP 9100DN | Hardware Guide - Page 88
7. Replacing Consumables AST042S Return the staple unit to its original position. 9. Close the finisher's front cover. • If you cannot pull out the upper unit, there are staples remaining inside the cartridge. Use all the staples, do not add more. Finisher SR4000 (Saddle Stitch) 7 The following - Ricoh Aficio SP 9100DN | Hardware Guide - Page 89
Adding Staples AST044S 4. Hold both sides of the cartridge, and then pull up the upper unit of it. AST054S 7 5. Take out the empty refill in the arrow direction. AST055S 6. Align the arrows on the new refill and the cartridge, and then push in the refill until it clicks. 87 - Ricoh Aficio SP 9100DN | Hardware Guide - Page 90
7. Replacing Consumables AST056S 7. Gently push down the upper unit into the cartridge. 7 AST057S 8. Pull out the ribbon. AST058S 9. Hold the green lever while pushing in the cartridge until it clicks. Return the lever S2 to its original position. 88 - Ricoh Aficio SP 9100DN | Hardware Guide - Page 91
Adding Staples AST048S Return the staple unit to its original position. 10. Close the finisher's front cover. • If you cannot pull out the upper unit, there are staples remaining inside the cartridge. Use all the staples, do not add more. 7 89 - Ricoh Aficio SP 9100DN | Hardware Guide - Page 92
7. Replacing Consumables 7 90 - Ricoh Aficio SP 9100DN | Hardware Guide - Page 93
Printer Cautions to Take When Cleaning • Do not remove any covers or screws other than those specified in this manual. Some parts of the the machine needs to be checked, adjusted, or repaired, contact your service representative. • Do not take apart or attempt any modifications to this machine - Ricoh Aficio SP 9100DN | Hardware Guide - Page 94
8. Cleaning and Adjusting the Printer Adjusting Tray Registration You can adjust the registration of each tray. Vertical adjustment is used for all trays. Normally, you need - Ricoh Aficio SP 9100DN | Hardware Guide - Page 95
Adjusting Tray Registration 6. Press the [Escape] key. 7. Press the [ ] or [ ] key to display [Adjustment], and then press the [ Enter] key. 8. Press the [ ] or [ ] key to display the adjusting value, and then press the [ Enter] key. 8 9. Press the [ ] or [ ] key to set the registration value (mm). - Ricoh Aficio SP 9100DN | Hardware Guide - Page 96
8. Cleaning and Adjusting the Printer AAL708S (1): Print Area (2): Feed Direction Pressing the [ ] or [ ] key makes the value increase or decrease by 1.0 mm steps. 10. Press the [ - Ricoh Aficio SP 9100DN | Hardware Guide - Page 97
9. Troubleshooting Error & Status Messages on the Display Panel This section describes the main messages that appear on the panel display. If a message that is not described here, follow its instructions. Status Messages Ready This is the default ready message. The machine is ready for use. No - Ricoh Aficio SP 9100DN | Hardware Guide - Page 98
9. Troubleshooting The printer is out of the staple. • Add staples, cancel staples mode [Form Feed], or cancel the job. Add Toner 9 The printer is out of toner. • Replace the toner bottle. • See p.81 . Call Service: EC Power Off On/Call Service if error reoccurs A communication error was sent - Ricoh Aficio SP 9100DN | Hardware Guide - Page 99
is full. • Remove the punch-hole chips from the punch receptacle. • Alternatively, disable the punch settings. • See p.124 "Removing Punch Waste". Error: Tray # Form Feed There is a problem with the tray. • Turn the power switch to Standby, and then to On. If the message appears again, call your - Ricoh Aficio SP 9100DN | Hardware Guide - Page 100
9. Troubleshooting The entered number of characters for the WEP Key (ASCII entry) is and then to On the power switch. If the error appears again, call your sales / service representative. Hardware Problem Ethernet The printer detected an ethernet error. • Turn the power switch to Stand by, and - Ricoh Aficio SP 9100DN | Hardware Guide - Page 101
power switch to Stand by, and then to On. If the message appears again, call your service provider. Hardware Problem Wireless Board Access to the IEEE 802.11b board is possible, but an error was detected. • tray using [Form Feed], or cancel the job. Low Toner remaining The printer is almost out of - Ricoh Aficio SP 9100DN | Hardware Guide - Page 102
9. Troubleshooting • Prepare a new toner bottle. • You can print until [Add Toner] appears. Menu Protected Cannot B2 lever correctly. P=XX I=XXXXXXXX Power Off On/Call Service if error reoccurs Controller error. The SC number indicates the problem. • Turn the power switch to Stand by, and then - Ricoh Aficio SP 9100DN | Hardware Guide - Page 103
". Replace Charger Unit It is time to replace the Charger. • Call your sales / service representative as soon as possible. Replace Cleaning web soon Cleaning web is almost worn out. • Call your sales / service representative as soon as possible. Replace Development Unit It is time to replace the - Ricoh Aficio SP 9100DN | Hardware Guide - Page 104
It is time to replace the waste toner. • Call your sales / service representative. Reset Tray # correctly The indicated paper input tray is not set correctly, or is not set. • Set the indicated paper input tray correctly. Reset Tray # or Form Feed There is a problem with the tray. 9 • Load the - Ricoh Aficio SP 9100DN | Hardware Guide - Page 105
order failed Call for supply order has failed. • Call your sales / service representative. Suspend/Resume was pressed The Suspend/Resume button on the finisher was pressed. • Press the button again to resume printing. Waste Toner is almost full Waste toner bottle is almost full. • Call your sales - Ricoh Aficio SP 9100DN | Hardware Guide - Page 106
9. Troubleshooting When Call-light Is Lit or Blinking • Do not push or Memory overflow Read the message on the control panel and take appropriate action. Warning (Example) • Toner level low • Waste toner bottle is almost full Read the message on the control panel and take appropriate action. 104 - Ricoh Aficio SP 9100DN | Hardware Guide - Page 107
When Call-light Is Lit or Blinking AQU070S 1. Use the lever to adjust the volume. 2. Push the lever to switch the buzzer on/off. 9 105 - Ricoh Aficio SP 9100DN | Hardware Guide - Page 108
9. Troubleshooting When the Machine does Not Print If the printing does not start even with printing instructions, check the following. Is the power on? Check the power p.104 "When Call-light Is Lit or Blinking". If the problem cannot be resolved, contact your sales or service representative. 106 - Ricoh Aficio SP 9100DN | Hardware Guide - Page 109
When the Machine does Not Print Checking the port connection When the printer is directly connected via computer cable and the data-in indicator does not flash or light up, port connection should be configured as follows: • For parallel connection, set port LPT1 or LPT2. • For a USB connection, - Ricoh Aficio SP 9100DN | Hardware Guide - Page 110
9. Troubleshooting Other Printing Problems If the printed image is differs from the computer's instructions, check the following: Toner smears display, set True Type fonts to print as an image. See the printer driver Help. Strange characters appears on the print image. • You may have not - Ricoh Aficio SP 9100DN | Hardware Guide - Page 111
the printer driver Help. • The fusing unit is deteriorated or damaged. Replace the unit. Contact your service representative. PDF Direct Print is not executed (PDF files do not print). • When printing a password-protected PDF file, set the password of the PDF file using the [PDF Menu] or Web Image - Ricoh Aficio SP 9100DN | Hardware Guide - Page 112
9. Troubleshooting The paper size appears on the control panel and printing may not be set properly. Contact your sales service representative. Multiple pages are fed at once. • There may be a gap between the front guide and the paper, or between the side guides and the paper in the paper tray. - Ricoh Aficio SP 9100DN | Hardware Guide - Page 113
guide and the paper, or between the end guides and the paper in the paper tray. Make sure there are no gaps. • The fusing unit is deteriorated or damaged. Replace the unit. Contact your service following settings with the printer driver may help speed up printing: PCL 6/5e Select the lowest value - Ricoh Aficio SP 9100DN | Hardware Guide - Page 114
9. Troubleshooting In tab, and then select the lowest value for [Resolution:]. In the printer driver's dialog box, on the [Print Quality] tab, in the [Print tab, in the [Document type] list, select [Fast]. • See the printer driver Help. • The data is so large or complex that it takes time to process - Ricoh Aficio SP 9100DN | Hardware Guide - Page 115
Troubleshooting Additional Troubleshooting Troubles service representative. No e-mail received when an alert occurs, and after resolving an alert. • Access the printer through the Web browser, log on as an Administrator on the Web mail is not sent if the problem is resolved before sending. However - Ricoh Aficio SP 9100DN | Hardware Guide - Page 116
9. Troubleshooting • If an Alert-notification e-mail, set with the earlier notification Set to obtain time information from the SNTP server. Refer to the Web Image Monitor's Help for the appropriate settings. If the problem cannot be resolved, contact your sales or service representative. 9 114 - Ricoh Aficio SP 9100DN | Hardware Guide - Page 117
Pausing Print When Using Finisher Pausing Print When Using Finisher You can pause a large volume of prints when using Finisher. 1. Press the [Suspend/Resume] key. The key lights up. ANQ082S 2. Remove the stack of paper from the finisher shift tray. 9 ANQ083S 3. Press the [Suspend/Resume] key. The - Ricoh Aficio SP 9100DN | Hardware Guide - Page 118
9. Troubleshooting Removing Jammed Staples • Keep your hands clear of the booklet finisher tray when pulling out or pushing in the finisher's staple unit. You can trap - Ricoh Aficio SP 9100DN | Hardware Guide - Page 119
4. Pull the cartridge gently out of the staple unit. Removing Jammed Staples AST025S 5. Push the buttons on either side of the cartridge and open the plate. AST121S 6. Remove the jammed staples. AST122S 7. Pull the plate facing down until it clicks. 9 117 - Ricoh Aficio SP 9100DN | Hardware Guide - Page 120
9. Troubleshooting AST123S 8. Reinstall the cartridge, pushing it into the unit until it clicks. AST060S 9. Return the staple unit to its original position. 10. Close the finisher's - Ricoh Aficio SP 9100DN | Hardware Guide - Page 121
Removing Jammed Staples AST038S 3. Open the face plate of the cartridge. AST039S 4. Remove the jammed staples. AST040S 5. Pull the face plate down until it clicks. 9 119 - Ricoh Aficio SP 9100DN | Hardware Guide - Page 122
9. Troubleshooting AST041S 6. Hold the green lever while pushing in the cartridge until it clicks. AST042S Return the staple unit to its original position. 7. Close the finisher's - Ricoh Aficio SP 9100DN | Hardware Guide - Page 123
3. Pull the lever S2. Pull out the cartridge gently. Removing Jammed Staples AST044S 4. Open the face plate of the cartridge. AST045S 5. Remove the jammed staples. AST046S 6. Pull the face plate up until it clicks. 9 121 - Ricoh Aficio SP 9100DN | Hardware Guide - Page 124
9. Troubleshooting AST047S 7. Hold the green lever while pushing in the cartridge until it clicks. Return the lever S2 to its original position. AST048S Return the staple unit to its original position. 8. Close the finisher's front cover. 9 122 - Ricoh Aficio SP 9100DN | Hardware Guide - Page 125
Removing Staple Waste 1. Open the finisher's front cover. Removing Staple Waste AST124S 2. Release the stopper from the staple waste box, and then pull it gently out. AST125S AST126S 3. Empty the box. 4. Reinstall the staple waste box, and then reposition the stopper. 5. Close the finisher's - Ricoh Aficio SP 9100DN | Hardware Guide - Page 126
9. Troubleshooting Removing Punch Waste When the "Empty Punch Receptacle" message appears, you cannot use the Punch function. Finisher SR841 The following procedure explains how to remove punch wastes from the Finisher SR841. 1. Open the finisher's front cover. AST127S 2. Pull out the punch waste - Ricoh Aficio SP 9100DN | Hardware Guide - Page 127
from the Finisher SR4000. 1. Open the finisher's front cover. AST061S 2. Pull out the punch waste box carefully, and then remove punch waste. AST062S 9 3. Reinstall the punch waste box. If you do not, the "Empty Punch Receptacle" message remains displayed. 4. Close the finisher's front cover - Ricoh Aficio SP 9100DN | Hardware Guide - Page 128
9. Troubleshooting 9 126 - Ricoh Aficio SP 9100DN | Hardware Guide - Page 129
in the finisher's staple unit. You can trap your fingers if you do not. • Misfed paper may be covered in toner. Be careful not to get toner on your hands or clothes. • Toner on prints made after removing misfed paper may be loose (inadequately fused). Make a few test prints until smudges no longer - Ricoh Aficio SP 9100DN | Hardware Guide - Page 130
10. Removing Misfed Paper AST016S 2. Push the button A and open the guide plate. 3. Remove misfed paper. AST144S 10 AST145S 4. Close the guide plate, and then close the front cover. 5. Open the top cover. 128 - Ricoh Aficio SP 9100DN | Hardware Guide - Page 131
Removing Misfed Paper 6. Remove misfed paper. AST146S AST147S 7. Close the top cover. 8. If the error message persists, open the front cover. 9. Turn the lever C1 to the left. ASU515S 10. Turn lever C2 counterclockwise and remove misfed paper. After removing the paper, return the lever to its - Ricoh Aficio SP 9100DN | Hardware Guide - Page 132
10. Removing Misfed Paper 11. Close the front cover. ASU516S • Jammed paper inside the LCT may be difficult to remove depending on the paper size set. Follow step 8 to remove it. Remove Misfeed B-F: Internal A paper jam has occurred inside the printer. 10 AST021S 1. Open the front cover. - Ricoh Aficio SP 9100DN | Hardware Guide - Page 133
Removing Misfed Paper ASU513S 3. Return the lever B2 to its original position. ASU514S After removing the paper, return the lever to its original position. If you cannot remove the paper, proceed to the following step. 4. Turn the lever C1 to the left. ASU515S 5. Turn the lever C2 counterclockwise - Ricoh Aficio SP 9100DN | Hardware Guide - Page 134
10. Removing Misfed Paper ASU516S After removing the paper, return the lever to its original position. If you cannot remove the paper, proceed to the following step. 6. Turn the fuser unit knob D1/E 11-12 times counterclockwise to eject the paper. AST134S 7. Pull the handle D2 and pull out the - Ricoh Aficio SP 9100DN | Hardware Guide - Page 135
Removing Misfed Paper 9. Raise the lever D4. AST136S AST137S 10. Remove the paper being careful not to touch the area around the lever D4. 10 AST138S After removing the paper, return the lever and the unit to their original positions. If you cannot remove the paper, proceed to the following step. - Ricoh Aficio SP 9100DN | Hardware Guide - Page 136
10. Removing Misfed Paper 12. Raise the lever E3. AST139S AST140S 13. Remove the paper being careful not to touch the area around the lever E3. 10 AST141S After removing the paper, return the lever and the unit to their original positions. If you cannot remove the paper, proceed to the following - Ricoh Aficio SP 9100DN | Hardware Guide - Page 137
Removing Misfed Paper 15. Remove misfed paper. AGU142S AST143S 16. Return each unit and lever to their original positions, and then close the front cover of the machine. Remove Misfeed Q: Interposer A paper jam has occurred in one of the paper trays or the large capacity tray (LCT, optional). 10 - Ricoh Aficio SP 9100DN | Hardware Guide - Page 138
10. Removing Misfed Paper 2. Raise the feed roller. AST148S 3. Remove misfed paper. AST149S 10 AST150S 4. Lower the feed roller, and then close the interposer's upper cover. 5. If the error message persists, open the finisher's front cover. 136 - Ricoh Aficio SP 9100DN | Hardware Guide - Page 139
Removing Misfed Paper AST151S 6. Lower the lever Q1, and then remove misfed paper. AST152S 7. If you cannot remove the paper, lower the Q2 lever, and then remove misfed paper. AST153S 8. Raise the lever Q1, and then close the finisher's front cover. Remove Misfeed R: Finisher A paper jam has - Ricoh Aficio SP 9100DN | Hardware Guide - Page 140
10. Removing Misfed Paper Finisher SR841 AST023S 1. Open the finisher's front cover. AST154S 2. Raise the lever R1, and remove misfed paper. 10 AST155S After removing the paper, return the lever to its original position. 3. If you cannot remove the paper, raise the lever R2, and then remove misfed - Ricoh Aficio SP 9100DN | Hardware Guide - Page 141
Removing Misfed Paper AST156S After removing the paper, return the lever to its original position. 4. If you cannot remove the paper, raise the lever R3, and then remove misfed paper. AST157S After removing the paper, return the lever to its original position. 5. If you cannot remove the paper, - Ricoh Aficio SP 9100DN | Hardware Guide - Page 142
10. Removing Misfed Paper AST159S After removing the paper, return the lever to its original position. 7. If you cannot remove the paper, raise the lever R6, and then remove misfed paper. AST160S After removing the paper, return the lever to its original position. 8. If you cannot remove the paper, - Ricoh Aficio SP 9100DN | Hardware Guide - Page 143
Finisher SR4000 Removing Misfed Paper AST024S 1. Open the finisher's front cover. 2. Turn the blue lever R1 counterclockwise. AST026S 3. Turn the blue knob R2 counterclockwise. When the optional interposer is installed, lower lever Q2, and then turn the knob R2 counterclockwise. 10 4. Remove - Ricoh Aficio SP 9100DN | Hardware Guide - Page 144
10. Removing Misfed Paper AST028S After removing the paper, return the lever to its original position. 5. If you cannot remove the paper, raise the lever R3, and then remove misfed paper. AST029S 6. Raise the lever R4, and then remove misfed paper. 10 AST030S After removing the paper, return the - Ricoh Aficio SP 9100DN | Hardware Guide - Page 145
Removing Misfed Paper AST030S After removing the paper, return the lever to its original position. 8. If you cannot remove the paper, lower the lever R6, and then remove misfed paper. AST032S After removing the paper, return the lever to its original position. 9. If you cannot remove the paper, - Ricoh Aficio SP 9100DN | Hardware Guide - Page 146
10. Removing Misfed Paper AST034S 11. Pull the lever R10 and pull out the staple unit, and then remove misfed paper. AST035S 12. If you cannot remove the paper, open the lever R11, and then remove misfed paper. 10 AST036S After removing the paper, return the lever to its original position. 13. If - Ricoh Aficio SP 9100DN | Hardware Guide - Page 147
Removing Misfed Paper AST037S After removing the paper, return the lever to its original position. Return the staple unit to its original position. 14. Close the finisher's front cover. 10 145 - Ricoh Aficio SP 9100DN | Hardware Guide - Page 148
10. Removing Misfed Paper 10 146 - Ricoh Aficio SP 9100DN | Hardware Guide - Page 149
11. Appendix Moving and Transporting the Printer When you move and transport your machine, contact the store where it was purchased or where service is provided. 11 147 - Ricoh Aficio SP 9100DN | Hardware Guide - Page 150
11. Appendix Disposal To dispose of the machine, contact the store where it was purchased or where service is provided. 11 148 - Ricoh Aficio SP 9100DN | Hardware Guide - Page 151
sales or service representative. Toner bottles Toner bottle Number of pages per bottle 43,000 • Toner bottles toner bottle might require replacement before 1,000 pages have been printed. • Toner bottles (a consumable) are not covered by warranty. However, in the event of defects or other problems - Ricoh Aficio SP 9100DN | Hardware Guide - Page 152
electrophotographic printing Dual component toner development First Print support USB 2.0. Optional: • IEEE 802.11b (Wireless LAN) • Parallel (Bidirectional IEEE1284) 11 • Gigabit Ethernet (1000Base-T) Resolution: 1,200 × 1,200 dpi (PCL 6, RPCS, PostScript 3, PDF) 600 × 600 dpi (PCL 6, PCL 5e - Ricoh Aficio SP 9100DN | Hardware Guide - Page 153
(Type 2:24, Type 14:112) Paper Size See p.57 "Paper and Other Media Supported by This Printer". Paper Weight: 52.3 - 216 g/m2 (45 - 180 kg /27.6" × 30.4" × 58.6" (without finisher) Weight: Less than 188 kg (without toner) Warm-up Time: Less than 300 seconds (23 °C, 73 F) Paper Capacity: Tandem paper - Ricoh Aficio SP 9100DN | Hardware Guide - Page 154
11. Appendix Standard paper tray Paper weight: 60 - 105 g/m2 (16 - 28 lb.) Memory: 256 MB Hard Disk Drive : 80 GB Network : Topology: Ethernet (10BaseT/100BaseTX) Protocol: TCP/IP, SMB, IPX/SPX, AppleTalk 550 sheets × 2 (80 g/m2, 20 lb.) Options Finisher SR841 (100-Sheet Staples) [Finisher - Ricoh Aficio SP 9100DN | Hardware Guide - Page 155
Specification • 1,500 sheets (A3 , B4 JIS , A4 , B5 JIS , 11 × 17 , 81/2 × 14 , 81/2 × 11 , 12 × 18 ) (80 g/m2, 20 lb.) • 500 sheets (A5 , 51/2 × 81/2 ) (80 g/m2, 20 lb.) • 100 sheets (A5 , 51/2 × 81/2 ) (80 g/m2, 20 lb.) Staple paper size: A3 , B4 JIS , A4 , B5 JIS , 11 × 17 ,81/2 × 14 Staple - Ricoh Aficio SP 9100DN | Hardware Guide - Page 156
11. Appendix • 250 sheets (A4 , B5 JIS , A5 , B6 JIS , 81/2 × 11 g/m2, 20 lb.) , 51/2 × 81/2 ) (80 • 50 sheets (A3 , B4 JIS , 11 × 17 , 81/2 × 14 , 12 × 18 ) (80 g/m2, 20 lb.) [Finisher Shift Tray 1] Paper sizes: A3 , B4 JIS , A4 , 51/2 × 81/ 4 14 Paper weight: , B5 JIS , 12 × 18 52 - 216 g/ - Ricoh Aficio SP 9100DN | Hardware Guide - Page 157
Specification Staple position: 4 position (Top, Top Slant, Bottom, 2 Staples) [Finisher Shift Tray 2] Paper size: A3 , B4 JIS , A4 , 51/2 × 81/2 81/4 × 14 Paper weight: , B5 JIS , A5 , B6 JIS , A6 , 11 × 17 , 81/2 × 14 , 81/2 × 11 , 12 × 18 , 71/4 × 101/2 , 8 × 13 , 81/2 × 13 , 81/4 × 13 , 52 - Ricoh Aficio SP 9100DN | Hardware Guide - Page 158
11. Appendix • 125 sets (2 - 9 sheets) (A4 , B5 JIS , 81/2 × 11 )(80 g/m2, 20 lb.) • 125 - 40 sets (10 - 30 sheets) (other paper size)(80 g/m2, 20 lb.) • 125 sets (2 - 9 sheets) (other paper size) (80 g/m2, 20 lb.) With mixed sizes: • 50 sets (2 - 30 sheets) (A4 /A3 , B5 JIS /B4 JIS , 81/2 × 11 - Ricoh Aficio SP 9100DN | Hardware Guide - Page 159
Specification 2 holes 2 holes 4 holes 4 holes 2 & 4 holes type A3 - A5, 11 × 17 - 51/2 × 81/2 A4 - A5, 81/2 × 11, 51/2 × 81/2 A3, B4 JIS, 11 × 17 A4, B5 JIS, 81/2 × 11 4 holes 4 holes 4 holes type A3 - A5, 11 × 17 - 51/2 × 81/2 A4-A5, 81/2 × 11, 51/2 × 81/2 2 holes 2 holes 3 holes 3 holes 2 & - Ricoh Aficio SP 9100DN | Hardware Guide - Page 160
11. Appendix 4 holes A4, 81/2 × 11 4 holes 4 holes 4 holes type(for Northern Europe) A3 - B5 JIS, 11 × 17 - 71/4 × 101/2 A4 - A5, 81/2 × 11, 51/2 × 81/2 4 holes 4 holes 4 holes type (for Europe) A3, B4 JIS, 11 × 17 A4, B5 JIS, 11 × 81/2 2 holes 2 holes 3 holes 3 holes 2 & 3 holes type A3 - - Ricoh Aficio SP 9100DN | Hardware Guide - Page 161
lb. There are types of paper between 128 - 216 g/m2 in weight that are not supported. Paper capacity: 4,000 sheets (80 g/m2, 20 lb.) Power consumption Maximum. 50 W 11 IEEE 802.11b Interface Unit Type H Transmission Spec.: Based on IEEE 802.11b (Wireless LAN) Protocol: IPv4, IPv6, IPX/SPX, AppleTalk - Ricoh Aficio SP 9100DN | Hardware Guide - Page 162
ad hoc mode and infrastructure mode IEEE 802.11b Interface Unit Type I Transmission Spec.: Based on IEEE 802.11b (Wireless LAN) 11 Protocol: IPv4, IPv6, IPX/SPX, AppleTalk • SmartDeviceMonitor and Web Image Monitor are supported. Data Transfer Speed: Auto select from below speed 1 Mbps, 2 Mbps - Ricoh Aficio SP 9100DN | Hardware Guide - Page 163
and infrastructure mode IEEE 1284 Interface Board Type A Transmission Spec.: IEEE 1284 Required cable: Standard IEEE 1284 compliant Micro TX, 1000Base - T) USB 2.0 It requires a USB computer port and cable that support USB 2.0. Data Transmission Speed: • Ethernet: 1000 Mbps, 100 Mbps, 10 Mbps • - Ricoh Aficio SP 9100DN | Hardware Guide - Page 164
11. Appendix 11 162 - Ricoh Aficio SP 9100DN | Hardware Guide - Page 165
INDEX A Adding Paper 63 C Changing the Paper Size Tray 2 and 3 67 Copying onto Tab Stock 70 E Exterior Front View 11 Front View 11 F Finisher 115 G Gigabit Ethernet Board Type A 161 I IEEE 1284 Interface Board Type A 161 IEEE 802.11b Interface Unit 159, 160 L Large Capacity Tray (LCT 73 - Ricoh Aficio SP 9100DN | Hardware Guide - Page 166
MEMO 164 G148 - Ricoh Aficio SP 9100DN | Hardware Guide - Page 167
Copyright © 2006 - Ricoh Aficio SP 9100DN | Hardware Guide - Page 168
Operating Instructions Hardware Guide Model No. MLP175n/P7675/LP275hdn/Aficio SP 9100DN EN USA G148-7202
-
 1
1 -
 2
2 -
 3
3 -
 4
4 -
 5
5 -
 6
6 -
 7
7 -
8
-
9
-
10
-
11
-
12
-
13
-
14
-
15
-
16
-
17
-
18
-
19
-
20
-
21
-
22
-
23
-
24
-
25
-
26
-
27
-
28
-
29
-
30
-
31
-
32
-
33
-
34
-
35
-
36
-
37
-
38
-
39
-
40
-
41
-
42
-
43
-
44
-
45
-
46
-
47
-
48
-
49
-
50
-
51
-
52
-
53
-
54
-
55
-
56
-
57
-
58
-
59
-
60
-
61
-
62
-
63
-
64
-
65
-
66
-
67
-
68
-
69
-
70
-
71
-
72
-
73
-
74
-
75
-
76
-
77
-
78
-
79
-
80
-
81
-
82
-
83
-
84
-
85
-
86
-
87
-
88
-
89
-
90
-
91
-
92
-
93
-
94
-
95
-
96
-
97
-
98
-
99
-
100
-
101
-
102
-
103
-
104
-
105
-
106
-
107
-
108
-
109
-
110
-
111
-
112
-
113
-
114
-
115
-
116
-
117
-
118
-
119
-
120
-
121
-
122
-
123
-
124
-
125
-
126
-
127
-
128
-
129
-
130
-
131
-
132
-
133
-
134
-
135
-
136
-
137
-
138
-
139
-
140
-
141
-
142
-
143
-
144
-
145
-
146
-
147
-
148
-
149
-
150
-
151
-
152
-
153
-
154
-
155
-
156
-
157
-
158
-
159
-
160
-
161
-
162
-
163
-
164
-
165
-
166
-
167
-
168
 |
 |
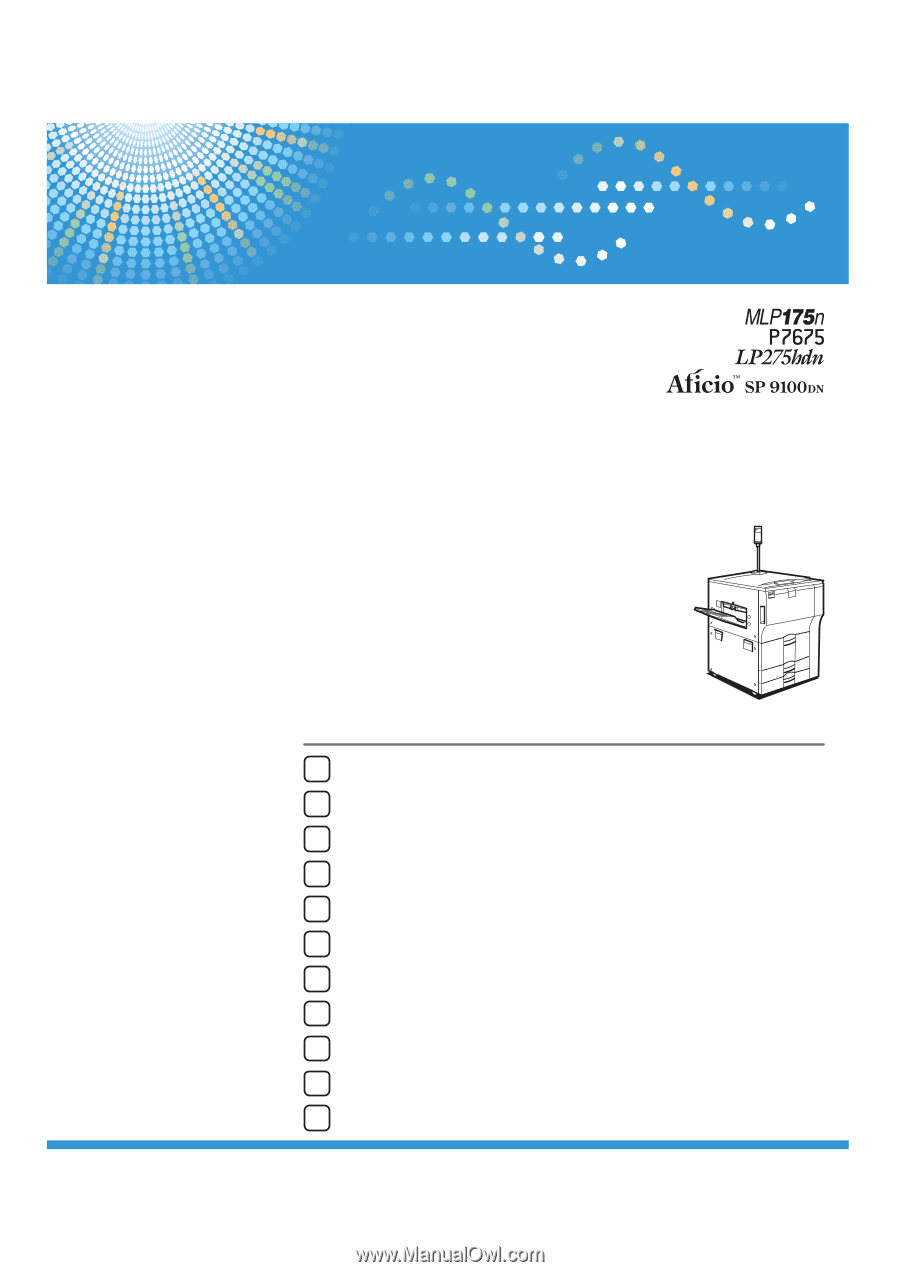
Read this manual carefully before you use this machine and keep it handy for future reference. For safe and correct use, be sure to read the Safety Information
before using the machine.
10
8
9
Guide to the Printer
Setting Up
Connecting the Printer
Configuration
Installing the Printer Driver
Paper and Other Media
Replacing Consumables
Cleaning and Adjusting the Printer
Troubleshooting
Removing Misfed Paper
Appendix
1
2
3
4
5
6
7
11
Hardware Guide
Operating Instructions