Ricoh Aficio SP 9100DN Hardware Guide - Page 52
Setting a WEP key, characters for ASCII. When using 128 bit WEP
 |
View all Ricoh Aficio SP 9100DN manuals
Add to My Manuals
Save this manual to your list of manuals |
Page 52 highlights
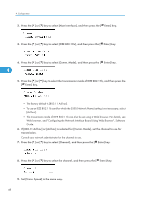
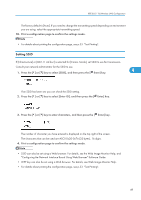
4. Configuration Setting a WEP key In the case of using a WEP key on a network, activate the WEP setting to be used for communication along with WEP. Consult your network administrator for the WEP key to use. 1. In the [IEEE 802.11b] menu, select [Security Method] using the [ ] or [ ] key, and then press the [ Enter] key. 4 2. Press the [ ] or [ ] key to select [WEP], and then press the [ Enter] key. When activating the WEP Setting, you will need to enter the WEP key. If you have not entered the key, be sure to enter it. 3. Press the [ ] or [ ] key to select [Change (HEX)] or [Change (ASCII)], and then press the [ Enter] key. 4. Press the [ ] or [ ] key to enter the characters, and then press the [ Enter] key. • When entering the character, pressing [ Enter] will mask it with an asterisk for security reasons. • When using 64 bit WEP, up to 10 characters can be used for hexadecimal and up to five characters for ASCII. When using 128 bit WEP, up to 26 characters can be used for hexadecimal and up to 13 characters for ASCII. • The number of characters that can be entered is limited to 10 or 26 for hexadecimal and 5 or 13 for ASCII. • For ASCII character strings, uppercase and lowercase letters are recognized respectively. 5. Press the [Menu] key to return to the initial screen. 6. Print a configuration page to confirm the settings made. 50
-
 1
1 -
2
-
3
-
4
-
5
-
6
-
7
-
8
-
9
-
10
-
11
-
12
-
13
-
14
-
15
-
16
-
17
-
18
-
19
-
20
-
21
-
22
-
23
-
24
-
25
-
26
-
27
-
28
-
29
-
30
-
31
-
32
-
33
-
34
-
35
-
36
-
37
-
38
-
39
-
40
-
41
-
42
-
43
-
44
-
45
-
46
-
 47
47 -
 48
48 -
 49
49 -
 50
50 -
 51
51 -
 52
52 -
 53
53 -
 54
54 -
 55
55 -
 56
56 -
 57
57 -
58
-
59
-
60
-
61
-
62
-
63
-
64
-
65
-
66
-
67
-
68
-
69
-
70
-
71
-
72
-
73
-
74
-
75
-
76
-
77
-
78
-
79
-
80
-
81
-
82
-
83
-
84
-
85
-
86
-
87
-
88
-
89
-
90
-
91
-
92
-
93
-
94
-
95
-
96
-
97
-
98
-
99
-
100
-
101
-
102
-
103
-
104
-
105
-
106
-
107
-
108
-
109
-
110
-
111
-
112
-
113
-
114
-
115
-
116
-
117
-
118
-
119
-
120
-
121
-
122
-
123
-
124
-
125
-
126
-
127
-
128
-
129
-
130
-
131
-
132
-
133
-
134
-
135
-
136
-
137
-
138
-
139
-
140
-
141
-
142
-
143
-
144
-
145
-
146
-
147
-
148
-
149
-
150
-
151
-
152
-
153
-
154
-
155
-
156
-
157
-
158
-
159
-
160
-
161
-
162
-
163
-
164
-
165
-
166
-
167
-
168
 |
 |
