Samsung CLX 3160FN User Manual (ENGLISH) - Page 33
Setting the paper size and type, Software, System Setup, Scroll, Paper Setup, Paper Size - printer drivers
 |
UPC - 635753712490
View all Samsung CLX 3160FN manuals
Add to My Manuals
Save this manual to your list of manuals |
Page 33 highlights
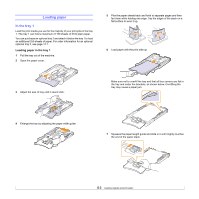
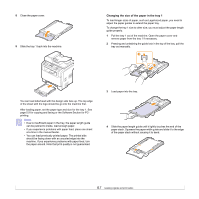
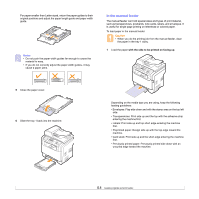
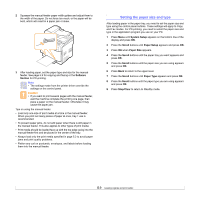
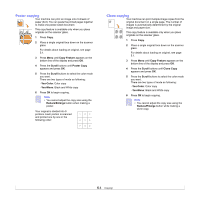
2 Squeeze the manual feeder paper width guides and adjust them to the width of the paper. Do not force too much, or the paper will be bent, which will result in a paper jam or skew. 3 After loading paper, set the paper type and size for the manual feeder. See page 5.9 for copying and faxing or the Software Section for PC-printing. Note • The settings made from the printer driver override the settings on the control panel. Caution • If you want to print several pages with the manual feeder, wait the machine complete the printing one page, then place a paper on the manual feeder. Otherwise it may cause the paper jam. Tips on using the manual feeder • Load only one size of print media at a time in the manual feeder. When you print out many pieces of paper at once, tray 1 use is recommended. • To prevent paper jams, do not add paper when there is still paper in the manual feeder. This also applies to other types of print media. • Print media should be loaded face up with the top edge going into the manual feeder first and be placed in the center of the tray. • Always load only the print media specified in page 5.2 to avoid paper jams and print quality problems. • Flatten any curl on postcards, envelopes, and labels before loading them into the manual feeder. Setting the paper size and type After loading paper in the paper tray, you need to set the paper size and type using the control panel buttons. These settings will apply to Copy and Fax modes. For PC-printing, you need to select the paper size and type in the application program you use on your PC. 1 Press Menu until System Setup appears on the bottom line of the display and press OK. 2 Press the Scroll buttons until Paper Setup appears and press OK. 3 Press OK when Paper Size appears. 4 Press the Scroll buttons until the paper tray you want appears and press OK. 5 Press the Scroll buttons until the paper size you are using appears and press OK. 6 Press Back to return to the upper level. 7 Press the Scroll buttons until Paper Type appears and press OK. 8 Press the Scroll buttons until the paper type you are using appears and press OK. 9 Press Stop/Clear to return to Standby mode. 5.9
-
 1
1 -
2
-
3
-
4
-
5
-
6
-
7
-
8
-
9
-
10
-
11
-
12
-
13
-
14
-
15
-
16
-
17
-
18
-
19
-
20
-
21
-
22
-
23
-
24
-
25
-
26
-
27
-
 28
28 -
 29
29 -
 30
30 -
 31
31 -
 32
32 -
 33
33 -
 34
34 -
 35
35 -
 36
36 -
 37
37 -
 38
38 -
39
-
40
-
41
-
42
-
43
-
44
-
45
-
46
-
47
-
48
-
49
-
50
-
51
-
52
-
53
-
54
-
55
-
56
-
57
-
58
-
59
-
60
-
61
-
62
-
63
-
64
-
65
-
66
-
67
-
68
-
69
-
70
-
71
-
72
-
73
-
74
-
75
-
76
-
77
-
78
-
79
-
80
-
81
-
82
-
83
-
84
-
85
-
86
-
87
-
88
-
89
-
90
-
91
-
92
-
93
-
94
-
95
-
96
-
97
-
98
-
99
-
100
-
101
-
102
-
103
-
104
-
105
-
106
-
107
-
108
-
109
-
110
-
111
-
112
-
113
-
114
-
115
-
116
-
117
-
118
-
119
-
120
-
121
-
122
-
123
-
124
-
125
-
126
-
127
-
128
-
129
-
130
-
131
-
132
-
133
-
134
-
135
-
136
-
137
-
138
-
139
 |
 |
