Samsung CLX 3160FN User Manual (ENGLISH) - Page 68
Sending new toner notification (CLX-3160FN only), System Setup, Scroll, Maintenance, Remote Service - toner cartridge
 |
UPC - 635753712490
View all Samsung CLX 3160FN manuals
Add to My Manuals
Save this manual to your list of manuals |
Page 68 highlights
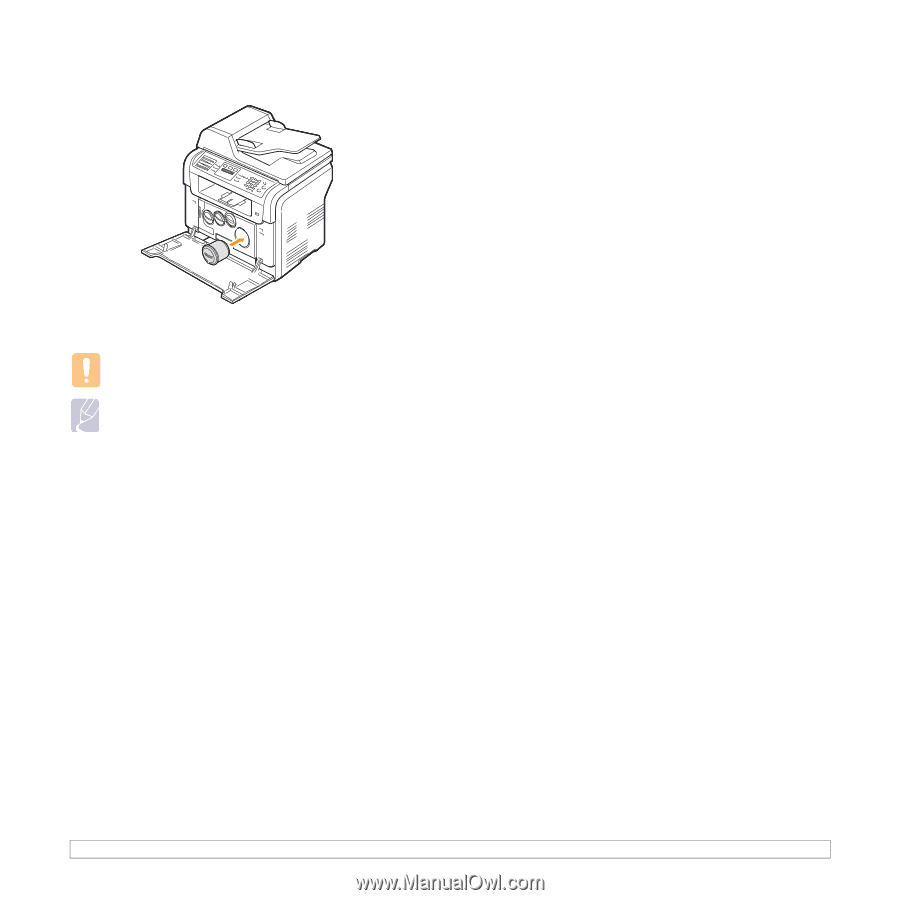
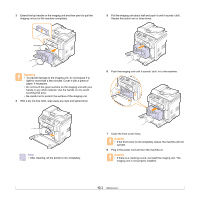
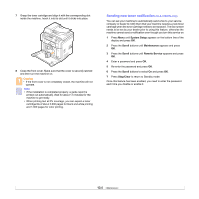
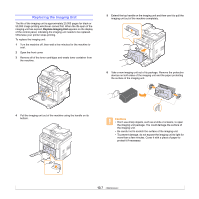
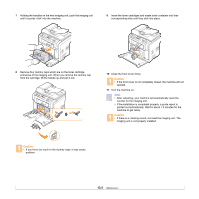
7 Grasp the toner cartridge and align it with the corresponding slot inside the machine. Insert it into its slot until it clicks into place. 8 Close the front cover. Make sure that the cover is securely latched and then turn the machine on. Caution • If the front cover is not completely closed, the machine will not operate. Note • If the installation is completed properly, a guide report is printed out automatically. Wait for about 1.5 minutes for the machine to get ready. • When printing text at 5% coverage, you can expect a toner cartridge life of about 2,000 pages for black and white printing and 1,000 pages for color printing. Sending new toner notification (CLX-3160FN only) You can set your machine to automatically send a fax to your service company or dealer to notify them that your machine requires a new toner cartridge when the toner cartridge needs to be replaced. The fax number needs to be set by your dealer prior to using this feature, otherwise the machine cannot send a notification even though you turn this service on. 1 Press Menu until System Setup appears on the bottom line of the display and press OK. 2 Press the Scroll buttons until Maintenance appears and press OK. 3 Press the Scroll buttons until Remote Service appears and press OK. 4 Enter a password and press OK. 5 Re-enter the password and press OK. 6 Press the Scroll buttons to select On and press OK. 7 Press Stop/Clear to return to Standby mode. Once this feature has been enabled, you need to enter the password each time you disable or enable it. 13.6
-
 1
1 -
2
-
3
-
4
-
5
-
6
-
7
-
8
-
9
-
10
-
11
-
12
-
13
-
14
-
15
-
16
-
17
-
18
-
19
-
20
-
21
-
22
-
23
-
24
-
25
-
26
-
27
-
28
-
29
-
30
-
31
-
32
-
33
-
34
-
35
-
36
-
37
-
38
-
39
-
40
-
41
-
42
-
43
-
44
-
45
-
46
-
47
-
48
-
49
-
50
-
51
-
52
-
53
-
54
-
55
-
56
-
57
-
58
-
59
-
60
-
61
-
62
-
 63
63 -
 64
64 -
 65
65 -
 66
66 -
 67
67 -
 68
68 -
 69
69 -
 70
70 -
 71
71 -
 72
72 -
 73
73 -
74
-
75
-
76
-
77
-
78
-
79
-
80
-
81
-
82
-
83
-
84
-
85
-
86
-
87
-
88
-
89
-
90
-
91
-
92
-
93
-
94
-
95
-
96
-
97
-
98
-
99
-
100
-
101
-
102
-
103
-
104
-
105
-
106
-
107
-
108
-
109
-
110
-
111
-
112
-
113
-
114
-
115
-
116
-
117
-
118
-
119
-
120
-
121
-
122
-
123
-
124
-
125
-
126
-
127
-
128
-
129
-
130
-
131
-
132
-
133
-
134
-
135
-
136
-
137
-
138
-
139
 |
 |