Sony MZ-N1 Operating Instructions - Page 52
Functions, Operations, On the remote control
 |
View all Sony MZ-N1 manuals
Add to My Manuals
Save this manual to your list of manuals |
Page 52 highlights
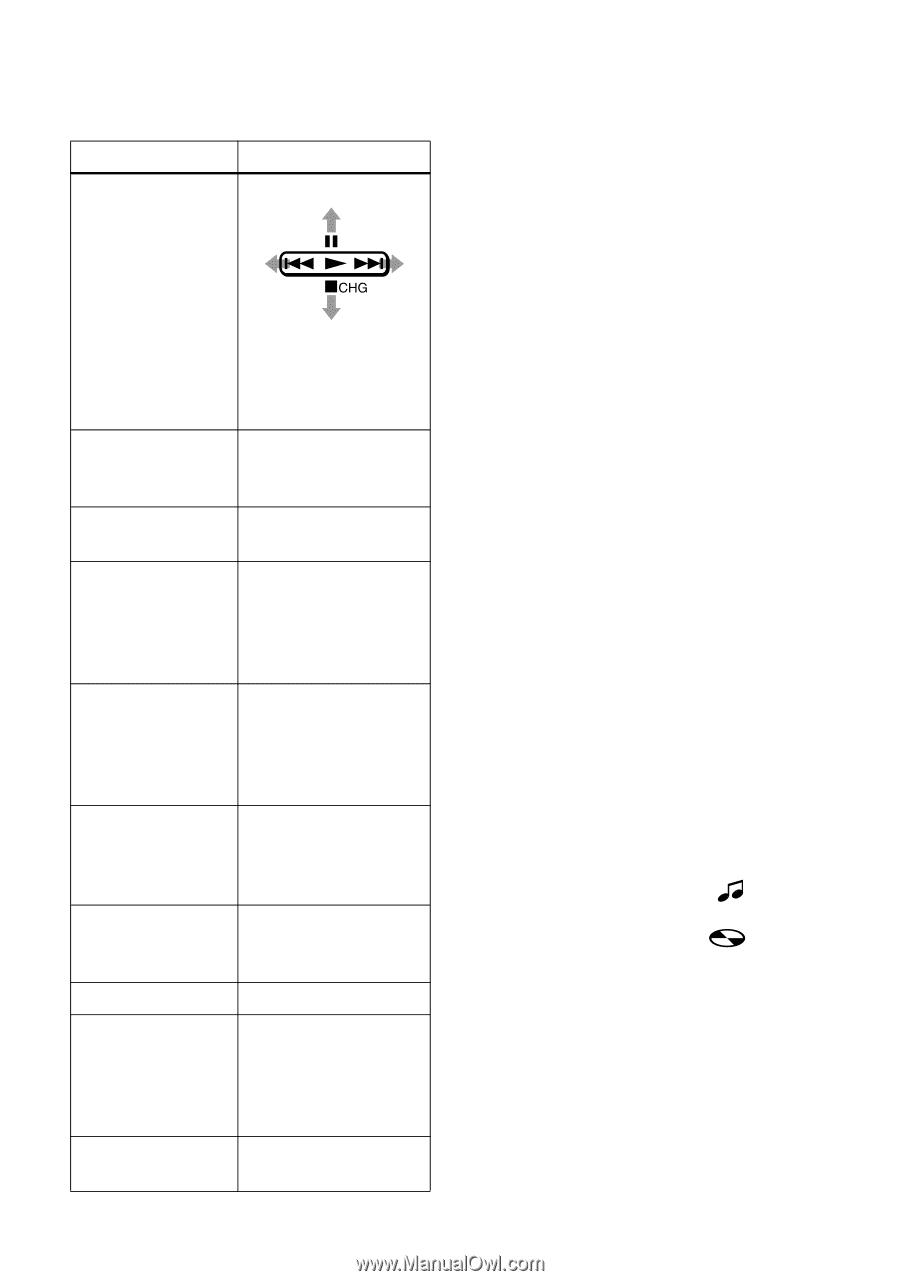
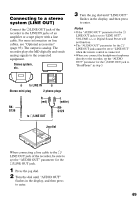
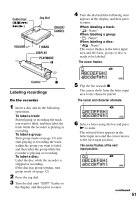
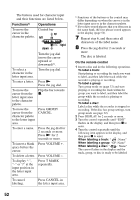
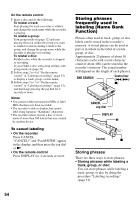
The buttons used for character input and their functions are listed below. Functions1) Operations To move the Control bar cursor in the up character palette. left right down Turn the jog dial (move the cursor upward or downward)2). To select a character in the letter input area. To enter a letter. Turn the jog dial. Press N Press the jog dial. To move the cursor from the letter input area to the character palette. Flip the bar towards x. To move the cursor from the character palette to the letter input area. Press GROUP/ CANCEL. To enter a name. Press the jog dial for 2 seconds or more. Press N for 2 seconds or more. To insert a blank Press VOLUME +. space before the cursor. To delete a letter. Press VOLUME -. To display ":", "-" or "/" at the input position in the letter input area. Press T MARK repeatedly. To cancel labeling. Press CANCEL in the letter input area. 52 1) Functions of the buttons or the control may differ depending on when the cursor is in the letter input area or in the character palette. 2) If you have stored phrases that you often use in the name bank, the first phrase stored appears in the display (page 54). 7 Repeat step 6, and then enter all characters of the label name. 8 Press the jog dial for 2 seconds or more. The disc is labeled. On the remote control 1 Insert a disc and do the following operations. To label a track: Start playing or recording the track you want to label, and then label the track while the recorder is playing or recording. To label a group: Turn group mode on (page 32) and start playing or recording the track within the group you want to label, and then label the group while the recorder is playing or recording. To label a disc: Label a disc while the recorder is stopped or recording. If the disc has group settings, turn group mode on (page 32). 2 Press DISPLAY for 2 seconds or more. 3 Turn the control repeatedly until "EDIT" flashes in the display, and then press x to enter. 4 Turn the control repeatedly until the following item appears in the display, and then press x to enter. When labeling a track: " : Name" When labeling a group: "GP: Name" When labeling a disc: " : Name" The cursor flashes in the display and the track, group, or disc is ready to be labeled
-
 1
1 -
2
-
3
-
4
-
5
-
6
-
7
-
8
-
9
-
10
-
11
-
12
-
13
-
14
-
15
-
16
-
17
-
18
-
19
-
20
-
21
-
22
-
23
-
24
-
25
-
26
-
27
-
28
-
29
-
30
-
31
-
32
-
33
-
34
-
35
-
36
-
37
-
38
-
39
-
40
-
41
-
42
-
43
-
44
-
45
-
46
-
 47
47 -
 48
48 -
 49
49 -
 50
50 -
 51
51 -
 52
52 -
 53
53 -
 54
54 -
 55
55 -
 56
56 -
 57
57 -
58
-
59
-
60
-
61
-
62
-
63
-
64
-
65
-
66
-
67
-
68
-
69
-
70
-
71
-
72
-
73
-
74
-
75
-
76
-
77
-
78
-
79
-
80
-
81
-
82
-
83
-
84
-
85
-
86
-
87
-
88
-
89
-
90
-
91
-
92
-
93
-
94
-
95
-
96
 |
 |