TP-Link TD-W8960N User Guide - Page 17
Quick Setup, Tools, Internet Options, Connections, LAN Settings - at t no username no password
 |
UPC - 845973060343
View all TP-Link TD-W8960N manuals
Add to My Manuals
Save this manual to your list of manuals |
Page 17 highlights
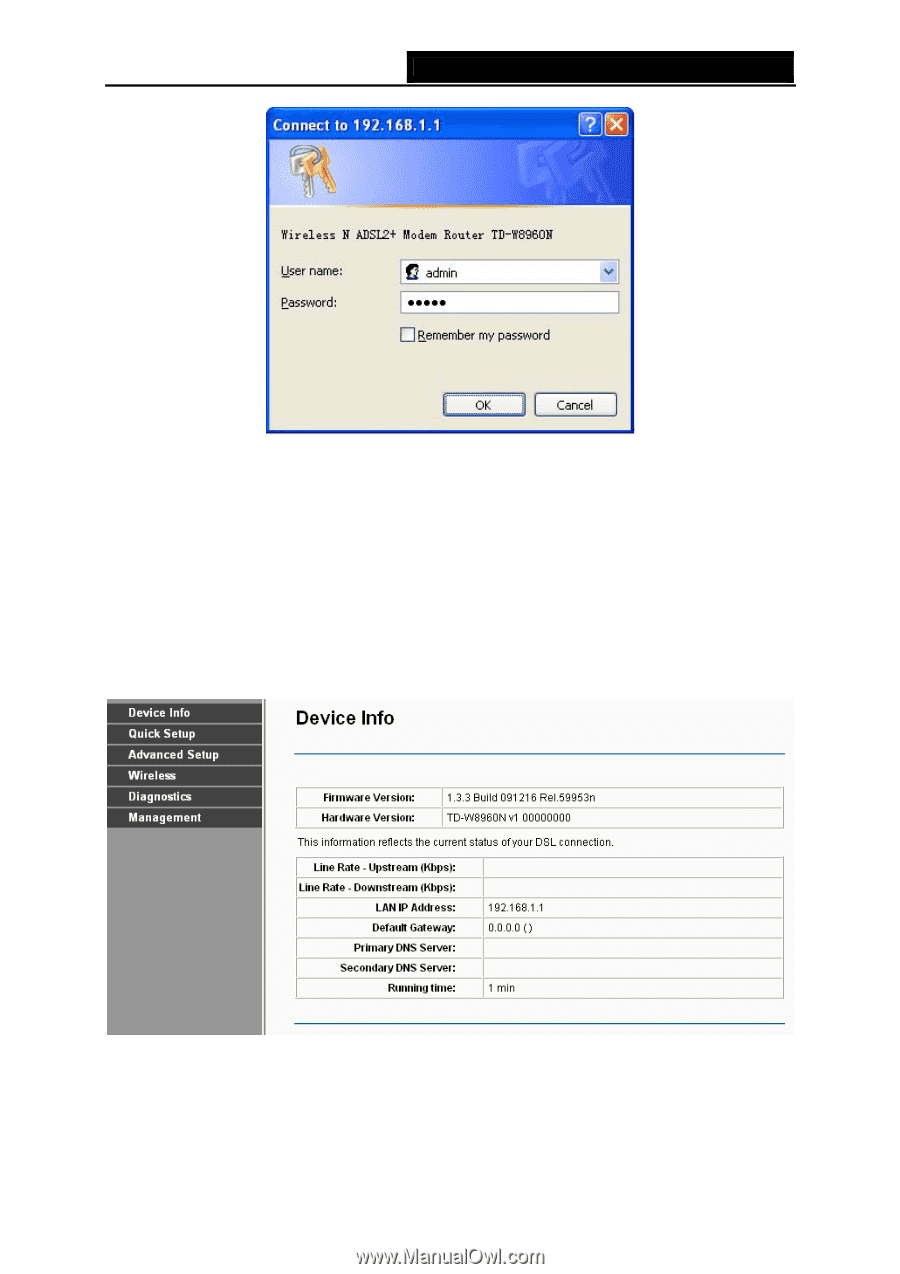
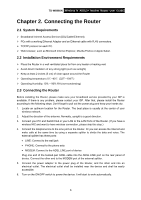
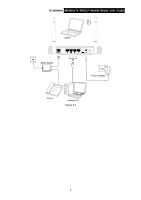
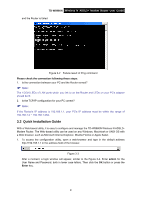
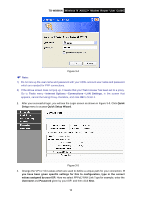
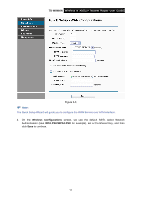
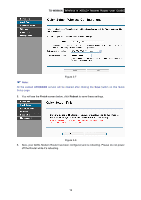
TD-W8960N Wireless N ADSL2+ Modem Router User Guide Figure 3-4 ) Note: 1) Do not mix up the user name and password with your ADSL account user name and password which are needed for PPP connections. 2) If the above screen does not pop up, it means that your Web-browser has been set to a proxy. Go to Tools menu→Internet Options→Connections→LAN Settings, in the screen that appears, cancel the Using Proxy checkbox, and click OK to finish it. 2. After your successful login, you will see the Login screen as shown in Figure 3-5. Click Quick Setup menu to access Quick Setup Wizard. Figure 3-5 3. Change the VPI or VCI values which are used to define a unique path for your connection. If you have been given specific settings for this to configuration, type in the correct values assigned by your ISP. Here we select PPPoE WAN Link Type for example, enter the Username and Password given by your ISP, and then click Next. 10
-
 1
1 -
2
-
3
-
4
-
5
-
6
-
7
-
8
-
9
-
10
-
11
-
 12
12 -
 13
13 -
 14
14 -
 15
15 -
 16
16 -
 17
17 -
 18
18 -
 19
19 -
 20
20 -
 21
21 -
 22
22 -
23
-
24
-
25
-
26
-
27
-
28
-
29
-
30
-
31
-
32
-
33
-
34
-
35
-
36
-
37
-
38
-
39
-
40
-
41
-
42
-
43
-
44
-
45
-
46
-
47
-
48
-
49
-
50
-
51
-
52
-
53
-
54
-
55
-
56
-
57
-
58
-
59
-
60
-
61
-
62
-
63
-
64
-
65
-
66
-
67
-
68
-
69
-
70
-
71
-
72
-
73
-
74
-
75
-
76
-
77
-
78
-
79
-
80
-
81
-
82
-
83
-
84
-
85
-
86
-
87
-
88
-
89
-
90
-
91
-
92
-
93
-
94
-
95
-
96
-
97
-
98
-
99
-
100
-
101
-
102
-
103
-
104
-
105
-
106
-
107
-
108
-
109
-
110
 |
 |