TP-Link TD-W8960N User Guide - Page 56
RIP, Destination Network Address
 |
UPC - 845973060343
View all TP-Link TD-W8960N manuals
Add to My Manuals
Save this manual to your list of manuals |
Page 56 highlights
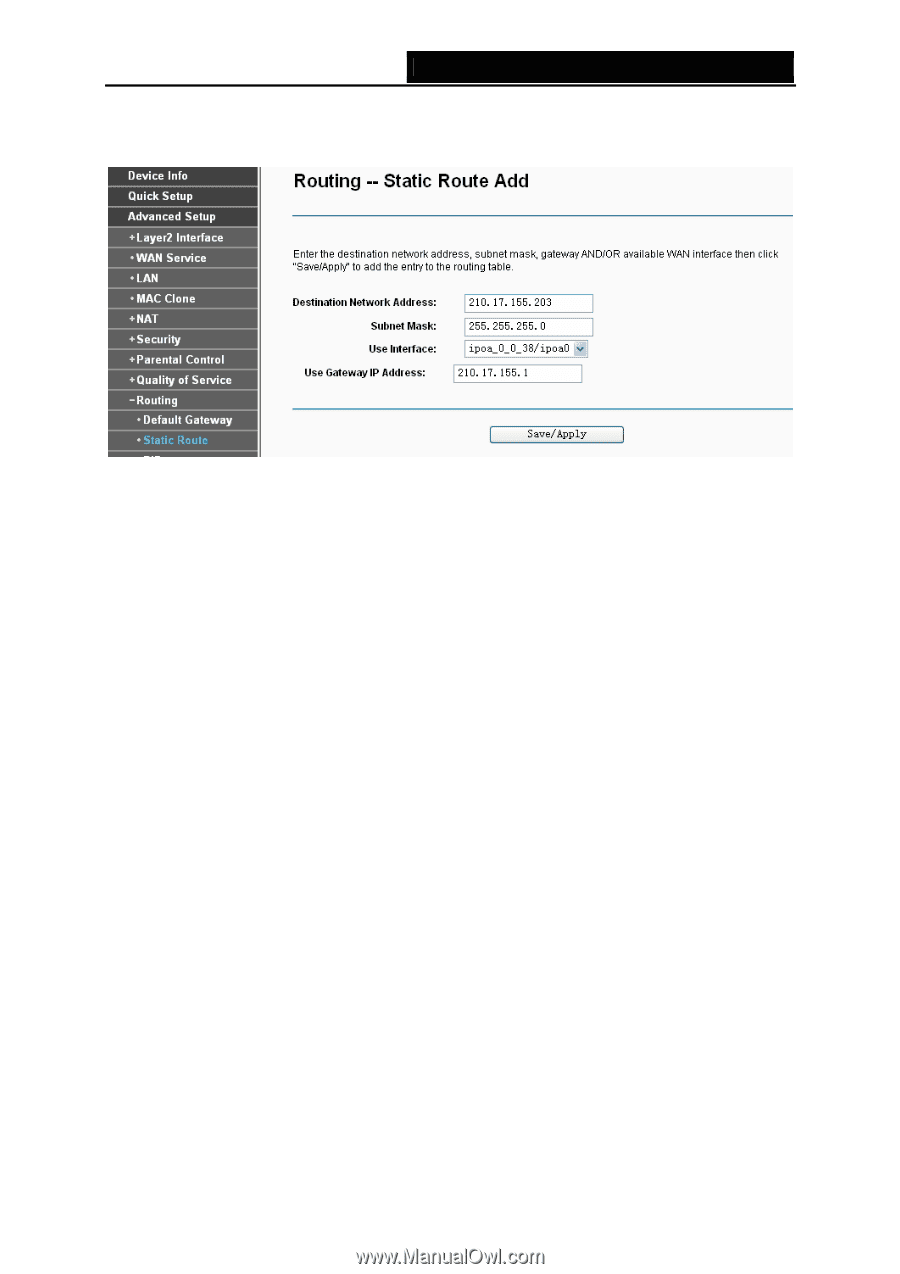
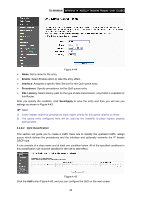
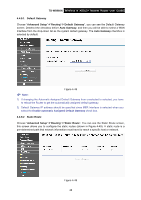
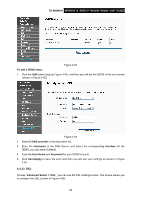
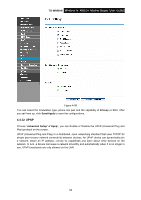
TD-W8960N Wireless N ADSL2+ Modem Router User Guide To add static routing entries: 1. Click the Add button in Figure 4-49, and you will see the screen as shown in Figure 4-50. Figure 4-50 2. Enter the following data: ¾ Destination Network Address: The Destination Network Address is the address of the network or host that you want to assign to a static route. ¾ Subnet Mask: The Subnet Mask determines which portion of an IP Address is the network portion, and which portion is the host portion. ¾ Use Interface: Select the Interface name in the text box, or else, the default Use Interface will be adopted for the Static Route. ¾ Use Gateway IP Address: If you select the IPoE or IPoA mode for Use Interface, the screen above will display this item, you should type the Gateway address correctly, and the other option for Use Interface will adopt the default Gateway address for the Static Route. 3. Click Save/Apply to and then you will see you settings as shown in Figure 4-49. To remove a static routing entry: 1. Select the Remove check box according to the entry in the Figure 4-49. 2. Click the Remove button, and the entry will be deleted. ) Note: Gateway IP address should be correctly configured if IP based Interface (IPoE, IPoA) is selected. 4.4.9.3 RIP Choose "Advanced Setup"Æ"Routing"Æ"RIP", you can see the RIP (Routing Information Protocol) screen which allows you to configure the RIP (shown in Figure 4-51). 49
-
 1
1 -
2
-
3
-
4
-
5
-
6
-
7
-
8
-
9
-
10
-
11
-
12
-
13
-
14
-
15
-
16
-
17
-
18
-
19
-
20
-
21
-
22
-
23
-
24
-
25
-
26
-
27
-
28
-
29
-
30
-
31
-
32
-
33
-
34
-
35
-
36
-
37
-
38
-
39
-
40
-
41
-
42
-
43
-
44
-
45
-
46
-
47
-
48
-
49
-
50
-
 51
51 -
 52
52 -
 53
53 -
 54
54 -
 55
55 -
 56
56 -
 57
57 -
 58
58 -
 59
59 -
 60
60 -
 61
61 -
62
-
63
-
64
-
65
-
66
-
67
-
68
-
69
-
70
-
71
-
72
-
73
-
74
-
75
-
76
-
77
-
78
-
79
-
80
-
81
-
82
-
83
-
84
-
85
-
86
-
87
-
88
-
89
-
90
-
91
-
92
-
93
-
94
-
95
-
96
-
97
-
98
-
99
-
100
-
101
-
102
-
103
-
104
-
105
-
106
-
107
-
108
-
109
-
110
 |
 |