TP-Link TD-W8960N User Guide - Page 59
DSL - password
 |
UPC - 845973060343
View all TP-Link TD-W8960N manuals
Add to My Manuals
Save this manual to your list of manuals |
Page 59 highlights
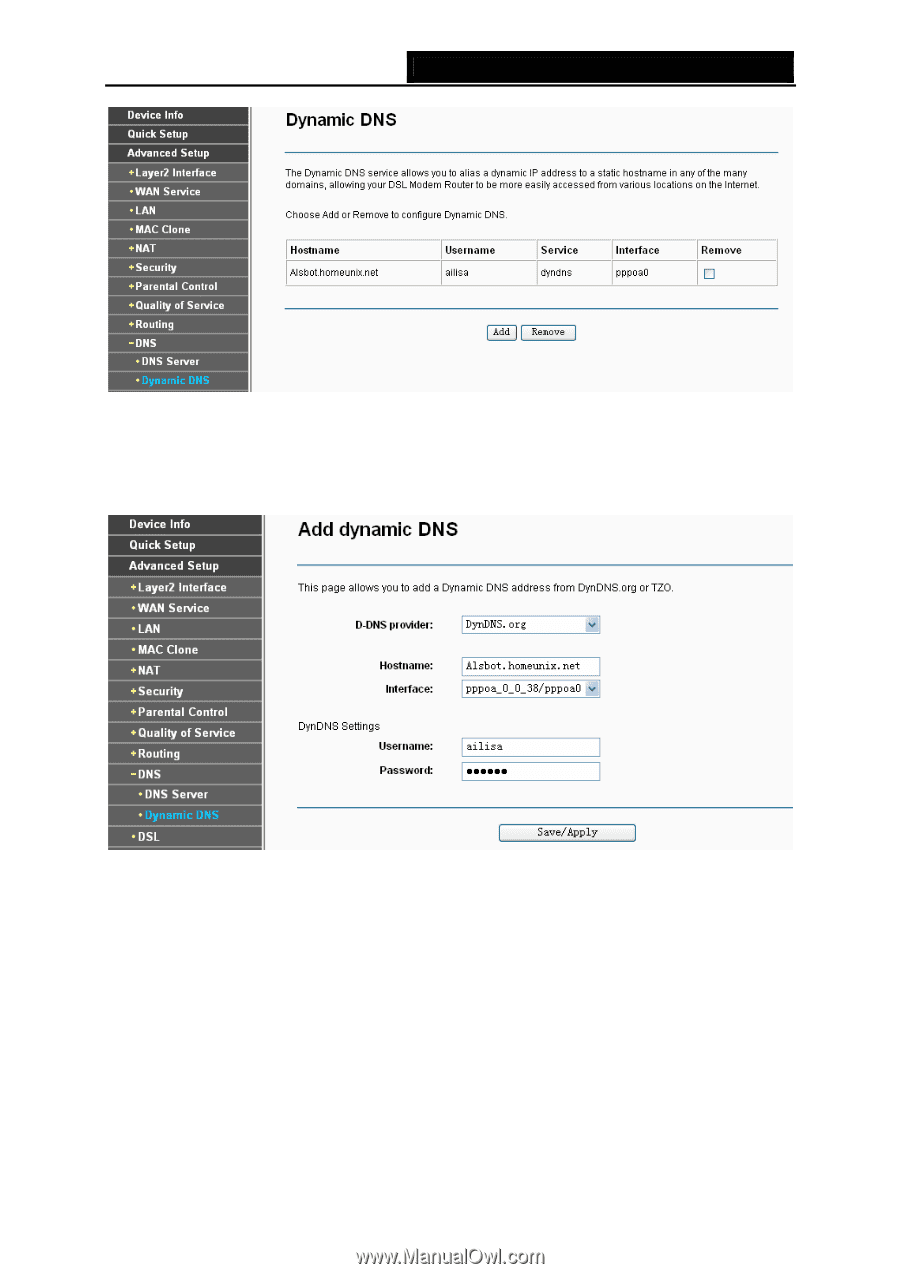
TD-W8960N Wireless N ADSL2+ Modem Router User Guide Figure 4-54 To add a DDNS entry: 1. Click the Add button (pop-up Figure 4-54), and then you will set the DDNS in the next screen (shown in Figure 4-55). Figure 4-55 2. Select D-DNS provider in the drop-down list. 3. Enter the Hostname of the DNS Server, and select the corresponding Interface for the DDNS, you can leave it default. 4. Type the User Name and Password for your DDNS account. 5. Click Save/Apply to save the entry and then you will see your settings as shown in Figure 4-54. 4.4.11 DSL Choose "Advanced Setup"Æ"DSL", you can see the DSL Settings screen, this screen allows you to configure the DSL (shown in Figure 4-56). 52
-
 1
1 -
2
-
3
-
4
-
5
-
6
-
7
-
8
-
9
-
10
-
11
-
12
-
13
-
14
-
15
-
16
-
17
-
18
-
19
-
20
-
21
-
22
-
23
-
24
-
25
-
26
-
27
-
28
-
29
-
30
-
31
-
32
-
33
-
34
-
35
-
36
-
37
-
38
-
39
-
40
-
41
-
42
-
43
-
44
-
45
-
46
-
47
-
48
-
49
-
50
-
51
-
52
-
53
-
 54
54 -
 55
55 -
 56
56 -
 57
57 -
 58
58 -
 59
59 -
 60
60 -
 61
61 -
 62
62 -
 63
63 -
 64
64 -
65
-
66
-
67
-
68
-
69
-
70
-
71
-
72
-
73
-
74
-
75
-
76
-
77
-
78
-
79
-
80
-
81
-
82
-
83
-
84
-
85
-
86
-
87
-
88
-
89
-
90
-
91
-
92
-
93
-
94
-
95
-
96
-
97
-
98
-
99
-
100
-
101
-
102
-
103
-
104
-
105
-
106
-
107
-
108
-
109
-
110
 |
 |
TD-W8960N
Wireless N ADSL2+ Modem Router User Guide
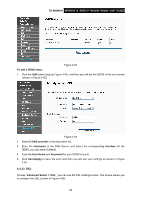
Figure 4-54
To add a DDNS entry:
1.
Click the
Add
button (pop-up Figure 4-54), and then you will set the DDNS in the next screen
(shown in Figure 4-55).
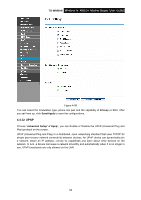
Figure 4-55
2.
Select
D-DNS provider
in the drop-down list.
3.
Enter the
Hostname
of the DNS Server, and select the corresponding
Interface
for the
DDNS, you can leave it default.
4.
Type the
User Name
and
Password
for your DDNS account.
5.
Click
Save/Apply
to save the entry and then you will see your settings as shown in Figure
4-54.
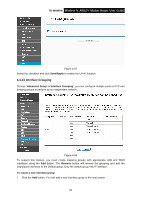
4.4.11 DSL
Choose “
Advanced Setup
”
Æ
“
DSL
”, you can see the DSL Settings screen, this screen allows you
to configure the DSL (shown in Figure 4-56).
52