TP-Link TD-W8960N User Guide - Page 82
TD-W8960N, Con WPA-PSK settings, WPA-PSK, Save/Apply
 |
UPC - 845973060343
View all TP-Link TD-W8960N manuals
Add to My Manuals
Save this manual to your list of manuals |
Page 82 highlights
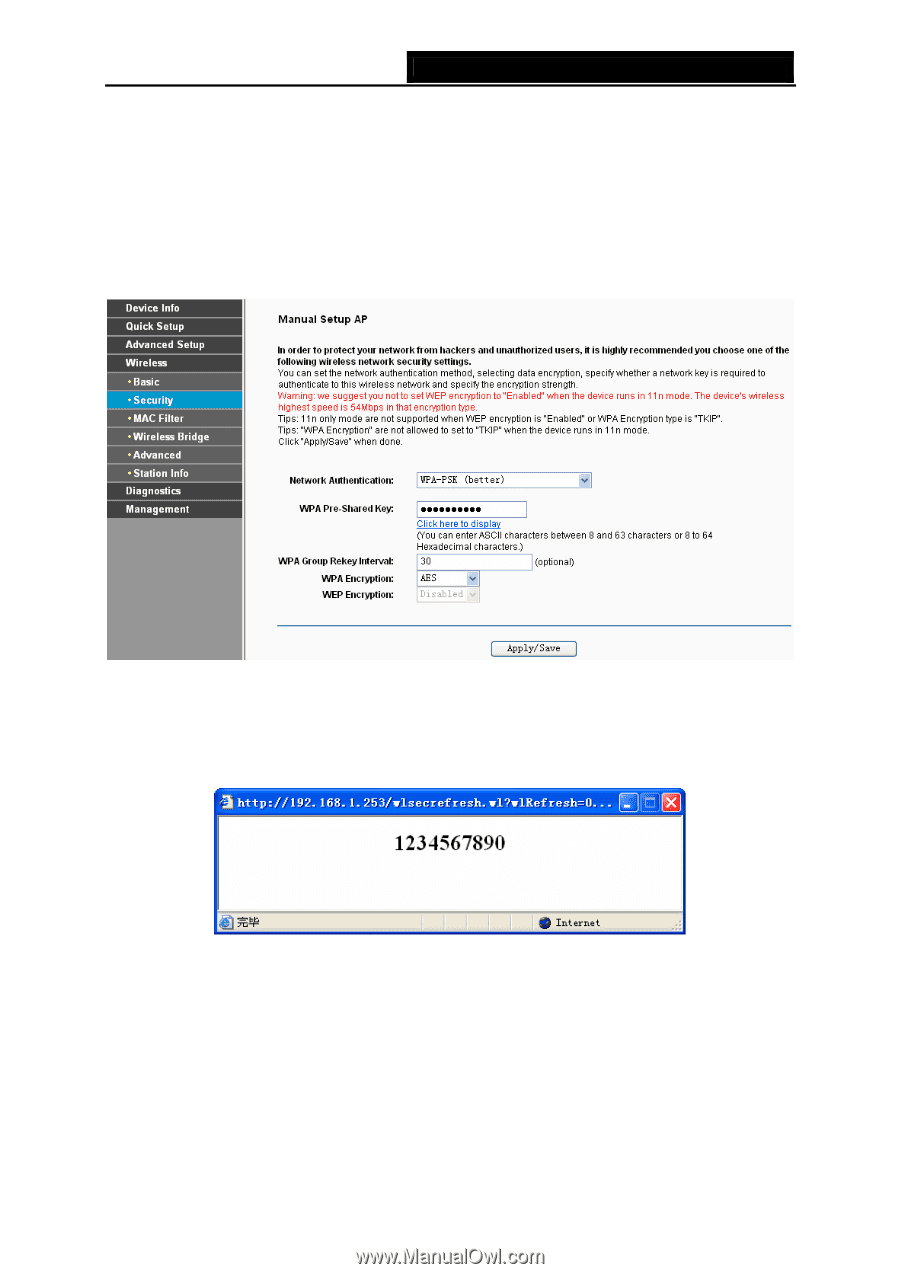
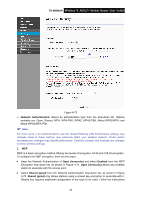
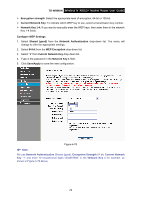
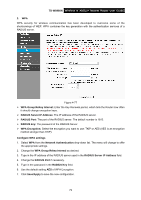
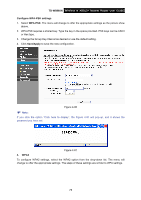
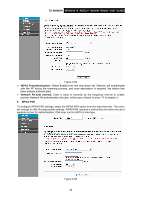
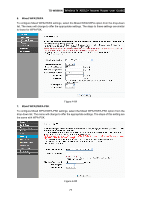
TD-W8960N Wireless N ADSL2+ Modem Router User Guide Configure WPA-PSK settings 1. Select WPA-PSK. The menu will change to offer the appropriate settings as the picture show above. 2. WPA-PSK requires a shared key. Type the key in the space provided. PSK keys can be ASCII or Hex type. 3. Change the Group Key Interval as desired or use the default setting. 4. Click Save/Apply to save the new configuration. Figure 4-80 ) Note: If you click the option "Click here to display", the Figure 4-81 will pop-up, and it shows the password you have set. Figure 4-81 4. WPA2 To configure WPA2 settings, select the WPA2 option from the drop-down list. The menu will change to offer the appropriate settings. The steps of these settings are similar to WPA settings. 75
-
 1
1 -
2
-
3
-
4
-
5
-
6
-
7
-
8
-
9
-
10
-
11
-
12
-
13
-
14
-
15
-
16
-
17
-
18
-
19
-
20
-
21
-
22
-
23
-
24
-
25
-
26
-
27
-
28
-
29
-
30
-
31
-
32
-
33
-
34
-
35
-
36
-
37
-
38
-
39
-
40
-
41
-
42
-
43
-
44
-
45
-
46
-
47
-
48
-
49
-
50
-
51
-
52
-
53
-
54
-
55
-
56
-
57
-
58
-
59
-
60
-
61
-
62
-
63
-
64
-
65
-
66
-
67
-
68
-
69
-
70
-
71
-
72
-
73
-
74
-
75
-
76
-
 77
77 -
 78
78 -
 79
79 -
 80
80 -
 81
81 -
 82
82 -
 83
83 -
 84
84 -
 85
85 -
 86
86 -
 87
87 -
88
-
89
-
90
-
91
-
92
-
93
-
94
-
95
-
96
-
97
-
98
-
99
-
100
-
101
-
102
-
103
-
104
-
105
-
106
-
107
-
108
-
109
-
110
 |
 |