TP-Link TL-R600VPN TL-R600VPN V1 User Guide - Page 50
IPsec
 |
View all TP-Link TL-R600VPN manuals
Add to My Manuals
Save this manual to your list of manuals |
Page 50 highlights
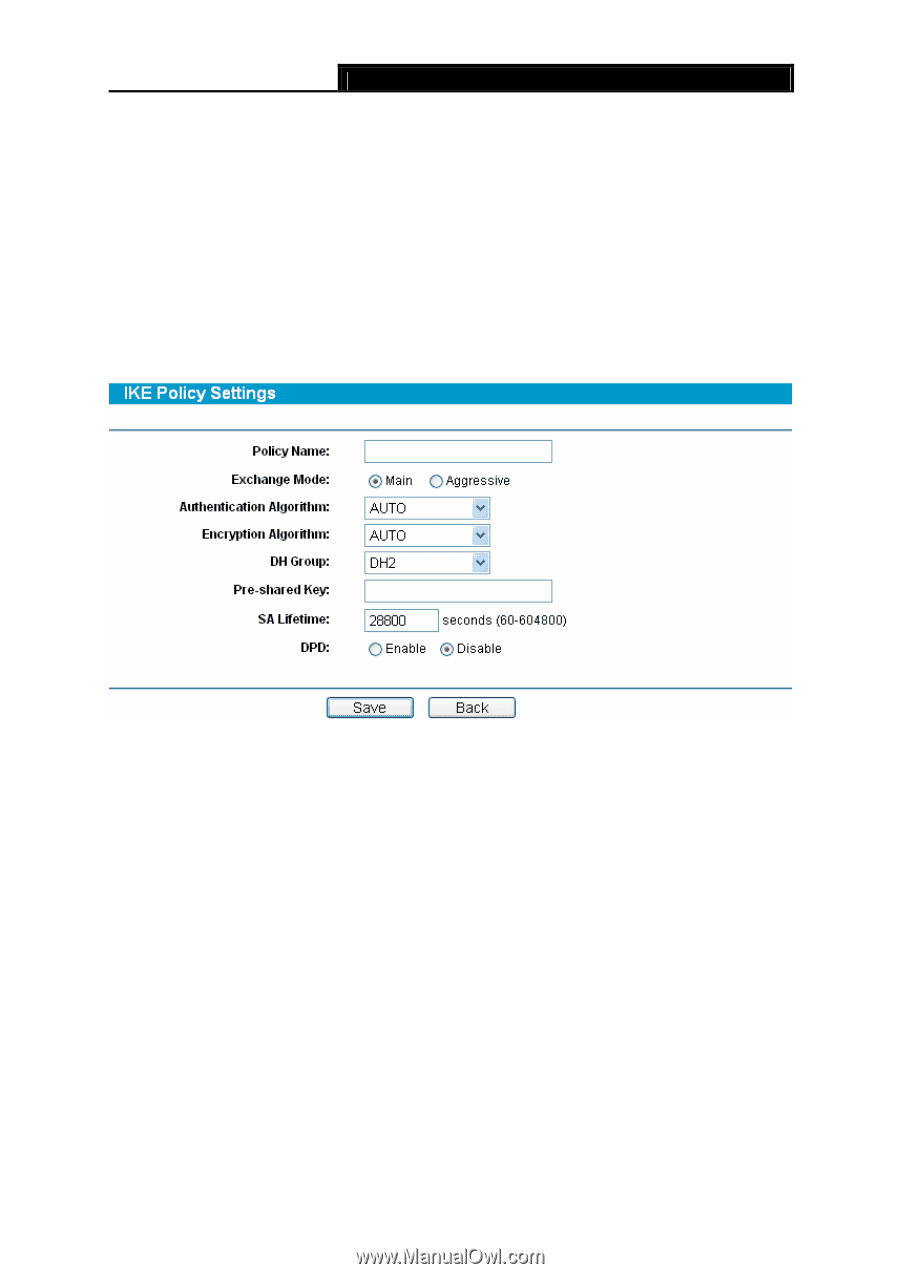
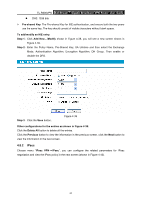
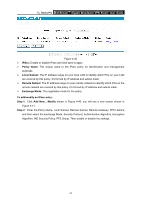
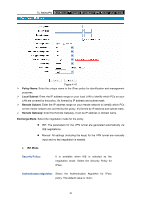
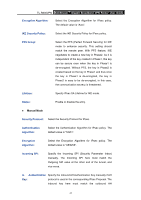
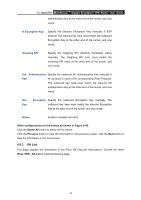
TL-R600VPN SafeStreamTM Gigabit Broadband VPN Router User Guide z DH3: 1536 bits ¾ Pre-shared Key: The Pre-shared Key for IKE authentication, and ensure both the two peers use the same key. The key should consist of visible characters without blank space. To add/modify an IKE entry: Step 1: Click Add New.../Modify shown in Figure 4-38, you will see a new screen shown in Figure 4-39. Step 2: Enter the Policy Name, Pre-Shared Key, SA Lifetime and then select the Exchange Mode, Authentication Algorithm, Encryption Algorithm, DH Group. Then enable or disable the DPD. Step 3: Click the Save button. Figure 4-39 Other configurations for the entries as shown in Figure 4-38: Click the Delete All button to delete all the entries. Click the Previous button to view the information in the previous screen, click the Next button to view the information in the next screen. 4.8.2 IPsec Choose menu "IPsec VPN → IPsec", you can configure the related parameters for IPsec negotiation and view the IPsec policy in the next screen (shown in Figure 4-40). 44
-
 1
1 -
2
-
3
-
4
-
5
-
6
-
7
-
8
-
9
-
10
-
11
-
12
-
13
-
14
-
15
-
16
-
17
-
18
-
19
-
20
-
21
-
22
-
23
-
24
-
25
-
26
-
27
-
28
-
29
-
30
-
31
-
32
-
33
-
34
-
35
-
36
-
37
-
38
-
39
-
40
-
41
-
42
-
43
-
44
-
 45
45 -
 46
46 -
 47
47 -
 48
48 -
 49
49 -
 50
50 -
 51
51 -
 52
52 -
 53
53 -
 54
54 -
 55
55 -
56
-
57
-
58
-
59
-
60
-
61
-
62
-
63
-
64
-
65
-
66
-
67
-
68
-
69
-
70
-
71
-
72
-
73
-
74
-
75
-
76
-
77
-
78
-
79
-
80
-
81
-
82
 |
 |