Vivitar T328 User Manual - Page 20
Image Size
 |
View all Vivitar T328 manuals
Add to My Manuals
Save this manual to your list of manuals |
Page 20 highlights
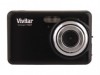
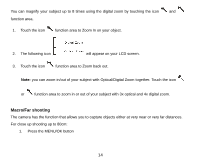
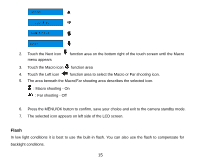
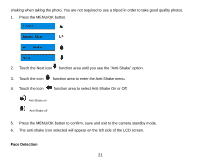
4. Touch the icon function area to select the scene you want to use. 5. The area beneath the Scene option area describes the selected icon. Auto Night Portrait Night Scenery Portrait Scenery Party Beach Sport High Sensitivity 6. Press the MENU/OK button to confirm, save and exit to the camera standby mode. 7. The selected icon appears next to the camera icon on the top left of the LCD screen. Image Size The image size and quality settings determine the number of photos that can be saved and the amount of memory required for each photo. The higher the photo quality the more memory it will take. The image size and quality will also affect the maximum size you can effectively print your photo. To set the Image size: 1. Press the MENU/OK button. 19
-
 1
1 -
2
-
3
-
4
-
5
-
6
-
7
-
8
-
9
-
10
-
11
-
12
-
13
-
14
-
 15
15 -
 16
16 -
 17
17 -
 18
18 -
 19
19 -
 20
20 -
 21
21 -
 22
22 -
 23
23 -
 24
24 -
 25
25 -
26
-
27
-
28
-
29
-
30
-
31
-
32
-
33
-
34
-
35
-
36
-
37
-
38
-
39
-
40
-
41
-
42
-
43
-
44
-
45
-
46
-
47
-
48
-
49
-
50
-
51
-
52
-
53
-
54
-
55
-
56
-
57
-
58
-
59
-
60
-
61
-
62
 |
 |