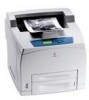
Xerox 4500N Reference Guide
Xerox 4500N - Phaser B/W Laser Printer Manual
 |
View all Xerox 4500N manuals
Add to My Manuals
Save this manual to your list of manuals |
Xerox 4500N manual content summary:
- Xerox 4500N | Reference Guide - Page 1
PhaserTM 4500 laser printer Reference Guide Guide de référence Guida di riferimento Referenzhandbuch Guía de referencia Guia de referência Naslaggids Referensguiden ® www.xerox.com/office/4500support - Xerox 4500N | Reference Guide - Page 2
Xerox Corporation. Phaser™, PhaserPort™, and PhaserTools™are trademarks of Xerox . PCL® and HP-GL® are registered Times™, and Univers™ are trademarks of Linotype-Hell AG and/or its subsidiaries. Windows® and Windows Services® are registered trademarks, and IPX™ and Novell Distributed Print Services - Xerox 4500N | Reference Guide - Page 3
Front Panel Brightness 1-17 Adjusting Front Panel Contrast 1-18 Changing Printer Language 1-18 Fonts 1-19 Types of Fonts 1-19 Resident Printer Fonts 1-19 Viewing a List of Available Fonts 1-19 Printing a List of Available Fonts 1-20 Downloading Fonts 1-21 Phaser™ 4500 Laser Printer i - Xerox 4500N | Reference Guide - Page 4
Guidelines 2-2 Tray Setup 2-2 Supported Papers 2-6 Paper Weights 2-7 Paper Usage Guidelines 2-9 Paper Storage Guidelines 2-9 Paper that May Damage Your Printer 2-10 Basic Printing 2-11 Loading Custom Size Paper 2-39 Loading Custom Size Paper in Tray 1-4 2-39 Phaser™ 4500 Laser Printer ii - Xerox 4500N | Reference Guide - Page 5
CD-ROM Install Steps 3-26 Other Methods of Installation 3-26 Windows 98 and Windows Me Troubleshooting 3-28 Macintosh 3-30 Requirements 3-30 Quick CD-ROM Install or Higher . . 3-33 Macintosh Troubleshooting (Mac OS 9.x, Mac OS X, Versions 10.1 and 10.2) . . . 3-34 Phaser™ 4500 Laser Printer iii - Xerox 4500N | Reference Guide - Page 6
to Clear 4-7 Jam at the Tray 4-10 Jam at the Top Cover 4-14 Jam at the Duplex Unit 4-18 Jam at the Stacker 4-19 Paper Size Jam 4-20 Print-Quality Problems 4-24 Diagnosing Print-Quality Problems 4-24 Repeating Defects 4-29 Maintenance 4-30 Cleaning the Outside of the Printer 4-30 Front - Xerox 4500N | Reference Guide - Page 7
A User Safety B Warranty C Printer Specifications (English Only) D Regulatory Information (English Only) E Material Safety Data Sheet (English Only) F Product Recycling and Disposal (English Only) Index Contents Phaser™ 4500 Laser Printer v - Xerox 4500N | Reference Guide - Page 8
Features Phaser™ 4500 Laser Printer This section includes: ■ "Printer Tour" on page 1-2 ■ "Front Panel" on page 1-5 ■ "Printer Drivers" on page 1-9 ■ "Managing Your Printer" on page 1-11 ■ "Printer Settings" on page 1-13 ■ "Fonts" on page 1-19 ■ "Registering Your Printer" on page 1-24 Copyright © - Xerox 4500N | Reference Guide - Page 9
, and troubleshoot the printer from your computer. ■ Usage Analysis Tool provides cost tracking that logs each job and the cost for each page. ■ PrintingScout provides on-screen notification and guidance if the printer needs help. Available Configurations The Phaser 4500 Laser Printer has four - Xerox 4500N | Reference Guide - Page 10
500-Sheet stacker 4500-072 Rear View 9 1 2 3 4 8 7 6 5 1. Parallel cable connection 2. Ethernet 10/100 Base-T connection 3. USB connection 4. Configuration card 5. Power receptacle 6. Duplex unit 7. Rear cover 8. Stacker rear cover 9. Stacker extension 4500-073 Phaser™ 4500 Laser Printer 1-3 - Xerox 4500N | Reference Guide - Page 11
Packaged with printer Packaged with printer Packaged with printer Packaged with printer (User Documentation CD-ROM) www.xerox.com/office www.xerox.com/office/infoSMART www.phaserSMART.com www.xerox.com/office/4500support ■ Front panel ■ CentreWare IS ■ Printer Driver Phaser™ 4500 Laser Printer 1-4 - Xerox 4500N | Reference Guide - Page 12
Phaser™ 4500 Laser Printer Front Panel This topic includes: ■ "Front Panel Features" on page 1-5 ■ "Front Panel Layout" jams. ■ Enables you to access tools and information pages to help resolve problems. ■ Enables you to change printer and network settings. Go to Reference/Features/Printer Settings - Xerox 4500N | Reference Guide - Page 13
help message with information about the printer, such as printer status, error messages, and maintenance information. 7. Down Arrow button Scrolls status messages and titles for the printer. ■ The bottom section displays the front panel menus and information text. Phaser™ 4500 Laser Printer 1-6 - Xerox 4500N | Reference Guide - Page 14
problems and obtain the best results from your printer. Access these pages from the printer's front panel. To print information pages: 1. At the printer's front panel, select Information, then press the OK button. 2. Select Information Pages, then press the OK button. Phaser™ 4500 Laser Printer - Xerox 4500N | Reference Guide - Page 15
which demonstrate different printer functions. To print sample pages: 1. At the printer's front panel, select Information, then press the OK button. 2. Select Sample Pages, then press the OK button. 3. Select the desired sample page, then press the OK button to print. Phaser™ 4500 Laser Printer 1-8 - Xerox 4500N | Reference Guide - Page 16
Phaser™ 4500 Laser Printer Printer Drivers This topic includes: ■ "Available Printer Drivers" on page 1-9 ■ "Printer Driver Features" on page 1-10 Printer drivers enable your computer and printer to communicate and provide access to your printer features. Xerox makes driver installation easy with - Xerox 4500N | Reference Guide - Page 17
◆ ◆ ◆ ◆ ◆ ◆ ◆ ◆ ◆ ◆ ▼ ▼ ▼ 1 PostScript only ● = Supported ■ = Must have duplex unit (DT or DX configuration) ◆ = Must have hard drive ▲ = Only available when your printer is connected to your computer via a network ▼ = Must have 500-Sheet stacker Phaser™ 4500 Laser Printer 1-10 - Xerox 4500N | Reference Guide - Page 18
Phaser™ 4500 Laser Printer Managing Your Printer This topic includes: ■ "Printer's IP Address" on page 1-11 ■ "CentreWare Internet Services (IS)" on page 1-11 ■ "PhaserSMART" on page 1-12 ■ "PrintingScout" on page 1-12 There are a number of resources available to help you get the best quality - Xerox 4500N | Reference Guide - Page 19
printer to our web site for analysis. PhaserSMART Diagnostic Tool examines the information, diagnoses the problem, and proposes a solution. If the problem is not resolved with the solution, PhaserSMART Technical Support assists you in opening a Service Request with Xerox Customer Support. Launching - Xerox 4500N | Reference Guide - Page 20
Phaser™ 4500 Laser Printer Printer Printer Language" on page 1-18 Accessing the Startup Page The printer automatically produces a "Startup Page" each time the printer is turned on or reset browser. 2. Enter your printer's IP address in the Printer Defaults. 6. Select Off or On from the Printer - Xerox 4500N | Reference Guide - Page 21
value if you want to extend the length of time before the printer goes into Power Saver mode. 5. Press the Printer Defaults. 6. Select On or Off from the Front Panel Menu drop-down list. ■ Select On to have all menus available. ■ Select Off to limit the printer setup items. Phaser™ 4500 Laser Printer - Xerox 4500N | Reference Guide - Page 22
1, 3, 5, or 10 minutes, 1 or 24 hours) indicate the length of time you want the printer to wait for you to load paper before printing. If you select a value of None, the printer does not wait for paper to be inserted and immediately picks paper from the default tray. Phaser™ 4500 Laser Printer 1-15 - Xerox 4500N | Reference Guide - Page 23
type and size when a tray runs out of paper. Tray switching is controlled by the printer driver, front panel, or CentreWare IS. PCL jobs always use tray switching, but PostScript jobs disable tray switching when a specific tray has been selected as the paper source. Phaser™ 4500 Laser Printer 1-16 - Xerox 4500N | Reference Guide - Page 24
Source tray to the front if a specific tray is selected. You can specify the sequence the printer uses to select trays containing the correct paper type and size for a print job. The tray sequence (brightest background light). 5. Press the OK button to save your change. Phaser™ 4500 Laser Printer 1-17 - Xerox 4500N | Reference Guide - Page 25
pages: 1. At the printer's front panel, select Printer Setup, then press the OK button. 2. Select Front Panel Setup, then press the OK button. 3. Select Front Panel Language, then press the OK button. 4. Select the desired language, then press the OK button. Phaser™ 4500 Laser Printer 1-18 - Xerox 4500N | Reference Guide - Page 26
Phaser™ 4500 Laser Printer Fonts This topic includes: ■ "Types of Fonts" on page 1-19 ■ "Resident Printer Fonts" on page 1-19 ■ "Viewing a List of Available Fonts" on page 1-19 ■ "Printing a List of Available Fonts" on page 1-20 ■ "Downloading Fonts" on page 1-21 Types of Fonts Your printer printer - Xerox 4500N | Reference Guide - Page 27
Right-click the 4500 printer, then select Properties. 3. Select the Troubleshooting tab. 4. Click the drop-down arrow in the Printer Information field to view the list of options. 5. Select PostScript Font List or PCL Font List from the drop-down list. 6. Click Print. Phaser™ 4500 Laser Printer 1-20 - Xerox 4500N | Reference Guide - Page 28
following downloadable fonts: PCL Font Type Support: ■ Type 0 ■ Type 10 ■ Type 11 ■ Type 15 ■ Type 20 Postscript Font Type Support: ■ Type 1 ■ Type 3 ■ Adobe ■ Agfa ■ Bitstream ■ Microsoft ■ Apple TrueType (Scalable to any point size; looks the same on-screen and printed) Phaser™ 4500 Laser Printer - Xerox 4500N | Reference Guide - Page 29
of the fonts in the folder to the list of fonts to download, click the Add All button. If you decide not to download a font, highlight the font in the list of fonts to download, then click Remove. 6. Select either the printer's memory or hard drive for Destination. Phaser™ 4500 Laser Printer 1-22 - Xerox 4500N | Reference Guide - Page 30
Fonts 7. Click Send to download the fonts in the list. Note To remove downloaded fonts from the printer, follow Steps 2 through 4. Click the Fonts drop-down list, select the font you want to remove, then click Remove. Phaser™ 4500 Laser Printer 1-23 - Xerox 4500N | Reference Guide - Page 31
Phaser™ 4500 Laser Printer Registering Your Printer Registering your printer is quick and easy. You can register your printer using one of the following methods: ■ Registration card that came with your printer ■ Online form at www.xerox.com/office/4500support ■ Web link from the Printer Installer - Xerox 4500N | Reference Guide - Page 32
Printing Phaser™ 4500 Laser Printer This section includes: ■ "Changing Paper" on page 2-2 ■ "Supported Papers" on page 2-6 ■ "Basic Printing" on page 2-11 ■ "Adjusting Printing Options" page 2-42 ■ "Supplies and Recycling" on page 2-50 Copyright © 2004 Xerox Corporation. All Rights Reserved. 2-1 - Xerox 4500N | Reference Guide - Page 33
problems can occur and the fuser can be damaged. Guidelines After loading any tray and adjusting the paper guides windows or metal clasps. Tray Setup 1. When loading paper, transparencies, or other specialty media in a tray, pull the tray completely out of the printer. 4500-001 Copyright © 2004 Xerox - Xerox 4500N | Reference Guide - Page 34
paper having a different width or length, adjust the width and length guides. 4500-024 Paper Length Guide Side Paper Guides 4500-023 3. Extend the tray to accommodate legal or US Folio (legal front of the tray. Extending Tray 4500-059 Contracting Tray 4500-060 Phaser™ 4500 Laser Printer 2-3 - Xerox 4500N | Reference Guide - Page 35
Changing Paper 4. Load the paper, transparencies, or other specialty media in the tray. Do not load paper above the fill line inside the tray. 4500-003 Paper and Transparency Fill Lines 5. Slide the side guide firmly against the paper or other specialty media. 4500-023 Phaser™ 4500 Laser Printer 2-4 - Xerox 4500N | Reference Guide - Page 36
Satisfaction Guarantee is available in the United States and Canada. Coverage may vary outside these areas; please contact your local representative for details. For online support information, go to www.xerox.com/office/4500support. Phaser™ 4500 Laser Printer 2-5 - Xerox 4500N | Reference Guide - Page 37
in these tables to ensure the best print quality and avoid printer jams. For best results, use only Xerox Printing Media specified for your printer; they are guaranteed to produce excellent results with your Phaser 4500 Laser Printer. Paper and Media Sizes Input Output Paper Size Tray 1 500 - Xerox 4500N | Reference Guide - Page 38
online support information, go to www.xerox.com/office/infoSMART. Simplex and Duplex Sizes Simplex (1-Sided Printing) Width Height Duplex (2- .0 in. Same as Input Same as Input Paper Weights The Phaser 4500 Laser Printer supports the following paper types and weights: Paper and Media Types and - Xerox 4500N | Reference Guide - Page 39
. A4 210 x 297 mm Straight/Reverse Collation Straight/Reverse Collation Straight/Reverse Collation Straight Collation Straight Collation Straight Collation 3R12130 3R12132 3R12133 3R12137 3R12135 3R97108 Phaser™ 4500 Laser Printer 2-8 - Xerox 4500N | Reference Guide - Page 40
. Phaser media is sold with appropriate packaging to prevent transportation problems and to promote positive customer results. Leave the media inside the packaging until you are ready to use it; reinsert unused media in the original packaging and reseal it for protection. Phaser™ 4500 Laser Printer - Xerox 4500N | Reference Guide - Page 41
■ Paper with cutouts or perforations ■ Paper with staples inserted ■ Envelopes with windows, metal clasps, adhesives with release strips, or side seams. Warning Use only Xerox clear transparency film. Other types of transparency film may melt and damage the printer. Phaser™ 4500 Laser Printer 2-10 - Xerox 4500N | Reference Guide - Page 42
. If you fail to do this, print-quality problems can occur and the fuser can be damaged. 4500-020 For more information on paper types, weights, and sizes, go to Reference/Printing/Supported Papers on the User Documentation CD-ROM. Copyright © 2004 Xerox Corporation. All Rights Reserved. 2-11 - Xerox 4500N | Reference Guide - Page 43
Pull the tray completely out of the printer. Basic Printing 4500-001 2. If loading paper having a different width or length, adjust the width and length guides. 4500-024 4500-023 3. Extend the tray to pushing in the front of the tray. 4500-0 Phaser™ 4500 Laser Printer 2-12 4500-060 - Xerox 4500N | Reference Guide - Page 44
paper, transparencies, or specialty media. If frequent jamming occurs with card stock or heavier paper that is less than 175 mm (7 in.) long, reduce the number of sheets in the tray. 5. Slide the side guide firmly against the paper or other specialty media. 4500-023 Phaser™ 4500 Laser Printer 2-13 - Xerox 4500N | Reference Guide - Page 45
Basic Printing 6. Insert the tray into the printer slot and push it completely to the back of the printer. 4500-040 7. Confirm or change the paper size and type when prompted by the front panel. Phaser 4500 4500-020 Phaser™ 4500 Laser Printer 2-14 - Xerox 4500N | Reference Guide - Page 46
you fail to do this, print-quality problems can occur and the fuser can be damaged. 4500-020 1. Pull the tray completely out of the printer. 4500-078 2. If loading paper having a different width or length, adjust the width and length guides. 4500-089 4500-088 Phaser™ 4500 Laser Printer 2-15 - Xerox 4500N | Reference Guide - Page 47
above the fill lines inside the tray. Only use paper, transparencies, or specialty media that are flat. If frequent jamming occurs with card stock or heavier paper that is less than 175 mm (7 in.) long, reduce the number of sheets in the tray. 4500-087 4500-086 Phaser™ 4500 Laser Printer 2-16 - Xerox 4500N | Reference Guide - Page 48
to the back of the printer. 4500-077 7. Set the paper size and type when prompted by the front panel. Phaser 4500 4500-020 Note For more information about printing options and other selections, click the Help button on the printer driver tab to view the online help. Phaser™ 4500 Laser Printer 2-17 - Xerox 4500N | Reference Guide - Page 49
, parallel or USB) ■ Network operating system ■ Printer configuration ■ File size and type of graphics ■ Computer speed Note Additional printer memory (RAM) may improve overall printer functions, but will not increase the pages per minute (ppm) ability of the printer. Phaser™ 4500 Laser Printer 2-18 - Xerox 4500N | Reference Guide - Page 50
Phaser™ 4500 Laser Printer Adjusting Printing Options This topic includes: ■ "Setting Printing Options" on Printing Options Many printing options are available with the Xerox printer driver. Selecting Printing Preferences in Windows Printer preferences control all of your jobs, unless you overwrite - Xerox 4500N | Reference Guide - Page 51
, Image Smoothing, Separation Page Source, Separation Page) ■ Paper Type ■ Paper Size ■ Tray Selection ■ Cover Pages ■ Print Quality ■ Paper Destination ■ Separation Pages ■ Proof, Saved, Secure Printing ■ Printer Information Pages ■ Helpful Web Links Phaser™ 4500 Laser Printer 2-20 - Xerox 4500N | Reference Guide - Page 52
Windows 98 or Windows Me Driver Tab/Dialog Box Setup tab Output Options tab Printing Options ■ Paper Type ■ Paper size ■ Tray Selection ■ Orientation ■ Print on 1 Side or Print on 2 Sides ■ Print Quality ■ Separation Pages ■ Cover Pages ■ Proof, Saved, Secure Printing Phaser™ 4500 Laser Printer - Xerox 4500N | Reference Guide - Page 53
■ Proof, Saved, Secure Printing ■ Separation Pages ■ Information Pages ■ Web Links ■ Page Layout ■ Print Quality ■ Paper Destination ■ Separation Pages ■ Cover Pages ■ Proof, Saved, Secure Printing ■ PrintingScout ■ Printer Information Pages ■ Helpful Web Links Phaser™ 4500 Laser Printer 2-22 - Xerox 4500N | Reference Guide - Page 54
Mac) To select print settings for a particular job, change the driver settings before sending the job to the printer. 1. With the document open in your application, click File, ■ All pages from ■ First page from ■ Remaining from Summary of all printer driver settings Phaser™ 4500 Laser Printer 2-23 - Xerox 4500N | Reference Guide - Page 55
Macintosh PostScript Driver Settings (Continued) Operating System Mac OS 9.x Driver Drop- ■ Print Time ■ Print Color ■ Intent ■ Printer Profile ■ Print Cover Page ■ Cover Page Paper Source ■ Font Documentation ■ Font Downloading ■ If Page Paper Source ■ Draft Mode Phaser™ 4500 Laser Printer 2-24 - Xerox 4500N | Reference Guide - Page 56
select Print Quality from the drop-down list, then select a print quality mode. ■ Mac OS X (version 10.1 and higher) driver: In the Print dialog box, select Image Quality from the drop-down list, then select a print quality mode from the Print Quality drop-down list. Phaser™ 4500 Laser Printer 2-25 - Xerox 4500N | Reference Guide - Page 57
Printing Phaser™ 4500 Laser Printer Guidelines ■ A duplex unit must be installed on your printer to . 60 - 216 g/m2 (16 - 130 lb.) Binding Preferences Use the printer driver to select Portrait or Landscape orientation for the images on the page. When you Xerox Corporation. All Rights Reserved. 2-26 - Xerox 4500N | Reference Guide - Page 58
the printer driver settings, then click OK to print. Setting the Printer Driver for 2-Sided Printing Operating System Steps Windows 98 or Windows Me Print. 2. Select Duplex. 3. Select Print on Both Sides. 4. Click the Binding icon that matches the edge to bind. Phaser™ 4500 Laser Printer 2-27 - Xerox 4500N | Reference Guide - Page 59
Phaser™ 4500 Laser Printer Transparencies This topic includes: ■ "Guidelines" on page 2-28 ■ "Printing Transparencies from Trays 1-4" on page 2-28 Xerox Clear Transparencies can be printed from any tray. They should be printed on one side only. To order Xerox Clear Transparencies, contact your local - Xerox 4500N | Reference Guide - Page 60
the transparencies into the tray. Transparencies 4500-081 Note Do not load transparencies above the transparency fill line; it may cause the printer to jam. 3. Adjust the width and length paper guides to match the size of the transparencies. 4500-092 4500-093 Phaser™ 4500 Laser Printer 2-29 - Xerox 4500N | Reference Guide - Page 61
, then press the OK button. e. Select Transparency, then press the OK button to save your selection. 6. In the printer driver, select the appropriate tray or paper type. For more information, go to Reference/Printing/Basic Printing on the User Documentation CD-ROM. Phaser™ 4500 Laser Printer 2-30 - Xerox 4500N | Reference Guide - Page 62
in Tray 1 and 75 envelopes in Trays 2-4 at any time. Caution Never use envelopes with windows or metal clasps; they can damage the printer. Damage caused by using non-Xerox envelopes is not covered under the Xerox warranty, service agreement, or Total Satisfaction Guarantee. The Total Satisfaction - Xerox 4500N | Reference Guide - Page 63
Envelopes 4500-001 2. Insert the envelopes into the tray, faceup with the flap of the envelope toward the left side of the tray. 4500-082 3. Adjust the paper guides to match the size of the envelopes. Note Do not load envelopes above the fill line inside the tray. Phaser™ 4500 Laser Printer 2-32 - Xerox 4500N | Reference Guide - Page 64
Type, then press the OK button. e. Select Envelope, then press the OK button to save your selection. 6. In the printer driver, select the appropriate tray or paper type. For more information, go to Reference/Printing/Basic Printing on the User Documentation CD-ROM. Phaser™ 4500 Laser Printer 2-33 - Xerox 4500N | Reference Guide - Page 65
Phaser™ 4500 Laser Printer Labels, Index Cards, and Greeting Cards This topic includes: ■ "Guidelines" on page 2-34 ■ "Printing Index Cards from Tray 1" on page 2-34 ■ "Printing Labels from Trays 1-4" on page 2-36 Xerox cause print quality problems or cause them to jam in the printer. ■ Rotate stock - Xerox 4500N | Reference Guide - Page 66
Type, then press the OK button. e. Select Card Stock, then press the OK button to save your selection. 6. In the printer driver, select the appropriate tray or paper type. For more information, go to Reference/Printing/Basic Printing on the User Documentation CD-ROM. Phaser™ 4500 Laser Printer 2-35 - Xerox 4500N | Reference Guide - Page 67
to be printed faceup with the top of the page toward the back of the tray. 4500-083 3. Adjust the width and length paper guides to match the size of the paper. 4. Insert the tray into the printer tray slot and push it completely to the back of the printer. 4500-103 Phaser™ 4500 Laser Printer 2-36 - Xerox 4500N | Reference Guide - Page 68
to save your selection. 6. In the printer driver, select the appropriate tray or paper type. 4500-016 3. Adjust the width and length paper guides to match the size of the paper. 4. Insert the tray into the printer tray slot and push it completely to the back of the printer. Phaser™ 4500 Laser Printer - Xerox 4500N | Reference Guide - Page 69
Labels, Index Cards, and Greeting Cards 5. At the printer's front panel, press the OK button to accept the paper size and type . e. Select Card Stock, then press the OK button to save your selection. 6. In the printer driver, select the appropriate tray or paper type. Phaser™ 4500 Laser Printer 2-38 - Xerox 4500N | Reference Guide - Page 70
Phaser™ 4500 Laser Printer Custom Size Paper Print custom size paper, within the following ranges, from the trays listed. Input Tray 1 Simplex (1-Sided Printing) Width Height 76 - 216 mm 3.0 - 8.5 in. 127 - 356 mm 5.0 - 14.0 in. Duplex (2-Sided Printing) Width Height 90 - 216 mm 3.5 - 8.5 - Xerox 4500N | Reference Guide - Page 71
, or specialty media. If frequent jamming occurs with card stock or heavier paper that is less than 175 mm (7 in.) long, reduce the number of sheets in the tray. 3. Adjust the width and length paper guides to match the size of the paper. 4500-088 4500-089 Phaser™ 4500 Laser Printer 2-40 - Xerox 4500N | Reference Guide - Page 72
. h. Select the type of paper loaded in the tray, then press the OK button to save your selection. 6. In the printer driver, select the appropriate tray or paper type. For more information, go to Reference/Printing/Basic Printing on the User Documentation CD-ROM. Phaser™ 4500 Laser Printer 2-41 - Xerox 4500N | Reference Guide - Page 73
Phaser™ 4500 Laser Printer Advanced To specify separation pages in a supported driver: ■ Windows 98, Windows Me PostScript driver: On the Output Options tab, select OS X (version 10.1 and higher) driver: In the Print dialog box, select the Printer Features drop-down list, select Separation Page - Xerox 4500N | Reference Guide - Page 74
pages on a single sheet of paper in a supported driver: ■ Windows 98, Windows Me PostScript driver: On the Setup tab, click the More driver: In the Print dialog box, select Layout from the drop-down list, then select the number of Pages Per Sheet and Layout direction. Phaser™ 4500 Laser Printer - Xerox 4500N | Reference Guide - Page 75
, click Advanced. Under Document Options and PostScript Options, select Yes for Mirrored Output or Negative Output. ■ Windows NT PostScript driver: On the Advanced tab, under Document Options and PostScript Options, select Yes for Mirrored Output or Negative Output. Phaser™ 4500 Laser Printer 2-44 - Xerox 4500N | Reference Guide - Page 76
for Scaling. ■ Windows NT driver: On the Advanced tab, select Graphic, then select the desired percentage for Scaling. ■ Mac OS 9, Mac OS X (version 10.1 and higher) driver: From the File menu, select Page Setup, then specify the percentage in the box for Scale. Phaser™ 4500 Laser Printer 2-45 - Xerox 4500N | Reference Guide - Page 77
the Watermarks dialog box. ■ Windows 2000, Windows XP, Windows Server 2003 PostScript driver: From the Layout tab, click the Advanced button. In the box under Document Options and Printer Features, select Watermarks, then select Modify for the desired watermark. Phaser™ 4500 Laser Printer 2-46 - Xerox 4500N | Reference Guide - Page 78
at the end of the document. To select cover pages in a supported driver: ■ Windows 98, Windows Me PostScript driver: On the Output Options tab, select First Page Only or First and Last Pages, then select the tray to use for the covers from the Source drop-down list. Phaser™ 4500 Laser Printer 2-47 - Xerox 4500N | Reference Guide - Page 79
: ■ Windows 98, Windows Me PostScript driver: On the Output Options tab, choose the job type under Walk-Up Features. For a secure print job, enter a 4-digit password to assign to this job. For a proof print or saved print job, enter the name you want to give this job. Phaser™ 4500 Laser Printer 2-48 - Xerox 4500N | Reference Guide - Page 80
Advanced Options ■ Windows 2000, Windows XP, Windows Server 2003, Windows NT PostScript driver: On the Output Options tab, choose the job type under Walk-Up Features. For a secure print Scroll to the desired number of copies, then press the OK button to print the job. Phaser™ 4500 Laser Printer 2-49 - Xerox 4500N | Reference Guide - Page 81
Replacements may be in the form of parts or kits. Routine Maintenance Items are typically customer replaceable. The only routine maintenance item for the Phaser 4500 Laser Printer is the maintenance kit. Access the "Supplies Info" menu from the printer's front panel to see the remaining life for the - Xerox 4500N | Reference Guide - Page 82
Phaser™ 4500 Laser Printer Connections and Networks This section includes: ■ "Connections and IP Address" on page 3-2 ■ "Printer Management Software" on page 3-10 ■ "Windows 2000, Windows XP, and Windows Server 2003" on page 3-15 ■ "Windows NT 4.x" on page 3-20 ■ "Windows 98 and Windows Me" on page - Xerox 4500N | Reference Guide - Page 83
Printer Setup" on page 3-2 ■ "Connection Setup" on page 3-6 Printer Setup Phaser™ 4500 Laser Printer The information in this section is also stored as an information page in your printer up a cable or DSL connection for your printer, go to www.xerox.com/office/infoSMART to view Document # 33188, - Xerox 4500N | Reference Guide - Page 84
5. If prompted, click OK to restart Windows. Windows 98 and Windows Me 1. On the desktop, right-click Network Neighborhood or My Network Places, then click Properties. 2. On the Configuration tab, select the TCP/IP protocol for your network card, then click Properties. Phaser™ 4500 Laser Printer 3-3 - Xerox 4500N | Reference Guide - Page 85
the Desktop Printer Utility (version 1.2 or later) to create a desktop USB printer. The utility is located in the PhaserTools folder which is created during the software installation. For more information go to www.xerox.com/office/ infoSMART to view Document # 33225. Phaser™ 4500 Laser Printer 3-4 - Xerox 4500N | Reference Guide - Page 86
the printer in the printers window. 6. Verify that your printer is set to Auto Select. 7. Click the Add button. The printer is displayed as an available printer in the Print Center. For more information, go to www.xerox.com/office/infoSMART to view Document # 49355. Phaser™ 4500 Laser Printer 3-5 - Xerox 4500N | Reference Guide - Page 87
Printer Driver To download the latest printer drivers, go to www.xerox.com/office/support. Windows 98 or Later and Windows 2000 or Later Install the printer driver from the Printer Installer and Utilities CD-ROM. The Printer the AppleTalk protocol is enabled, but is not Phaser™ 4500 Laser Printer 3-6 - Xerox 4500N | Reference Guide - Page 88
DHCP protocol is enabled by setting the front panel or using CentreWare IS. Note To determine your printer's IP address, select Printer Identification at the front panel. For information about the front panel, go to Reference/Features on the User Documentation CD-ROM. Phaser™ 4500 Laser Printer 3-7 - Xerox 4500N | Reference Guide - Page 89
the Domain Name Service (DNS) The printer supports DNS through an printer for DDNS to function. Your network's DHCP server must also support Dynamic DNS updates through option 12 or option 81 support. See your network administrator for details. 1. Launch your web browser. Phaser™ 4500 Laser Printer - Xerox 4500N | Reference Guide - Page 90
- Set to NO. ■ DDNS/WINS Name - Use the default name provided by Xerox or enter another name. ■ Primary WINS Server (optional) ■ Secondary WINS Server (optional network setup and troubleshooting, go to Reference/Connections & Networks on the User Documentation CD-ROM. Phaser™ 4500 Laser Printer 3-9 - Xerox 4500N | Reference Guide - Page 91
Phaser™ 4500 Laser Printer Printer Management Software This topic includes: ■ "Using CentreWare Software" on page 3-10 ■ "Using Printer Management Features" on page 3-12 Using CentreWare Software CentreWare Internet Service (IS) CentreWare IS is a printer administration and support tool using web - Xerox 4500N | Reference Guide - Page 92
Guide. CentreWare MC (Microsoft Management Console) CentreWare MC allows IP discovery of printers equipped with an embedded web server. The embedded web server in Xerox printers is called CentreWare Internet Services. For installing or managing multiple printers on a Windows NT 4.x (Service Pack - Xerox 4500N | Reference Guide - Page 93
printer to automatically send email to the system administrator and others under the following conditions: ■ When printer errors, warnings, and alerts occur. ■ When the printer requires attention (for example, when service is required or supplies need to be replenished). Phaser™ 4500 Laser Printer - Xerox 4500N | Reference Guide - Page 94
your printer's IP address in the browser's Address field (http://xxx.xxx.xxx.xxx). 3. Select Jobs. 4. Select Usage Profile Reports on the left sidebar. 5. Click the Usage Profile Properties link. Follow the instructions on the page to set up reports. 6. Click Save Changes. Phaser™ 4500 Laser Printer - Xerox 4500N | Reference Guide - Page 95
at least 32 MB of RAM. At least 1 GB of hard drive space is recommended for the server. ■ Supported operating systems: Windows 98 or later and Windows 2000 or later ■ Microsoft Excel 97 or Excel 2000 for export to spreadsheet (for graphing, billing, data analysis) Phaser™ 4500 Laser Printer 3-14 - Xerox 4500N | Reference Guide - Page 96
Phaser™ 4500 Laser Printer Windows 2000, Windows XP, and Windows Server 2003 This topic includes: ■ "Preliminary Steps" on page 3-15 ■ "Quick CD-ROM Install Steps" on page 3-15 ■ "Other Methods of Installation" on page 3-16 ■ "Windows 2000, Windows XP, Windows Server 2003 Troubleshooting (TCP/IP)" - Xerox 4500N | Reference Guide - Page 97
-click Add Printer to launch the Add Printer Wizard, then click Next. ■ For Windows XP and Windows Server 2003, click Printers and Faxes. Double-click Add Printer to launch the Add Printer Wizard, then click Next. 3. Click the Local Printer button, then click Next. Phaser™ 4500 Laser Printer 3-16 - Xerox 4500N | Reference Guide - Page 98
print-quality problems exist, or if the job does not print, go to Reference/Troubleshooting on the User Documentation CD-ROM for more information. Microsoft IPP Port Follow these steps to obtain the printer's URL and create an Internet Printing Protocol (IPP) printer. Phaser™ 4500 Laser Printer 3-17 - Xerox 4500N | Reference Guide - Page 99
Select the Start Menu tab, then select Classic Start menu. Click OK. This troubleshooting section assumes you have completed the following tasks: ■ Loaded a Phaser printer PCL or PostScript printer driver. ■ Printed and kept a current copy of the "Configuration Page". Printing the Configuration Page - Xerox 4500N | Reference Guide - Page 100
tab. 2. Click Print Test Page. If the printer does not print, do one of the following: ■ Select PhaserSMART Technical Support on the Troubleshooting tab of your Windows printer driver to access PhaserSMART Technical Support. ■ Go to www.xerox.com/office/support. Phaser™ 4500 Laser Printer 3-19 - Xerox 4500N | Reference Guide - Page 101
Phaser™ 4500 Laser Printer Windows NT 4.x This topic includes: ■ "Preliminary Steps" on page 3-20 ■ "Quick CD-ROM Install Steps" on page 3-20 ■ "Other Methods of Installation" on page 3-21 ■ "Windows NT 4.x Troubleshooting (TCP/IP)" on page 3-23 Preliminary Steps These preliminary steps must be - Xerox 4500N | Reference Guide - Page 102
MC snap-in to Microsoft Management Console for installing or managing multiple printers on a Windows NT network with TCP/IP protocol enabled. See the CentreWare MC User Guide at www.xerox.com/office. Note The CentreWare methods are not discussed in this section. For more information concerning - Xerox 4500N | Reference Guide - Page 103
No if the test page did not print or printed incorrectly. Proceed to step 4. 4. Note the print-quality of the print job. If print-quality problems exist or if the job does not print, go to Reference/Troubleshooting on the User Documentation CD-ROM. Phaser™ 4500 Laser Printer 3-22 - Xerox 4500N | Reference Guide - Page 104
Windows NT 4.x Windows NT 4.x Troubleshooting (TCP/IP) This troubleshooting section assumes you have completed the following tasks: ■ Loaded a Phaser printer PCL or PostScript printer driver. ■ Printed If necessary, re-select the TCP/IP number used for your printer. Phaser™ 4500 Laser Printer 3-23 - Xerox 4500N | Reference Guide - Page 105
4.x Printing a Test Page 1. Click the General tab. 2. Click Print Test Page. If the printer still does not print, do one of the following: ■ Access PhaserSMART Technical Support on the Troubleshooting tab of your printer driver. ■ Go to www.xerox.com/office/support. Phaser™ 4500 Laser Printer 3-24 - Xerox 4500N | Reference Guide - Page 106
Phaser™ 4500 Laser Printer Windows 98 and Windows Me This topic includes: ■ "Preliminary Steps" on page 3-25 ■ "Quick CD-ROM Install Steps" on page 3-26 ■ "Other Methods of Installation" on page 3-26 ■ "Windows 98 and Windows Me Troubleshooting Windows environments, go to your Microsoft Windows - Xerox 4500N | Reference Guide - Page 107
Printers. 3. Right-click the printer to be attached to the new TCP/IP port, then click Properties. 4. Click the Details tab, then click the Add Port button. 5. Select Other. 6. From the list of available printer-port monitors, select the Xerox TCP/IP Port, then click OK. Phaser™ 4500 Laser Printer - Xerox 4500N | Reference Guide - Page 108
"Xerox TCP/IP Port Monitor" in this section. The Windows installer installs PhaserPort for Windows (for those installations using PostScript drivers). PhaserPort for Windows is a Xerox print monitor for printing over Windows 98 or Windows Me TCP/IP peer-to-peer networks. Phaser™ 4500 Laser Printer - Xerox 4500N | Reference Guide - Page 109
the changes. Windows 98 and Windows Me Troubleshooting This troubleshooting section assumes you have completed the following tasks: ■ Verified that the printer is plugged in, turned on, and connected to an active network. ■ Installed a Phaser printer PCL or PostScript print driver. ■ Verified that - Xerox 4500N | Reference Guide - Page 110
printer must have a valid TCP/IP address assigned. 4. If any of the above protocols or services printer. If the printer does not print, access PhaserSMART Technical Support from the Troubleshooting tab of the Windows printer driver or go to www.xerox.com/office/support. Phaser™ 4500 Laser Printer - Xerox 4500N | Reference Guide - Page 111
Phaser™ 4500 Laser Printer Macintosh This Troubleshooting (Mac OS 9.x, Mac OS X, Versions 10.1 and 10.2)" on page 3-34 Requirements ■ A workstation with the appropriate printer driver printer driver. 3. Select the printer. 4. Click Create to create the desktop printer. Copyright © 2004 Xerox - Xerox 4500N | Reference Guide - Page 112
Save. 9. Two methods are available for printing through LPR: ■ Use the new Desktop Printer (LPR) ■ Use the LaserWriter 8.5.1 printer driver (any printer can be selected). Click File, then click Print to select the appropriate LPR printer in the Printer drop-down list. Phaser™ 4500 Laser Printer 3-31 - Xerox 4500N | Reference Guide - Page 113
for the Phaser printer. Note Certain utilities, such as Adobe Font Downloader, are not printer using the AppleTalk protocol. If you use Mac OS software, create an AppleTalk desktop printer, then delete this printer after running and exiting the non-compatible software. Phaser™ 4500 Laser Printer - Xerox 4500N | Reference Guide - Page 114
5. Select your printer from the list provided. 6. Select the appropriate PPD from the list in the Printer Model drop-down list. If your printer's PPD is not listed, install it from the Printer Installer and Utilities CD-ROM. 7. Click Add to complete the configuration. Phaser™ 4500 Laser Printer 3-33 - Xerox 4500N | Reference Guide - Page 115
Technical Support through CentreWare Internet Services: a. Launch your web browser. b. Enter your printer's IP address in the browser's Address field (http:// xxx.xxx.xxx.xxx). c. Select Support. d. Click the PhaserSMART Diagnostic Tool link to access PhaserSMART. Phaser™ 4500 Laser Printer 3-34 - Xerox 4500N | Reference Guide - Page 116
reset the printer. Support through CentreWare Internet Services: a. Launch your web browser. b. Enter your printer's IP address in the browser's Address field (http:// xxx.xxx.xxx.xxx). c. Select Support. d. Click the PhaserSMART Diagnostic Tool link to access PhaserSMART. Phaser™ 4500 Laser Printer - Xerox 4500N | Reference Guide - Page 117
Phaser™ 4500 Laser Printer Novell NetWare This topic includes: ■ "Configuration Software for NetWare Networks" on page 3-36 ■ "Quick Setup" on page 3-36 ■ "Advanced Setup" on page 3-36 ■ "NetWare 4.x, NetWare 5.x, and NetWare 6.x Print Server Setup" on page 3-37 ■ "Novell NetWare Troubleshooting" on - Xerox 4500N | Reference Guide - Page 118
Software is available on the Xerox web site at www.xerox.com/office. Instructions are available on the web site for installing a printer using NDPS. The web site also contains the CentreWare for NDPS User Guide. Novell NetWare Troubleshooting Troubleshooting for Windows-based computers includes both - Xerox 4500N | Reference Guide - Page 119
using CentreWare DP. If it is not set, use CentreWare DP to set it, then reset the printer. Note Setting the Primary Server is extremely important on large networks. 8. Go to www.xerox.com/office/support if the above steps fail to resolve the printing problem. Phaser™ 4500 Laser Printer 3-38 - Xerox 4500N | Reference Guide - Page 120
, reset the printer. Once the printer has been reset, allow approximately two minutes for the printer to go through a self test, then log onto the network server. 5. Print out another copy of the "Configuration Page" to verify that the items you modified were set and kept. Phaser™ 4500 Laser Printer - Xerox 4500N | Reference Guide - Page 121
frame type and connectors. 3. Verify that the printer is enabled and the connector and frame type are correct. If changes are made, reset the printer from the front panel. 4. Re-print a test page. If the test print does not print, go to www.xerox.com/office/support. Phaser™ 4500 Laser Printer 3-40 - Xerox 4500N | Reference Guide - Page 122
Phaser™ 4500 Laser Printer UNIX (Linux) This topic includes: ■ "Quick Install Steps" on page 3-41 ■ "Additional Resources" on page 3-42 Your printer supports connection to a variety of UNIX platforms through the parallel and network interface. The workstations currently supported by CentreWare for - Xerox 4500N | Reference Guide - Page 123
platform (UNIX), and the printer driver files you want. c. Click Go to Downloads. d. Select the appropriate CentreWare printer driver for your platform. e. Also download the PrinterPackage XPXX. It provides the printer-specific features of CentreWare for UNIX driver. Phaser™ 4500 Laser Printer 3-42 - Xerox 4500N | Reference Guide - Page 124
Phaser™ 4500 Laser Printer . Troubleshooting This section includes: ■ "Automatic Diagnostic Tools" on page 4-2 ■ "Paper Jams" on page 4-3 ■ "Print-Quality Problems" on page 4-24 ■ "Maintenance" on page 4-30 ■ "Front Panel Messages" on page 4-31 ■ "Moving and Repacking the Printer" on page 4-36 ■ " - Xerox 4500N | Reference Guide - Page 125
Phaser™ 4500 Laser Printer Automatic Diagnostic Tools This topic includes: ■ "PhaserSMART Technical Support" on page 4-2 ■ "Front Panel i Button" on page 4-2 ■ "PrintingScout" on page 4-2 Xerox provides several automatic diagnostic tools to help you produce and maintain print quality. PhaserSMART - Xerox 4500N | Reference Guide - Page 126
Phaser™ 4500 Laser Printer Paper Jams This topic includes: ■ "Jam at the Exit and Jam at the Rear" on page 4-3 ■ "Jam at the Exit and Jam at the Rear (with Duplex Unit)" on page 4-5 ■ "Jam at the Exit - Open Top Cover to Clear" on page 4-7 ■ "Jam at the Tray" on page 4-10 ■ "Jam at the Top Cover" on - Xerox 4500N | Reference Guide - Page 127
Paper Jams 2. Remove the jammed paper. Confirm that all paper fragments are removed. 4500-042 3. If you do not find jammed paper in Step 2, open the cover above the exit and pull the jammed paper completely out of the printer. 4. Close the rear cover. 4500-062 4500-043 Phaser™ 4500 Laser Printer - Xerox 4500N | Reference Guide - Page 128
the latest support solutions with a few mouse clicks. (English only) Jam at the Exit and Jam at the Rear (with Duplex Unit) 1. Open the duplex unit cover. 4500-008 2. Open the rear cover. Caution Be careful, some components inside the rear cover may be hot. 4500-011 Phaser™ 4500 Laser Printer 4-5 - Xerox 4500N | Reference Guide - Page 129
Paper Jams 3. Remove the jammed paper. Confirm that all paper fragments are removed. 4500-061 4. If you do not find jammed paper in Step 3, open the cover above the exit and pull the jammed paper completely out of the printer. 5. Close the rear cover. 4500-062 4500-012 Phaser™ 4500 Laser Printer - Xerox 4500N | Reference Guide - Page 130
-based diagnostic tool that automatically delivers the latest support solutions with a few mouse clicks. (English only) Jam at the Exit - Open Top Cover to Clear 1. If you have a stacker, remove the paper from the stacker, then lift the stacker. 4500-004 4500-017 Phaser™ 4500 Laser Printer 4-7 - Xerox 4500N | Reference Guide - Page 131
Paper Jams 2. Remove the jammed paper from the exit. Confirm that all paper fragments are removed. 3. Open the top cover. 4500-065 4. Close the top cover. 4500-039 4500-002 Phaser™ 4500 Laser Printer 4-8 - Xerox 4500N | Reference Guide - Page 132
have a stacker, lower the stacker. Paper Jams 4500-019 For additional information, go to www.phaserSMART.com. PhaserSMART is a powerful, Internet-based diagnostic tool that automatically delivers the latest support solutions with a few mouse clicks. (English only) Phaser™ 4500 Laser Printer 4-9 - Xerox 4500N | Reference Guide - Page 133
tray and all trays above it. For example, if the jam is at Tray 3, pull out Trays 1, 2, and 3. If you have a jam at Tray 2, pull out Tray 2 only. It is not necessary to pull out all of the trays. If you have a jam at Tray 1, pull out Trays 1 and 2. 4500-033 Phaser™ 4500 Laser Printer 4-10 - Xerox 4500N | Reference Guide - Page 134
2. Pull jammed paper from the printer tray slot. Paper Jams 3. Remove crumpled paper from the tray. 4500-046 4500-018 4. If you have a stacker, remove paper from the stacker, then lift the stacker. 4500-004 4500-100 Phaser™ 4500 Laser Printer 4-11 - Xerox 4500N | Reference Guide - Page 135
5. Open the top cover. Paper Jams 6. Remove the print cartridge. 4500-101 4500-036 7. Remove the jammed paper. Confirm that all paper fragments are removed. 4500-009 Phaser™ 4500 Laser Printer 4-12 - Xerox 4500N | Reference Guide - Page 136
8. Insert the print cartridge. Paper Jams 4500-035 9. Insert the trays into the printer slot and push them completely to the back of the printer. 10. Close the top cover. 4500-034 4500-002 Phaser™ 4500 Laser Printer 4-13 - Xerox 4500N | Reference Guide - Page 137
is a powerful, Internet-based diagnostic tool that automatically delivers the latest support solutions with a few mouse clicks. (English only) Jam at the Top Cover 1. If you have a stacker, remove paper from the stacker, then raise the stacker. 4500-004 4500-017 Phaser™ 4500 Laser Printer 4-14 - Xerox 4500N | Reference Guide - Page 138
2. Open the top cover. Paper Jams 3. Remove the print cartridge. 4500-039 4500-036 4. Turn the green rollers to move the jammed paper out of the rollers, then gently pull the jammed paper out of the rollers. 4500-037 Phaser™ 4500 Laser Printer 4-15 - Xerox 4500N | Reference Guide - Page 139
Trays 1 and 2 completely out of the printer. 4500-045 6. Turn the green rollers and remove the jammed paper. Confirm that all paper fragments are removed. 4500-037 7. Insert the trays into the printer slot and push them completely to the back of the printer. 4500-034 Phaser™ 4500 Laser Printer 4-16 - Xerox 4500N | Reference Guide - Page 140
you have a stacker, lower the stacker. 4500-002 4500-019 For additional information, go to www.phaserSMART.com. PhaserSMART is a powerful, Internet-based diagnostic tool that automatically delivers the latest support solutions with a few mouse clicks. (English only) Phaser™ 4500 Laser Printer 4-17 - Xerox 4500N | Reference Guide - Page 141
Jam at the Duplex Unit 1. Open the duplex unit cover. Paper Jams 4500-008 2. Remove the jammed paper. Confirm that all paper fragments are removed. 3. Close the duplex unit cover. 4500-010 4500-006 Phaser™ 4500 Laser Printer 4-18 - Xerox 4500N | Reference Guide - Page 142
-based diagnostic tool that automatically delivers the latest support solutions with a few mouse clicks. (English only) Jam at the Stacker 1. Open the rear stacker cover. 4500-015 2. Remove the jammed paper. Confirm that all paper fragments are removed. 4500-048 Phaser™ 4500 Laser Printer 4-19 - Xerox 4500N | Reference Guide - Page 143
information, go to www.phaserSMART.com. PhaserSMART is a powerful, Internet-based diagnostic tool that automatically delivers the latest support solutions with a few mouse clicks. (English only) Paper Size Jam 1. Pull the tray completely out of the printer. 4500-030 Phaser™ 4500 Laser Printer 4-20 - Xerox 4500N | Reference Guide - Page 144
that the paper tray guides are pressed firmly against the paper. Paper Jams 4500-023 4500-024 3. Insert the tray into the printer slot and push it completely to the back of the printer. 4500-040 4. When the Confirm the correct size and type at the front panel. Phaser™ 4500 Laser Printer 4-21 - Xerox 4500N | Reference Guide - Page 145
5. If you have a duplex unit, open the duplex unit cover. Paper Jams 4500-008 6. Open the rear cover. Caution Be careful, some components inside the rear cover may be hot. 4500-041 Phaser™ 4500 Laser Printer 4-22 - Xerox 4500N | Reference Guide - Page 146
have a duplex unit, close the duplex unit cover. 4500-006 For additional information, go to www.phaserSMART.com. PhaserSMART is a powerful, Internet-based diagnostic tool that automatically delivers the latest support solutions with a few mouse clicks. (English only) Phaser™ 4500 Laser Printer 4-23 - Xerox 4500N | Reference Guide - Page 147
"Repeating Defects" on page 4-29 Your printer is designed to produce consistently high-quality prints. If you observe printquality problems, use the information on these pages to troubleshoot them. For detailed, online support information, go to www.xerox.com/office/infoSMART. Caution If you change - Xerox 4500N | Reference Guide - Page 148
be installed correctly. 2. The print cartridge may be defective or at the end of its life. 3. The transfer roller may be defective. 1. Remove and re-install the print cartridge. 2. Replace the print cartridge. 3. Replace the transfer roller (in the maintenance kit). Phaser™ 4500 Laser Printer 4-25 - Xerox 4500N | Reference Guide - Page 149
be defective. 4. The transfer roller may be defective. 1. Print several blank sheets of paper to remove the toner accumulations. 2. Replace the print cartridge. 3. Replace the fuser (in the maintenance kit). 4. Replace the transfer roller (in the maintenance kit). Phaser™ 4500 Laser Printer 4-26 - Xerox 4500N | Reference Guide - Page 150
may be in poor condition. 3. The paper may be damp. 4. The fuser may be at the end of its life. 1. Verify that the paper is correctly loaded in the appropriate tray. 2. Replace the paper. 3. Replace the paper. 4. Replace the fuser (contained in the maintenance kit). Phaser™ 4500 Laser Printer 4-27 - Xerox 4500N | Reference Guide - Page 151
Areas of the print are extremely light or missing. 1. The paper may be in poor condition. 2. The paper may be damp. 3. The print cartridge may be defective or at the end of its life. 1. Replace the paper. 2. Replace the paper. 3. Replace the print cartridge. Phaser™ 4500 Laser Printer 4-28 - Xerox 4500N | Reference Guide - Page 152
the packaging). 2. If the problem continues, then remove and repackage the new print cartridge. 3. Reinstall the original print cartridge, then replace the maintenance kit (fuser and transfer roller). 4. If the problem continues, contact your Customer Support Center. Phaser™ 4500 Laser Printer 4-29 - Xerox 4500N | Reference Guide - Page 153
Phaser™ 4500 Laser Printer Maintenance For safety information, go to Reference/Troubleshooting/User Safety on the User Documentation CD-ROM. Your printer needs little maintenance to keep it producing quality prints. Certain routine maintenance items need to be ordered occasionally: Maintenance Kit - Xerox 4500N | Reference Guide - Page 154
Phaser™ 4500 Laser Printer Front Panel Messages This topic includes: ■ "Status Messages" on page 4-31 ■ "Error and Warnings" on page 4-31 Your printer's front panel provides you with information and troubleshooting help. Phaser 4500 4500-020 The front panel is divided into two sections. The upper - Xerox 4500N | Reference Guide - Page 155
2. Remove paper from the Stacker and raise output tray. 3. Open the Top Cover. 4. Remove the Print Cartridge. 5. Remove the jammed paper. 6. Reinsert the Print Cartridge. 7. Reinsert trays. 8. Close the Top Cover. 9. Lower the Stacker tray and replace its contents. Phaser™ 4500 Laser Printer 4-32 - Xerox 4500N | Reference Guide - Page 156
1 & 2. 6. Remove the jammed paper. 7. Reinsert trays. 8. Reinsert the Print Cartridge. 9. Close the Top Cover. 10. Lower the Stacker tray and replace its contents. Jam At Duplex; Open Duplex To Clear 1. Open Duplex. 2. Remove the jammed paper. 3. Close Duplex. Phaser™ 4500 Laser Printer 4-33 - Xerox 4500N | Reference Guide - Page 157
Rear Cover. 1. Check the paper tray guides. 2. Open Duplex. 3. Open the Rear Cover. 4. Remove the jammed paper. 5. Close the Rear Cover. 6. Close Duplex. Reinsert the indicated tray to continue printing. Reinstall the indicated tray. Load paper in the indicated tray. Phaser™ 4500 Laser Printer 4-34 - Xerox 4500N | Reference Guide - Page 158
, use caution, some components inside the rear cover may be hot. Order replacement. Replace Print Cartridge 1. Open the Top Cover. 2. Replace Print Cartridge. 3. Refer to the pictorial installation instructions on the Print Cartridge itself. 4. Close the Top Cover. Phaser™ 4500 Laser Printer 4-35 - Xerox 4500N | Reference Guide - Page 159
Phaser™ 4500 Laser Printer Moving and Repacking the Printer This topic includes: ■ "Precautions for Moving the Printer" on page 4-36 ■ "Moving the Printer Within the Office" on page 4-37 ■ "Preparing the Printer for Shipment" on page 4-37 For safety information, go to Reference/Troubleshooting/User - Xerox 4500N | Reference Guide - Page 160
in the original packaging or a repackaging kit. If you do not have all of the original packaging, order the repackaging kit from www.xerox.com/office/4500supplies. Additional instructions for repackaging the printer are provided at www.xerox.com/office/4500support. Phaser™ 4500 Laser Printer 4-37 - Xerox 4500N | Reference Guide - Page 161
learn more about your Xerox Phaser™ 4500 Laser Printer. Use these web sites to obtain information about your printer: Resource To link to product and supplies information, download printer drivers, view documents, and access support information: To access the troubleshooting knowledge base used by - Xerox 4500N | Reference Guide - Page 162
result in fire or electrical shock. If you notice unusual noises or odors: 1. Turn off the printer immediately 2. Disconnect the power cord from the electrical outlet 3. Call an authorized service representative to correct the problem. Copyright © 2004 Xerox Corporation. All Rights Reserved. A-1 - Xerox 4500N | Reference Guide - Page 163
laser product performance standards set by governmental, national, and international agencies and is certified as a Class 1 Laser Product. The printer does not emit hazardous light because the beam is totally enclosed during all modes of customer operation and maintenance. Phaser™ 4500 Laser Printer - Xerox 4500N | Reference Guide - Page 164
slots and openings on the printer. The printer may overheat without adequate ventilation. ■ For optimum performance, use the printer at elevations below 3,000 m (11,480 ft.). ■ Do not place the printer near a heat source. ■ Do not place the printer in direct sunlight. Phaser™ 4500 Laser Printer A-3 - Xerox 4500N | Reference Guide - Page 165
to the printer not covered by the warranty, service agreement, or Total Satisfaction Guarantee. The Total Satisfaction Guarantee is available in the United States and Canada. Coverage may vary outside these areas; please contact your local representative for details. Phaser™ 4500 Laser Printer A-4 - Xerox 4500N | Reference Guide - Page 166
See the manual(s) for information. Avoid pinching fingers in the printer. Use caution to avoid personal injury. Hot surface on or in the printer. Use caution to avoid personal injury. Do not expose the imaging unit to light for more than 15 minutes. Do not touch. Phaser™ 4500 Laser Printer A-5 - Xerox 4500N | Reference Guide - Page 167
Warranty Phaser™ 4500 Laser Printer For warranty information regarding your Xerox printer, go to www.xerox.com/office/ 4500warranty. Copyright © 2004 Xerox Corporation. All Rights Reserved. B-1 - Xerox 4500N | Reference Guide - Page 168
Phaser™ 4500 Laser Printer Printer Specifications Physical Specifications Width: 422 mm (16.6 in.) Height: 404 mm (15.9 in.) Depth: 465 mm (18.3 in.) Weight (with 10K cartridge): 21 KG (45 Hz ■ 220 VAC, 50 Hz ENERGY STAR qualified printer Copyright © 2004 Xerox Corporation. All Rights Reserved. C-1 - Xerox 4500N | Reference Guide - Page 169
to a maximum of 256 MB Page Description Languages (PDL) ■ PCL ■ Adobe PostScript 3 Fonts ■ PostScript ■ PCL Interfaces ■ IEEE 1284 parallel ■ Ethernet 10BaseT and 100BaseTx (only for N, DT, and DX configurations) ■ USB Phaser™ 4500 Laser Printer C-2 - Xerox 4500N | Reference Guide - Page 170
Phaser™ 4500 Laser Printer Regulatory Information The equipment described in this manual generates and uses radio frequency energy. If it is not installed properly in strict accordance with Xerox' instructions, it may cause interference with radio and television reception or may not function - Xerox 4500N | Reference Guide - Page 171
des Communications du Canada, NMB-003. European Union Xerox Corporation declares, under our sole responsibility, that the printer to which this declaration relates is in conformity with 2.0 kV Common mode 2.0 kV Differential mode 0.15 - 80 MHz, 3 V, 80% AM @ 1 kHz Phaser™ 4500 Laser Printer D-2 - Xerox 4500N | Reference Guide - Page 172
>95% dropout for 250 cycles @ 50 Hz This product, if used properly in accordance with the user's instructions, is neither dangerous for the consumer nor for the environment. A signed copy of the Declaration of Conformity for this product can be obtained from Xerox. Phaser™ 4500 Laser Printer D-3 - Xerox 4500N | Reference Guide - Page 173
™ 4500 Laser Printer Material Safety Data Sheet For Material Safety Data information regarding your Phaser 4500 printer, go to www.xerox.com/office/4500msds. For the Customer Support Center phone numbers, see the information booklet entitled Total Satisfaction Services that came with your printer - Xerox 4500N | Reference Guide - Page 174
Phaser™ 4500 Laser Printer Product Recycling and Disposal Xerox operates a worldwide equipment takeback and reuse/recycle program. Contact your Xerox sales representative (1-800-ASK-XEROX) to determine whether this Xerox product is part of the program. For more information about Xerox environmental - Xerox 4500N | Reference Guide - Page 175
local domain name space database, 3-8 resolver protocol, 3-8 servers, 3-8 setup using CWIS, 3-8 downloading fonts CentreWare Font Management Utility, 1-22 from a Mac, 1-22 driver changing settings for Mac, 2-23 changing Windows settings for individual jobs, 2-19 Phaser™ 4500 Laser Printer Index-1 - Xerox 4500N | Reference Guide - Page 176
, 3-2 duplex unit closing, 4-7 closing cover, 4-18, 4-23 jam, 4-18 opening, 4-5 opening cover, 4-18, 4-22 Dynamic Domain Name Service (DDNS address manually, 3-3 status messages, 2-50 tray sequence, 1-17 tray settings, 1-16 verifying IP address, 3-7 warnings, 2-50 Phaser™ 4500 Laser Printer Index-2 - Xerox 4500N | Reference Guide - Page 177
, 1-15 change using CentreWare IS, 1-15 low-energy consumption mode, 1-14 M Macintosh download fonts, 1-22 PostScript driver settings, 2-23 MaiLinX alerts, 3-12 maintaining your printer, 4-30 manually setting the printer's IP address, 3-3 material safety data sheet, E-1 media environment, 2-9 sizes - Xerox 4500N | Reference Guide - Page 178
paper sizes, 2-6 paper tray guides adjusting, 4-21 PC printer driver printing font lists, 1-20 Phaser installer, 3-3 PhaserSMART, 1-12, 4-2 accessing, 4-2 Technical Support, 4-2, 4-38 Power Saver, 1-14 timeout, 1-14 print processing time, 2-18 speed, 2-18 print cartridge, A-4 inserting, 4-13, 4-17 - Xerox 4500N | Reference Guide - Page 179
jobs, 2-19 Windows, 2-19 print-quality modes, 2-25 print-quality problems repeatiing defects, 4-29 troubleshooting, 4-24 service agreement, 4-36, A-5 setting printer's IP address, 3-7 static IP address, 3-3, 3-4 setting an IP address, 3-2 software failures, 4-31 Index Phaser™ 4500 Laser Printer - Xerox 4500N | Reference Guide - Page 180
OS 9, Mac OS X, version 10.1 and 10.2, 3-35 Macintosh, 3-31 Novell NetWare, 3-37 PhaserSMART, 1-4 print-quality problems, 4-24 Technical Support, 1-4, 1-12, 4-2 Windows 2000, Windows XP, Windows Server 2003, 3-18 Windows 98, Windows Me, 3-28 Windows NT 4.x, 3-23 Phaser™ 4500 Laser Printer Index-6 - Xerox 4500N | Reference Guide - Page 181
, 1-7, 4-31 warning symbols, A-5 warnings, 2-50 warranty, B-1 watermarks, 2-46 web links, 4-38 Windows PCL driver settings, 2-22 PostScript driver settings, 2-20 X Xerox TCP/IP Port Monitor, 3-26 Xerox Usage Analysis Tool, 3-14 Xerox warranty, 4-36, A-5 Index Phaser™ 4500 Laser Printer Index-7
-
 1
1 -
 2
2 -
 3
3 -
 4
4 -
 5
5 -
 6
6 -
 7
7 -
8
-
9
-
10
-
11
-
12
-
13
-
14
-
15
-
16
-
17
-
18
-
19
-
20
-
21
-
22
-
23
-
24
-
25
-
26
-
27
-
28
-
29
-
30
-
31
-
32
-
33
-
34
-
35
-
36
-
37
-
38
-
39
-
40
-
41
-
42
-
43
-
44
-
45
-
46
-
47
-
48
-
49
-
50
-
51
-
52
-
53
-
54
-
55
-
56
-
57
-
58
-
59
-
60
-
61
-
62
-
63
-
64
-
65
-
66
-
67
-
68
-
69
-
70
-
71
-
72
-
73
-
74
-
75
-
76
-
77
-
78
-
79
-
80
-
81
-
82
-
83
-
84
-
85
-
86
-
87
-
88
-
89
-
90
-
91
-
92
-
93
-
94
-
95
-
96
-
97
-
98
-
99
-
100
-
101
-
102
-
103
-
104
-
105
-
106
-
107
-
108
-
109
-
110
-
111
-
112
-
113
-
114
-
115
-
116
-
117
-
118
-
119
-
120
-
121
-
122
-
123
-
124
-
125
-
126
-
127
-
128
-
129
-
130
-
131
-
132
-
133
-
134
-
135
-
136
-
137
-
138
-
139
-
140
-
141
-
142
-
143
-
144
-
145
-
146
-
147
-
148
-
149
-
150
-
151
-
152
-
153
-
154
-
155
-
156
-
157
-
158
-
159
-
160
-
161
-
162
-
163
-
164
-
165
-
166
-
167
-
168
-
169
-
170
-
171
-
172
-
173
-
174
-
175
-
176
-
177
-
178
-
179
-
180
-
181
 |
 |

Referensguiden
Naslaggids
Guia de referência
Guía de referencia
Referenzhandbuch
Guida di riferimento
Guide de référence
Phaser
TM
4500
laser printer
®
Reference Guide
www.xerox.com/office/4500support