Yamaha EL-87 Owner's Manual - Page 120
Step Forward and Step Reverse Controls
 |
View all Yamaha EL-87 manuals
Add to My Manuals
Save this manual to your list of manuals |
Page 120 highlights
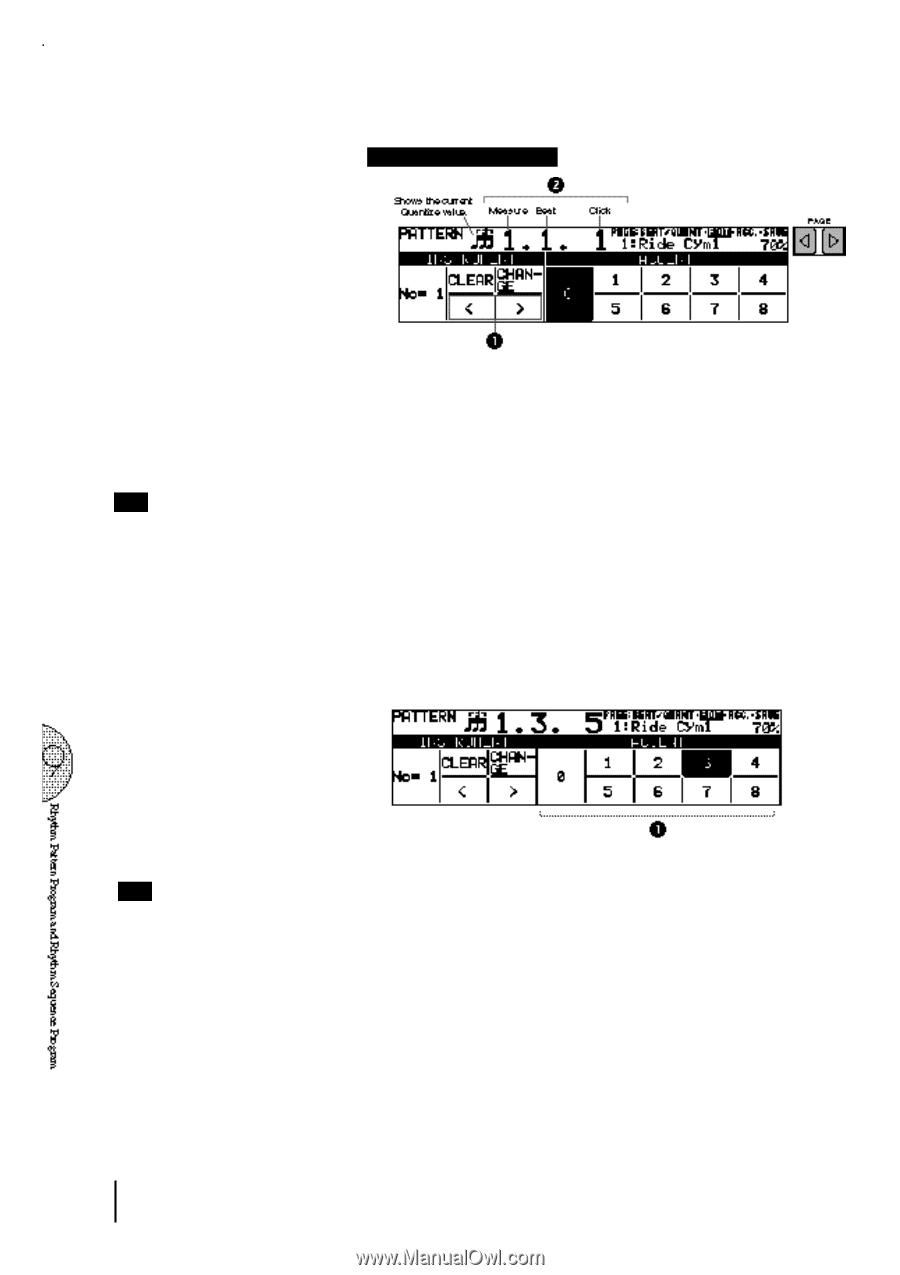
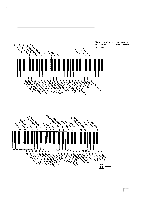
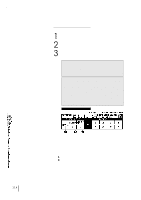
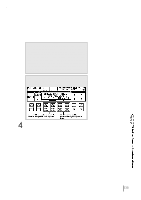
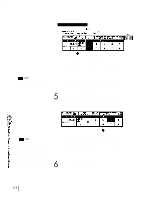
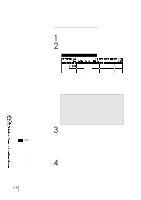
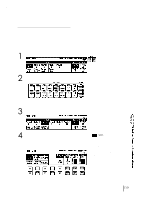
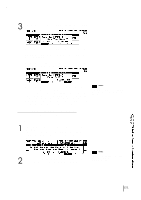
EDIT Page-Step Write NOTE: You can return to the BEAT/QUANTIZE page in the middle of editing and change the time signature and/or the Quantize value. 1 Step Forward and Step Reverse Controls Each press of the corresponding Data Control buttons advances or reverses the rhythm clock by one step. The size of a single step is determined by the Quantize value, set in the Beat/Quantize page. 2 Rhythm Clock Displays the current position in the pattern, according to the measure, beat, and number of clicks. A click is the smallest division of a pattern, and one beat is made up of 24 clicks. The rhythm clock advances up to two measure and loops back to the beginning of the rhythm (1.1.1). 5 Use the Accent section of the EDIT page to enter the sound to the selected point. Press the Data Control buttons corresponding to each Accent to actually enter the percussion sounds. The Accent section has nine steps, from a minimum of 0, or no sound, to a maximum of 8. The Accent 0 can be used when entering rests. NOTE: You can record up to sixteen different instrument sounds in a single rhythm, with each instrument occupying one of the sixteen available tracks. The Rhythm Pattern Program has polyphonic capacity for playing up to sixteen sounds simultaneously. Instruments can only be entered if there are empty tracks remaining. If all sixteen tracks have been used, no subsequently selected instruments can be heard or recorded. 1 ACCENT Records the instrument and determines its volume or Accent level. Press the Data Control button that corresponds to the Accent level you wish to set; the instrument is automatically inserted at that Accent level to the selected position in the pattern (shown in the rhythm clock). Selection of an Accent level automatically advances the rhythm clock by one step, according to the current Quantize resolution value. 6 Repeat the above procedures #2 through #5 to layer each rhythm track and complete your own rhythm. 116
-
 1
1 -
2
-
3
-
4
-
5
-
6
-
7
-
8
-
9
-
10
-
11
-
12
-
13
-
14
-
15
-
16
-
17
-
18
-
19
-
20
-
21
-
22
-
23
-
24
-
25
-
26
-
27
-
28
-
29
-
30
-
31
-
32
-
33
-
34
-
35
-
36
-
37
-
38
-
39
-
40
-
41
-
42
-
43
-
44
-
45
-
46
-
47
-
48
-
49
-
50
-
51
-
52
-
53
-
54
-
55
-
56
-
57
-
58
-
59
-
60
-
61
-
62
-
63
-
64
-
65
-
66
-
67
-
68
-
69
-
70
-
71
-
72
-
73
-
74
-
75
-
76
-
77
-
78
-
79
-
80
-
81
-
82
-
83
-
84
-
85
-
86
-
87
-
88
-
89
-
90
-
91
-
92
-
93
-
94
-
95
-
96
-
97
-
98
-
99
-
100
-
101
-
102
-
103
-
104
-
105
-
106
-
107
-
108
-
109
-
110
-
111
-
112
-
113
-
114
-
 115
115 -
 116
116 -
 117
117 -
 118
118 -
 119
119 -
 120
120 -
 121
121 -
 122
122 -
 123
123 -
 124
124 -
 125
125 -
126
-
127
-
128
-
129
-
130
-
131
-
132
-
133
-
134
-
135
-
136
-
137
-
138
-
139
-
140
-
141
-
142
-
143
-
144
-
145
-
146
-
147
-
148
-
149
-
150
-
151
-
152
-
153
-
154
-
155
-
156
 |
 |