Yamaha EL-87 Owner's Manual - Page 27
Keyboard Voice s Upper Voices 2 and Lead Voices
 |
View all Yamaha EL-87 manuals
Add to My Manuals
Save this manual to your list of manuals |
Page 27 highlights
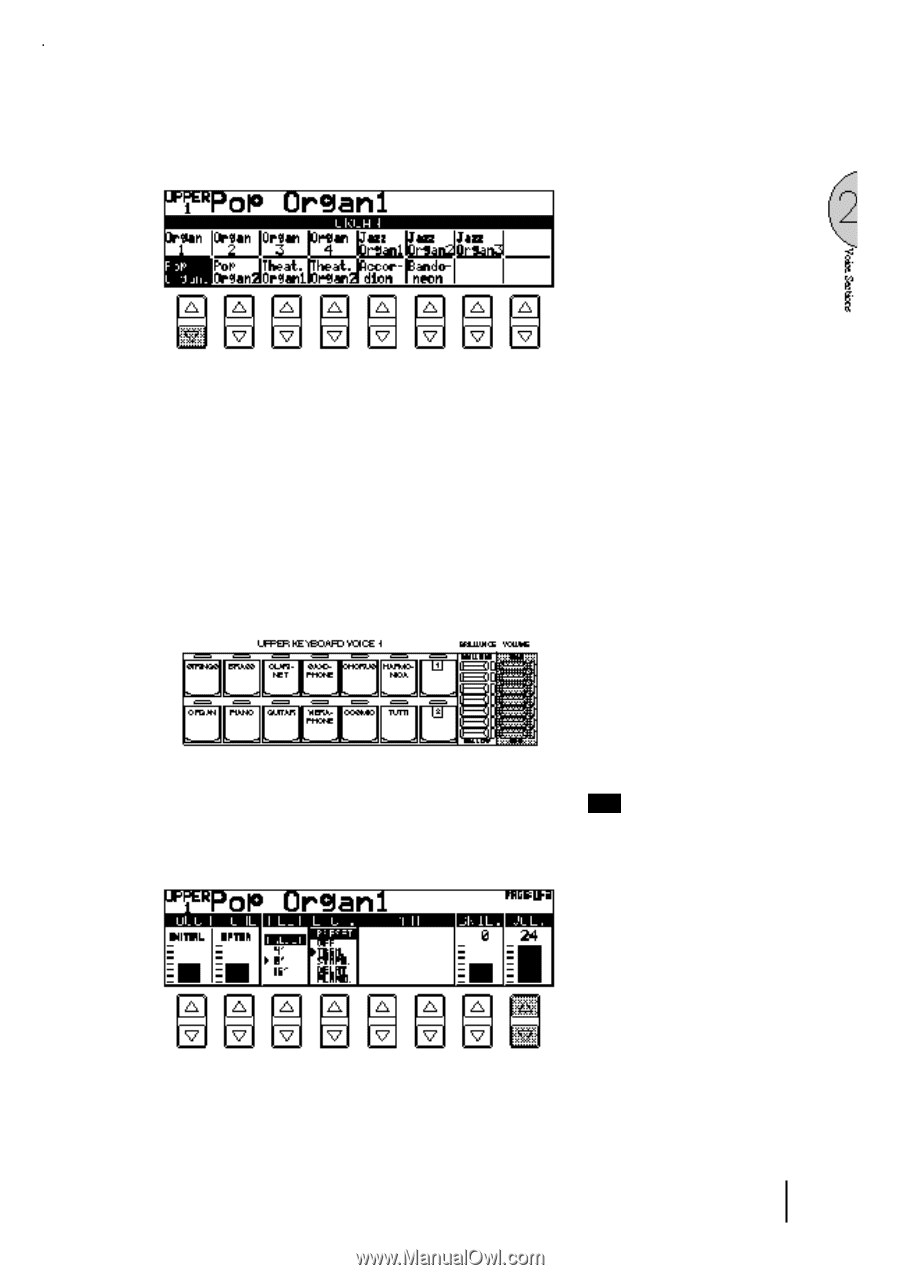
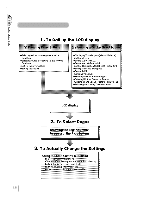
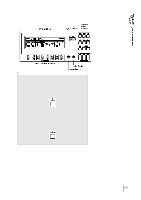
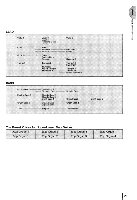
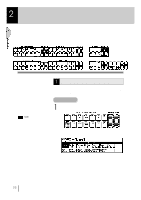
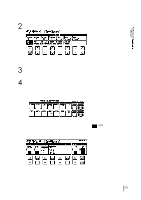
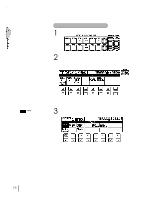
2 Press one of the Data Control buttons that corresponds to voice you wish to select. The selected voice will be shown at the upper row of the LCD. In this case, Pop Organ 1 appears. 3 If you wish to, you can select voices from the other Upper Keyboard Voice sections (Upper Voices 2 and Lead Voices), following steps #1 and #2 above. 4 Set the volume for each voice section. There are two volume controls: Coarse and Fine. Coarse: Use the VOLUME controls of each voice section on the panel to set the desired level for each voice. The controls have seven volume settings, from a minimum of 0, or no sound, to a maximum of full volume. Fine: Pressing the same panel voice button again (or the same Data Control button corresponding to the selected voice) calls up the Voice Condition display. Use the Data Control buttons directly under the display to change the level of the desired voice. The relative level is indicated by the bar under each voice in the display as well as by a numeric value (from 0-24). NOTE: Pressing a voice button once calls up that voice's Voice Menu display. Pressing it a second time calls up the Voice Condition display. Successive presses alternate between the two displays. 23
-
 1
1 -
2
-
3
-
4
-
5
-
6
-
7
-
8
-
9
-
10
-
11
-
12
-
13
-
14
-
15
-
16
-
17
-
18
-
19
-
20
-
21
-
 22
22 -
 23
23 -
 24
24 -
 25
25 -
 26
26 -
 27
27 -
 28
28 -
 29
29 -
 30
30 -
 31
31 -
 32
32 -
33
-
34
-
35
-
36
-
37
-
38
-
39
-
40
-
41
-
42
-
43
-
44
-
45
-
46
-
47
-
48
-
49
-
50
-
51
-
52
-
53
-
54
-
55
-
56
-
57
-
58
-
59
-
60
-
61
-
62
-
63
-
64
-
65
-
66
-
67
-
68
-
69
-
70
-
71
-
72
-
73
-
74
-
75
-
76
-
77
-
78
-
79
-
80
-
81
-
82
-
83
-
84
-
85
-
86
-
87
-
88
-
89
-
90
-
91
-
92
-
93
-
94
-
95
-
96
-
97
-
98
-
99
-
100
-
101
-
102
-
103
-
104
-
105
-
106
-
107
-
108
-
109
-
110
-
111
-
112
-
113
-
114
-
115
-
116
-
117
-
118
-
119
-
120
-
121
-
122
-
123
-
124
-
125
-
126
-
127
-
128
-
129
-
130
-
131
-
132
-
133
-
134
-
135
-
136
-
137
-
138
-
139
-
140
-
141
-
142
-
143
-
144
-
145
-
146
-
147
-
148
-
149
-
150
-
151
-
152
-
153
-
154
-
155
-
156
 |
 |