Yamaha EL-87 Owner's Manual - Page 95
About the Operators
 |
View all Yamaha EL-87 manuals
Add to My Manuals
Save this manual to your list of manuals |
Page 95 highlights
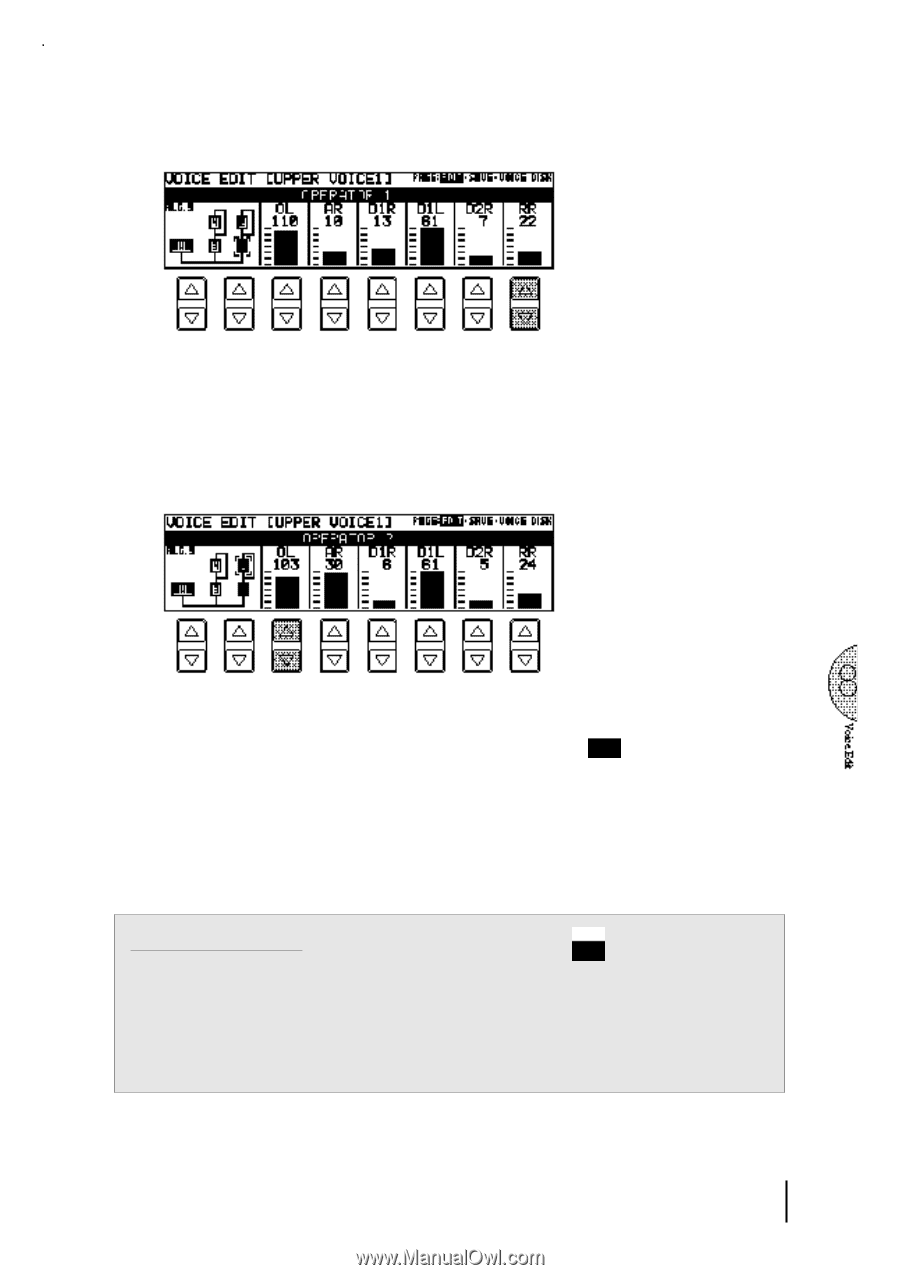
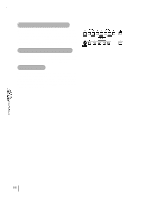
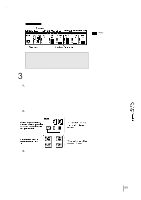
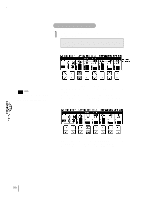
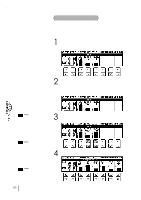
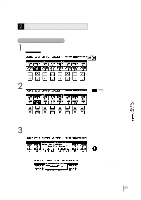
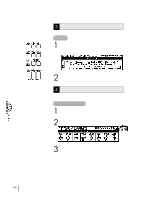
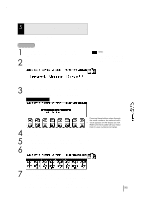
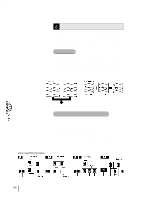
Adjust the RR (Release Rate) parameter. Play a note on the keyboard and then release it. Notice how the changes affect the tail end of the sound, just after you release the key. By changing this parameter, you can make the sound sustain beyond the release point (lower settings). 2 Keeping Operator 1 on, select and turn on Operator 2, then adjust the Operator level. Adjust the OL (Output Level) parameter. Use the Data Control buttons below OL (Output Level) to change the level of Operator 2. Notice that the volume of the sound doesn't change, but the tone does. Increasing the level of one of the top row Operators generally makes the tone of the Operator below it brighter or more metallic. Decreasing the level has the opposite effect. 3 Turn off Operators 1 and 2, and turn on Operators 3 and 4. Make some changes to their parameters, as you did with Operators 1 and 2 in steps #1 and #2 above. Set the OL of the Operator 3 to 110. NOTE: Raising the OL of the Operator 2 to make the sound brighter and lowering the AR of the Operator 2 can produce a distinctive effect. About the Operators NOTE: Changing the level of one of the top row Operators (2 and 4 here) No sound will be produced nor will affects the tone of the Operator below it. adjusting the top row Operators have any Changing the level of one of the bottom row Operators (1 and 3) effect if all of the bottom row Operators affects the volume of the related top row Operator. have been turned off or set to their minimum level. Be sure to turn on the bottom row of Operators and set them to a suitable level before changing the parameters of the top row Operators. 91
-
 1
1 -
2
-
3
-
4
-
5
-
6
-
7
-
8
-
9
-
10
-
11
-
12
-
13
-
14
-
15
-
16
-
17
-
18
-
19
-
20
-
21
-
22
-
23
-
24
-
25
-
26
-
27
-
28
-
29
-
30
-
31
-
32
-
33
-
34
-
35
-
36
-
37
-
38
-
39
-
40
-
41
-
42
-
43
-
44
-
45
-
46
-
47
-
48
-
49
-
50
-
51
-
52
-
53
-
54
-
55
-
56
-
57
-
58
-
59
-
60
-
61
-
62
-
63
-
64
-
65
-
66
-
67
-
68
-
69
-
70
-
71
-
72
-
73
-
74
-
75
-
76
-
77
-
78
-
79
-
80
-
81
-
82
-
83
-
84
-
85
-
86
-
87
-
88
-
89
-
 90
90 -
 91
91 -
 92
92 -
 93
93 -
 94
94 -
 95
95 -
 96
96 -
 97
97 -
 98
98 -
 99
99 -
 100
100 -
101
-
102
-
103
-
104
-
105
-
106
-
107
-
108
-
109
-
110
-
111
-
112
-
113
-
114
-
115
-
116
-
117
-
118
-
119
-
120
-
121
-
122
-
123
-
124
-
125
-
126
-
127
-
128
-
129
-
130
-
131
-
132
-
133
-
134
-
135
-
136
-
137
-
138
-
139
-
140
-
141
-
142
-
143
-
144
-
145
-
146
-
147
-
148
-
149
-
150
-
151
-
152
-
153
-
154
-
155
-
156
 |
 |