Yamaha EL-87 Owner's Manual - Page 130
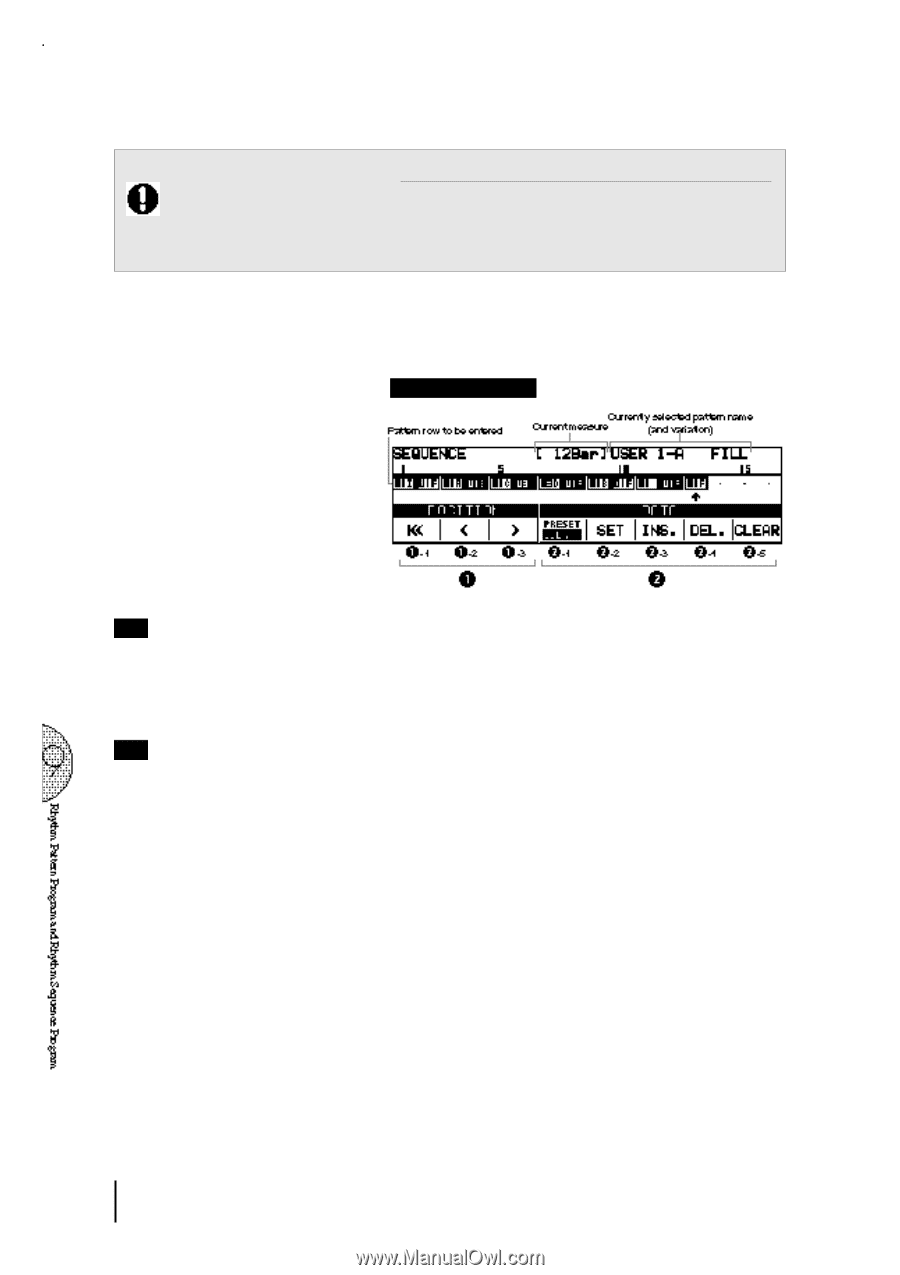
About Entering Intro. And Ending Patterns
 |
View all Yamaha EL-87 manuals
Add to My Manuals
Save this manual to your list of manuals |
Page 130 highlights
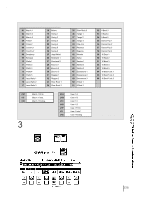
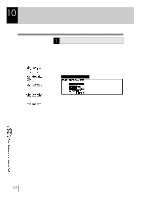
Any existing pattern data that follows an Ending pattern is automatically deleted. About Entering Intro. And Ending Patterns: Pressing the INTRO. ENDING button when at the first position in the pattern row automatically enters an Intro pattern there. Pressing the INTRO. ENDING button at any other position in the row enters an Ending pattern. 4 Use the cursor controls to move the cursor along the pattern row in the display and select the position at which patterns will be entered. Then use the data controls to enter and delete pattern numbers in the pattern row. SEQUENCE Page NOTE: An Intro or Fill In pattern entered to the first position is not registered as a measure, and the current measure display shows "-Bar" even though a pattern has been entered. NOTE: The Coarse button can also be used with the cursor controls to move the cursor several steps at a time. 1 Cursor Controls 1 - 1 ‚ Moves the cursor one measure to the right. 2 Data Controls 2 - 1 PRESET/USER Determins the type of rhythm, Preset or User. 2 - 2 SET For initially entering a pattern number to an empty position in the pattern row, or for replacing a pattern at the cursor position. 2 - 3 INS. (Insert) For inserting a pattern number before the current cursor position. The new pattern is entered to the cursor position and all other patterns to the right of the cusor are moved to accommodate the new number. The operation is the same as for SET . 2-4 DEL. (Delete) For deleting a pattern number at the current cursor position. 2- 5 CLEAR For erasing all patterns entered to the selected sequence. After selecting CLEAR, the display for confirmation of the operation appears. Select "OK" to clear the currently selected rhythm sequence, or "Cancel" to abort the operation and return to the previous display. 126
-
 1
1 -
2
-
3
-
4
-
5
-
6
-
7
-
8
-
9
-
10
-
11
-
12
-
13
-
14
-
15
-
16
-
17
-
18
-
19
-
20
-
21
-
22
-
23
-
24
-
25
-
26
-
27
-
28
-
29
-
30
-
31
-
32
-
33
-
34
-
35
-
36
-
37
-
38
-
39
-
40
-
41
-
42
-
43
-
44
-
45
-
46
-
47
-
48
-
49
-
50
-
51
-
52
-
53
-
54
-
55
-
56
-
57
-
58
-
59
-
60
-
61
-
62
-
63
-
64
-
65
-
66
-
67
-
68
-
69
-
70
-
71
-
72
-
73
-
74
-
75
-
76
-
77
-
78
-
79
-
80
-
81
-
82
-
83
-
84
-
85
-
86
-
87
-
88
-
89
-
90
-
91
-
92
-
93
-
94
-
95
-
96
-
97
-
98
-
99
-
100
-
101
-
102
-
103
-
104
-
105
-
106
-
107
-
108
-
109
-
110
-
111
-
112
-
113
-
114
-
115
-
116
-
117
-
118
-
119
-
120
-
121
-
122
-
123
-
124
-
 125
125 -
 126
126 -
 127
127 -
 128
128 -
 129
129 -
 130
130 -
 131
131 -
 132
132 -
 133
133 -
 134
134 -
 135
135 -
136
-
137
-
138
-
139
-
140
-
141
-
142
-
143
-
144
-
145
-
146
-
147
-
148
-
149
-
150
-
151
-
152
-
153
-
154
-
155
-
156
 |
 |