Yamaha EL-87 Owner's Manual - Page 89
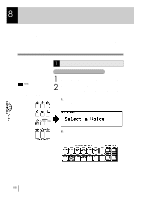
The number 160 appears on the LED display
 |
View all Yamaha EL-87 manuals
Add to My Manuals
Save this manual to your list of manuals |
Page 89 highlights
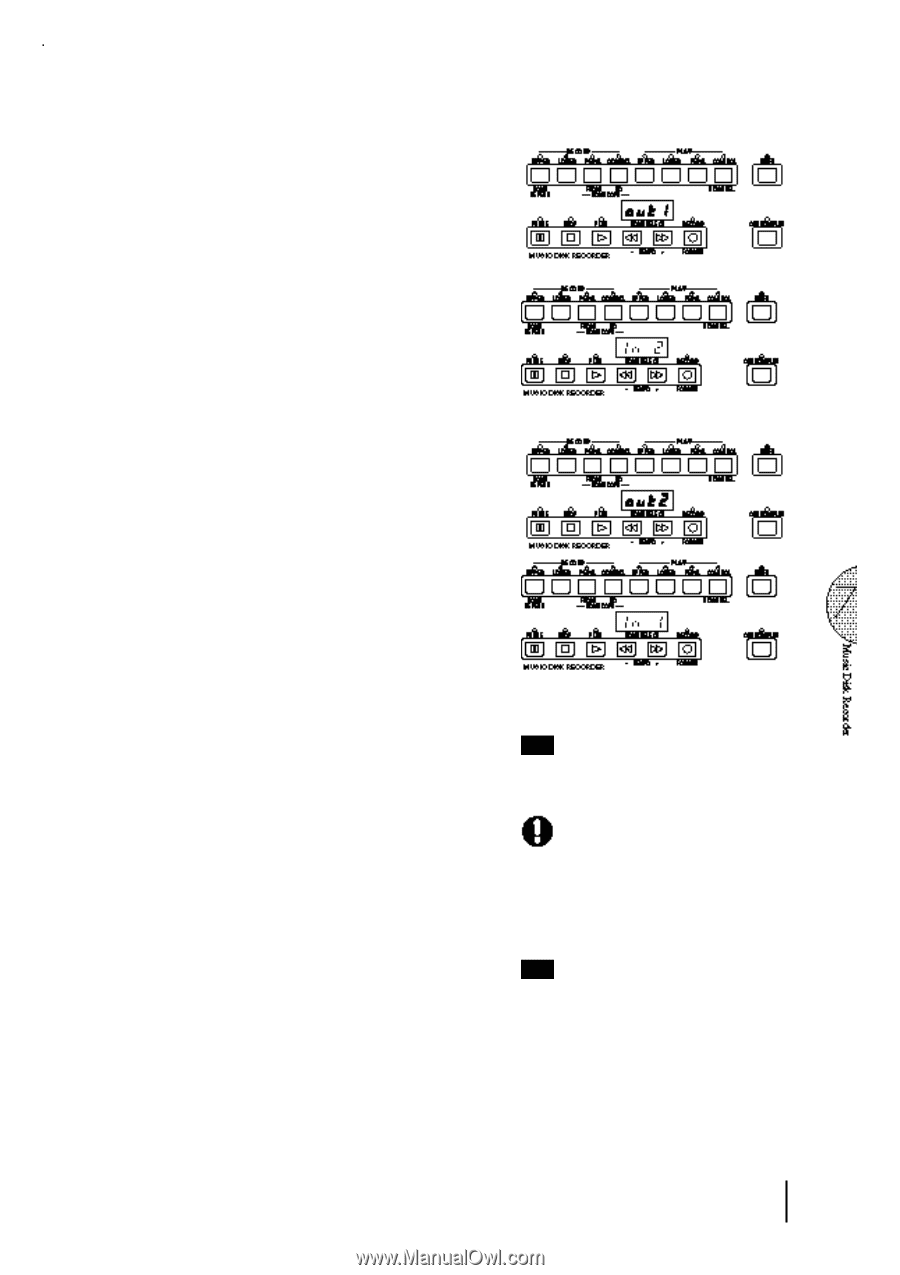
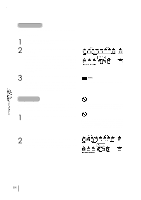
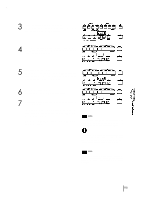
3 Insert the source disk into the disk slot. The M.D.R. starts reading the data in the source disk. "out 1" appears on the LED display. 4 Press the eject button to take out the source disk. "In 2" appears on the LED display to urge you to insert the destination disk. 5 Insert the destination disk. The number "160" appears on the LED display and counting down is initiated as the disk is being copied. "out 2" appears on the LED display. 6 Eject the destination disk. "In 1" appears on the LED display again. 7 Repeat the procedures #3 through #6 as indicated on the LED display. The number of times you repeat depend on the size of the data to be copied and the disk type (2DD type: 2 ~ 16 times; 2HD: 2 ~ 31). When finished, "End" will appear on the LCD display for 2 or 3 seconds. NOTE: "Fort" or "bAd" may appear if an error occur in the middle of the operation. If this happen, please retry formatting the destination disk and copying disk. Follow the M.D.R. direction to eject/insert the disks durinmg the operation. Do not eject/insert the disks frivolously ignoring the M.D.R. direction. Doing so can damage the disk and possibly the disk drive. NOTE: If you want to cancel the Disk Copy operation in the middle of procedures, eject the disk and turn the power off. In this case, you are required to format the destination disk again. 85
-
 1
1 -
2
-
3
-
4
-
5
-
6
-
7
-
8
-
9
-
10
-
11
-
12
-
13
-
14
-
15
-
16
-
17
-
18
-
19
-
20
-
21
-
22
-
23
-
24
-
25
-
26
-
27
-
28
-
29
-
30
-
31
-
32
-
33
-
34
-
35
-
36
-
37
-
38
-
39
-
40
-
41
-
42
-
43
-
44
-
45
-
46
-
47
-
48
-
49
-
50
-
51
-
52
-
53
-
54
-
55
-
56
-
57
-
58
-
59
-
60
-
61
-
62
-
63
-
64
-
65
-
66
-
67
-
68
-
69
-
70
-
71
-
72
-
73
-
74
-
75
-
76
-
77
-
78
-
79
-
80
-
81
-
82
-
83
-
 84
84 -
 85
85 -
 86
86 -
 87
87 -
 88
88 -
 89
89 -
 90
90 -
 91
91 -
 92
92 -
 93
93 -
 94
94 -
95
-
96
-
97
-
98
-
99
-
100
-
101
-
102
-
103
-
104
-
105
-
106
-
107
-
108
-
109
-
110
-
111
-
112
-
113
-
114
-
115
-
116
-
117
-
118
-
119
-
120
-
121
-
122
-
123
-
124
-
125
-
126
-
127
-
128
-
129
-
130
-
131
-
132
-
133
-
134
-
135
-
136
-
137
-
138
-
139
-
140
-
141
-
142
-
143
-
144
-
145
-
146
-
147
-
148
-
149
-
150
-
151
-
152
-
153
-
154
-
155
-
156
 |
 |